社区微信群开通啦,扫一扫抢先加入社区官方微信群

社区微信群
1.新建一个springboot工程
2.在数据库中我们新建2张表,建表语句如下:
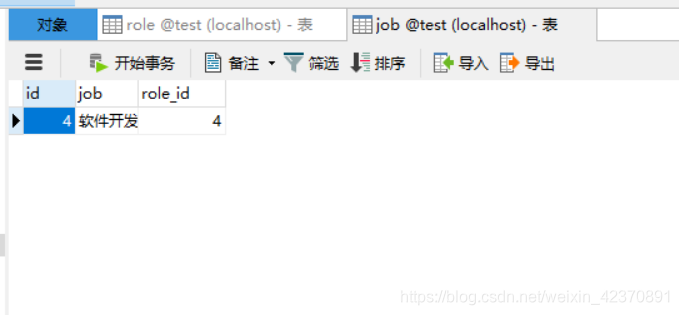
job表:
CREATE TABLE `job` (
  `id` int(32) NOT NULL AUTO_INCREMENT,
  `job` varchar(255) DEFAULT NULL,
  `role_id` int(32) DEFAULT NULL,
  PRIMARY KEY (`id`)
) ENGINE=InnoDB DEFAULT CHARSET=utf8;
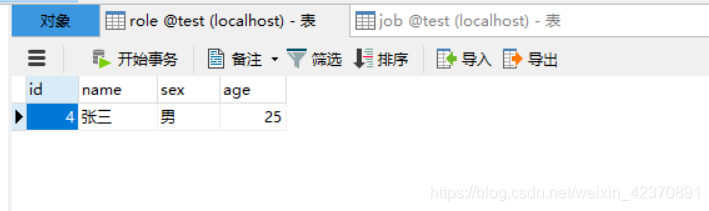
role表:
CREATE TABLE `role` (
  `id` int(32) NOT NULL AUTO_INCREMENT,
  `name` varchar(255) DEFAULT NULL,
  `sex` varchar(255) DEFAULT NULL,
  `age` int(32) DEFAULT NULL,
  PRIMARY KEY (`id`)
) ENGINE=InnoDB DEFAULT CHARSET=utf8;
3.RoleController
package com.springboot.controller;

import com.springboot.beans.HttpResponseEntity;
import com.springboot.common.Constans;
import com.springboot.dao.entity.Role;
import com.springboot.service.RoleService;
import org.springframework.beans.factory.annotation.Autowired;
import org.springframework.web.bind.annotation.RequestBody;
import org.springframework.web.bind.annotation.RequestMapping;
import org.springframework.web.bind.annotation.RequestMethod;
import org.springframework.web.bind.annotation.RestController;

@RestController
public class RoleController {
    @Autowired
    private RoleService roleService;
    @RequestMapping(value = "/addRoleJob",method = RequestMethod.POST,headers = "Accept=application/json")
    public HttpResponseEntity addRoleJob(@RequestBody Role role){
        HttpResponseEntity httpResponseEntity = new HttpResponseEntity ();
        try{
            int addRoleJob = roleService.addRoleJob(role);
            httpResponseEntity.setData ( addRoleJob );
            httpResponseEntity.setCode ( Constans.SUCCESS_CODE );
            httpResponseEntity.setMessage(Constans.ADD_SUCCESS_MESSAGE);
        }catch (Exception e){
            httpResponseEntity.setCode ( Constans.ADD_EXIST_CODE );
            httpResponseEntity.setMessage ( Constans.ADD_EXIST_MESSAGE );
        }
        return httpResponseEntity;
    }
}
4.RoleService
package com.springboot.service;

import com.springboot.dao.JobMapper;
import com.springboot.dao.RoleMapper;
import com.springboot.dao.entity.Job;
import com.springboot.dao.entity.Role;
import org.springframework.beans.factory.annotation.Autowired;
import org.springframework.stereotype.Service;
import org.springframework.transaction.annotation.Transactional;

@Service
public class RoleService {
    @Autowired
    private RoleMapper roleMapper;
    @Autowired
    private JobMapper jobMapper;
    @Transactional
    public int addRoleJob(Role role) {
        roleMapper.addRoleJob(role);
        Job job = new Job();
        job.setRoleId(role.getId());
        job.setJob(role.getJob());
        int i = jobMapper.addJob(job);
        return i;
    }
}
5.RoleMapper
int addRoleJob(Role role);
6.RoleMapper.xml
<insert id="addRoleJob" parameterType="com.springboot.dao.entity.Role" keyProperty="id" keyColumn="id" useGeneratedKeys="true">
    <!--
      WARNING - @mbg.generated
      This element is automatically generated by MyBatis Generator, do not modify.
    -->
    insert into role (name, sex,
    age)
    values (#{name,jdbcType=VARCHAR}, #{sex,jdbcType=VARCHAR},
    #{age,jdbcType=INTEGER})
  </insert>
7.在Role实体里加一个 job字段,生成get,set方法
private String job;

    public String getJob() {
        return job;
    }

    public void setJob(String job) {
        this.job = job;
    }
8.JobMapper
int addJob(Job job);
9.JobMapper.xml
<insert id="addJob" parameterType="com.springboot.dao.entity.Job" keyProperty="id" keyColumn="id" useGeneratedKeys="true">
    <!--
      WARNING - @mbg.generated
      This element is automatically generated by MyBatis Generator, do not modify.
    -->
    insert into job (job, role_id
    )
    values (#{job,jdbcType=VARCHAR}, #{roleId,jdbcType=INTEGER}
    )
  </insert>
10.代码就写完了,运行一下,我们用postman测试一下
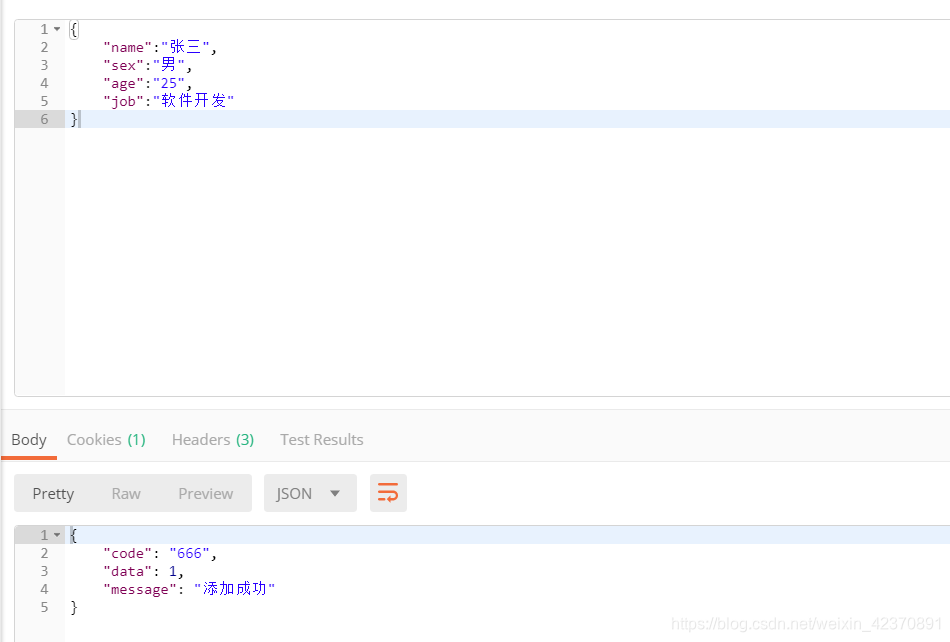
完成了。
如果觉得我的文章对您有用,请随意打赏。你的支持将鼓励我继续创作!
