社区微信群开通啦,扫一扫抢先加入社区官方微信群

社区微信群
实际项目开发中,程序往往会出现各式各样的异常情况,特别是服务端开发人员,总是不停的编写接口提供给前端调用,分工协作的情况下,避免不了异常的发生,如果直接将错误的信息直接暴露给用户,这样的体验很糟糕,并且对黑客而言,详细异常信息往往会提供非常大的帮助…
我们先来看一个简单的异常请求的接口,代码如下:
@GetMapping("/test1")
public String test1() {
	......
    // 模拟异常,假设业务处理的时候出现错误了,或者空指针了等等
    int i = 10 / 0;
    ......
    return "test1";
}
当我们通过浏览器访问它的时候,发现出现如下错误提示页面: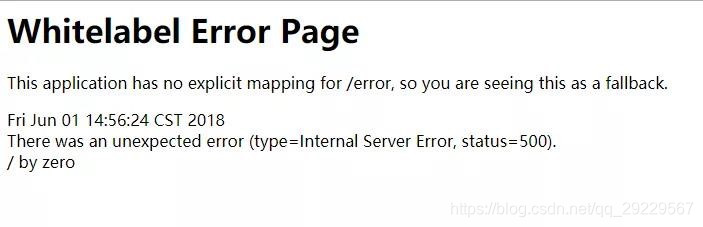
当我们通过Postman访问它的时候,发现出现如下错误提示页面: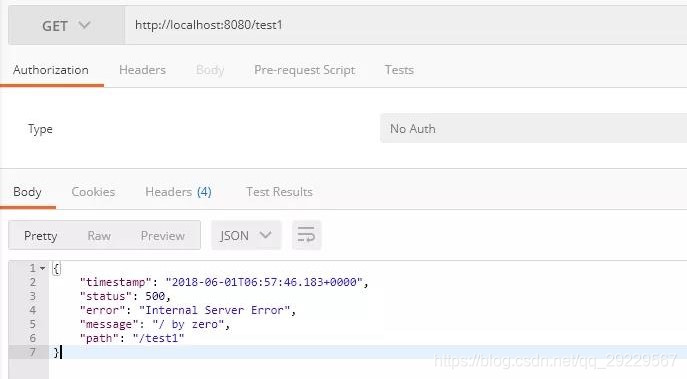
上面的这种处理是很不友好的的。、
针对上面的情况,我们可以采用try-catch的方式,手动捕获异常信息,然后返回对应的结果集,示例代码如下:
@GetMapping("/test2")
public Map<String, String> test2() {
    Map<String, String> result = new HashMap<>(16);

    //直接捕获所有代码块,然后在 cache
    try {
        int i = 10 / 0;
        result.put("code", "200");
        result.put("data", "具体返回的结果集");
    } catch (Exception e) {
        result.put("code", "500");
        result.put("message", "请求错误");
    }

    return result;
}
上述方法虽然间接性的解决错误暴露的问题,同样的弊端也很明显,增加了大量的代码量,当异常过多的情况下对应的catch层愈发的多了起来,很难管理这些业务异常和错误码之间的匹配,所以不建议使用。
综上所述,我们需要对异常进行全局捕获了,通过简单配置全局掌控。接下来就看看 Spring Boot 提供的解决方案。
在 pom.xml 中添加上 spring-boot-starter-web 的依赖即可。
<dependencies>
	......
    <dependency>
        <groupId>org.springframework.boot</groupId>
        <artifactId>spring-boot-starter-web</artifactId>
    </dependency>
	......
</dependencies>
在应用开发过程中,除系统自身的异常外,不同业务场景中用到的异常也不一样,我们通常会定义自己的异常,示例如下:
/**
 * 自定义异常
 */
public class CustomException extends RuntimeException {

    private static final long serialVersionUID = 4564124491192825748L;

    private int code;

    public CustomException() {
        super();
    }

    public CustomException(int code, String message) {
        super(message);
        this.setCode(code);
    }

    public int getCode() {
        return code;
    }

    public void setCode(int code) {
        this.code = code;
    }
}
定义返回的异常信息的格式,这样异常信息风格更为统一。
package com.battcn.exception;

/**
 * 返回信息模板
 */
public class ErrorResponseEntity {

    private int code;
    private String message;

    // 省略 get set 方法
}
和平时正常写的代码没区别不是很大,示例如下:
/**
 * 全局异常演示
 */
@RestController
public class ExceptionController {

    @GetMapping("/test3")
    public String test3(Integer num) {
        if (num == null) {
            throw new CustomException(400, "num不能为空");
        }

        int i = 10 / num;
        return "result:" + i;
    }
}
自定义统一异常处理类中会用到如下一些关键的注解,概述如下:
创建一个 GlobalExceptionHandler 类,并添加上 @RestControllerAdvice 注解就可以定义出异常通知类了,然后在定义的方法中添加上 @ExceptionHandler 即可实现异常的捕捉。示例如下:
/**
 * 全局异常处理
 */
@RestControllerAdvice
public class GlobalExceptionHandler extends ResponseEntityExceptionHandler {

    /**
     * 定义要捕获的异常 可以多个 @ExceptionHandler({})
     *
     * @param request  request
     * @param e        exception
     * @param response response
     * @return 响应结果
     */
    @ExceptionHandler(CustomException.class)
    public ErrorResponseEntity customExceptionHandler(HttpServletRequest request, final Exception e, HttpServletResponse response) {
        response.setStatus(HttpStatus.BAD_REQUEST.value());

        CustomException exception = (CustomException) e;
        return new ErrorResponseEntity(exception.getCode(), exception.getMessage());
    }

    /**
     * 捕获  RuntimeException 异常
     *
     * @param request  request
     * @param e        exception
     * @param response response
     * @return 响应结果
     */
    @ExceptionHandler(RuntimeException.class)
    public ErrorResponseEntity runtimeExceptionHandler(HttpServletRequest request, final Exception e, HttpServletResponse response) {
        response.setStatus(HttpStatus.BAD_REQUEST.value());

        RuntimeException exception = (RuntimeException) e;
        return new ErrorResponseEntity(400, exception.getMessage());
    }

    /**
     * 通用的接口映射异常处理方
     */
    @Override
    protected ResponseEntity<Object> handleExceptionInternal(Exception ex, Object body, HttpHeaders headers,HttpStatus status, WebRequest request) {
        if (ex instanceof MethodArgumentNotValidException) {
            MethodArgumentNotValidException exception = (MethodArgumentNotValidException) ex;
            return new ResponseEntity<>(new ErrorResponseEntity(status.value(), exception.getBindingResult().getAllErrors().get(0).getDefaultMessage()), status);
        }

        if (ex instanceof MethodArgumentTypeMismatchException) {
            MethodArgumentTypeMismatchException exception = (MethodArgumentTypeMismatchException) ex;

            logger.error("参数转换失败,方法:" + exception.getParameter().getMethod().getName() + ",参数:" + exception.getName()+ ",信息:" + exception.getLocalizedMessage());

            return new ResponseEntity<>(new ErrorResponseEntity(status.value(), "参数转换失败"), status);
        }

        return new ResponseEntity<>(new ErrorResponseEntity(status.value(), "参数转换失败"), status);
    }
}
@SpringBootApplication
public class TestApplication {

    public static void main(String[] args) {
        SpringApplication.run(Chapter17Application.class, args);
    }

}
完成上述准备事项后,启动TestApplication,通过下面的测试结果可以发现,真的是很简单,代码变得整洁了,扩展性也变好了。
访问 http://localhost:8080/test3
{"code":400,"message":"num不能为空"}

访问 http://localhost:8080/test3?num=0
{"code":400,"message":"/ by zero"}

访问 http://localhost:8080/test3?num=5
result:2
如果觉得我的文章对您有用,请随意打赏。你的支持将鼓励我继续创作!
