社区微信群开通啦,扫一扫抢先加入社区官方微信群

社区微信群
网上搜了一些社区发现可视化的代码,发现GitHub上有几个不错的可视化案例,如
https://github.com/networkanddatasciencelab/SNA-Community-Detection
https://github.com/networkanddatasciencelab/Network_Analytical_Notebooks
https://github.com/networkanddatasciencelab/HIN_Community_Detection
这些效果比较好,但是都用了一些其他的包,比如 igraph (安装这个包经常会出问题,我就是因为没有装好就不想用它的画图布局了,然后自己写了这个代码)。
代码里面的配色方案可以参考这篇文章:设计师必备,101个最佳配色方案!
(注:这里面的配色都是16进制的,如果用于PPT等RGB颜色设置的话,需要进行颜色转换,网上有很多颜色码转换工具,如 https://www.sioe.cn/yingyong/yanse-rgb-16/)
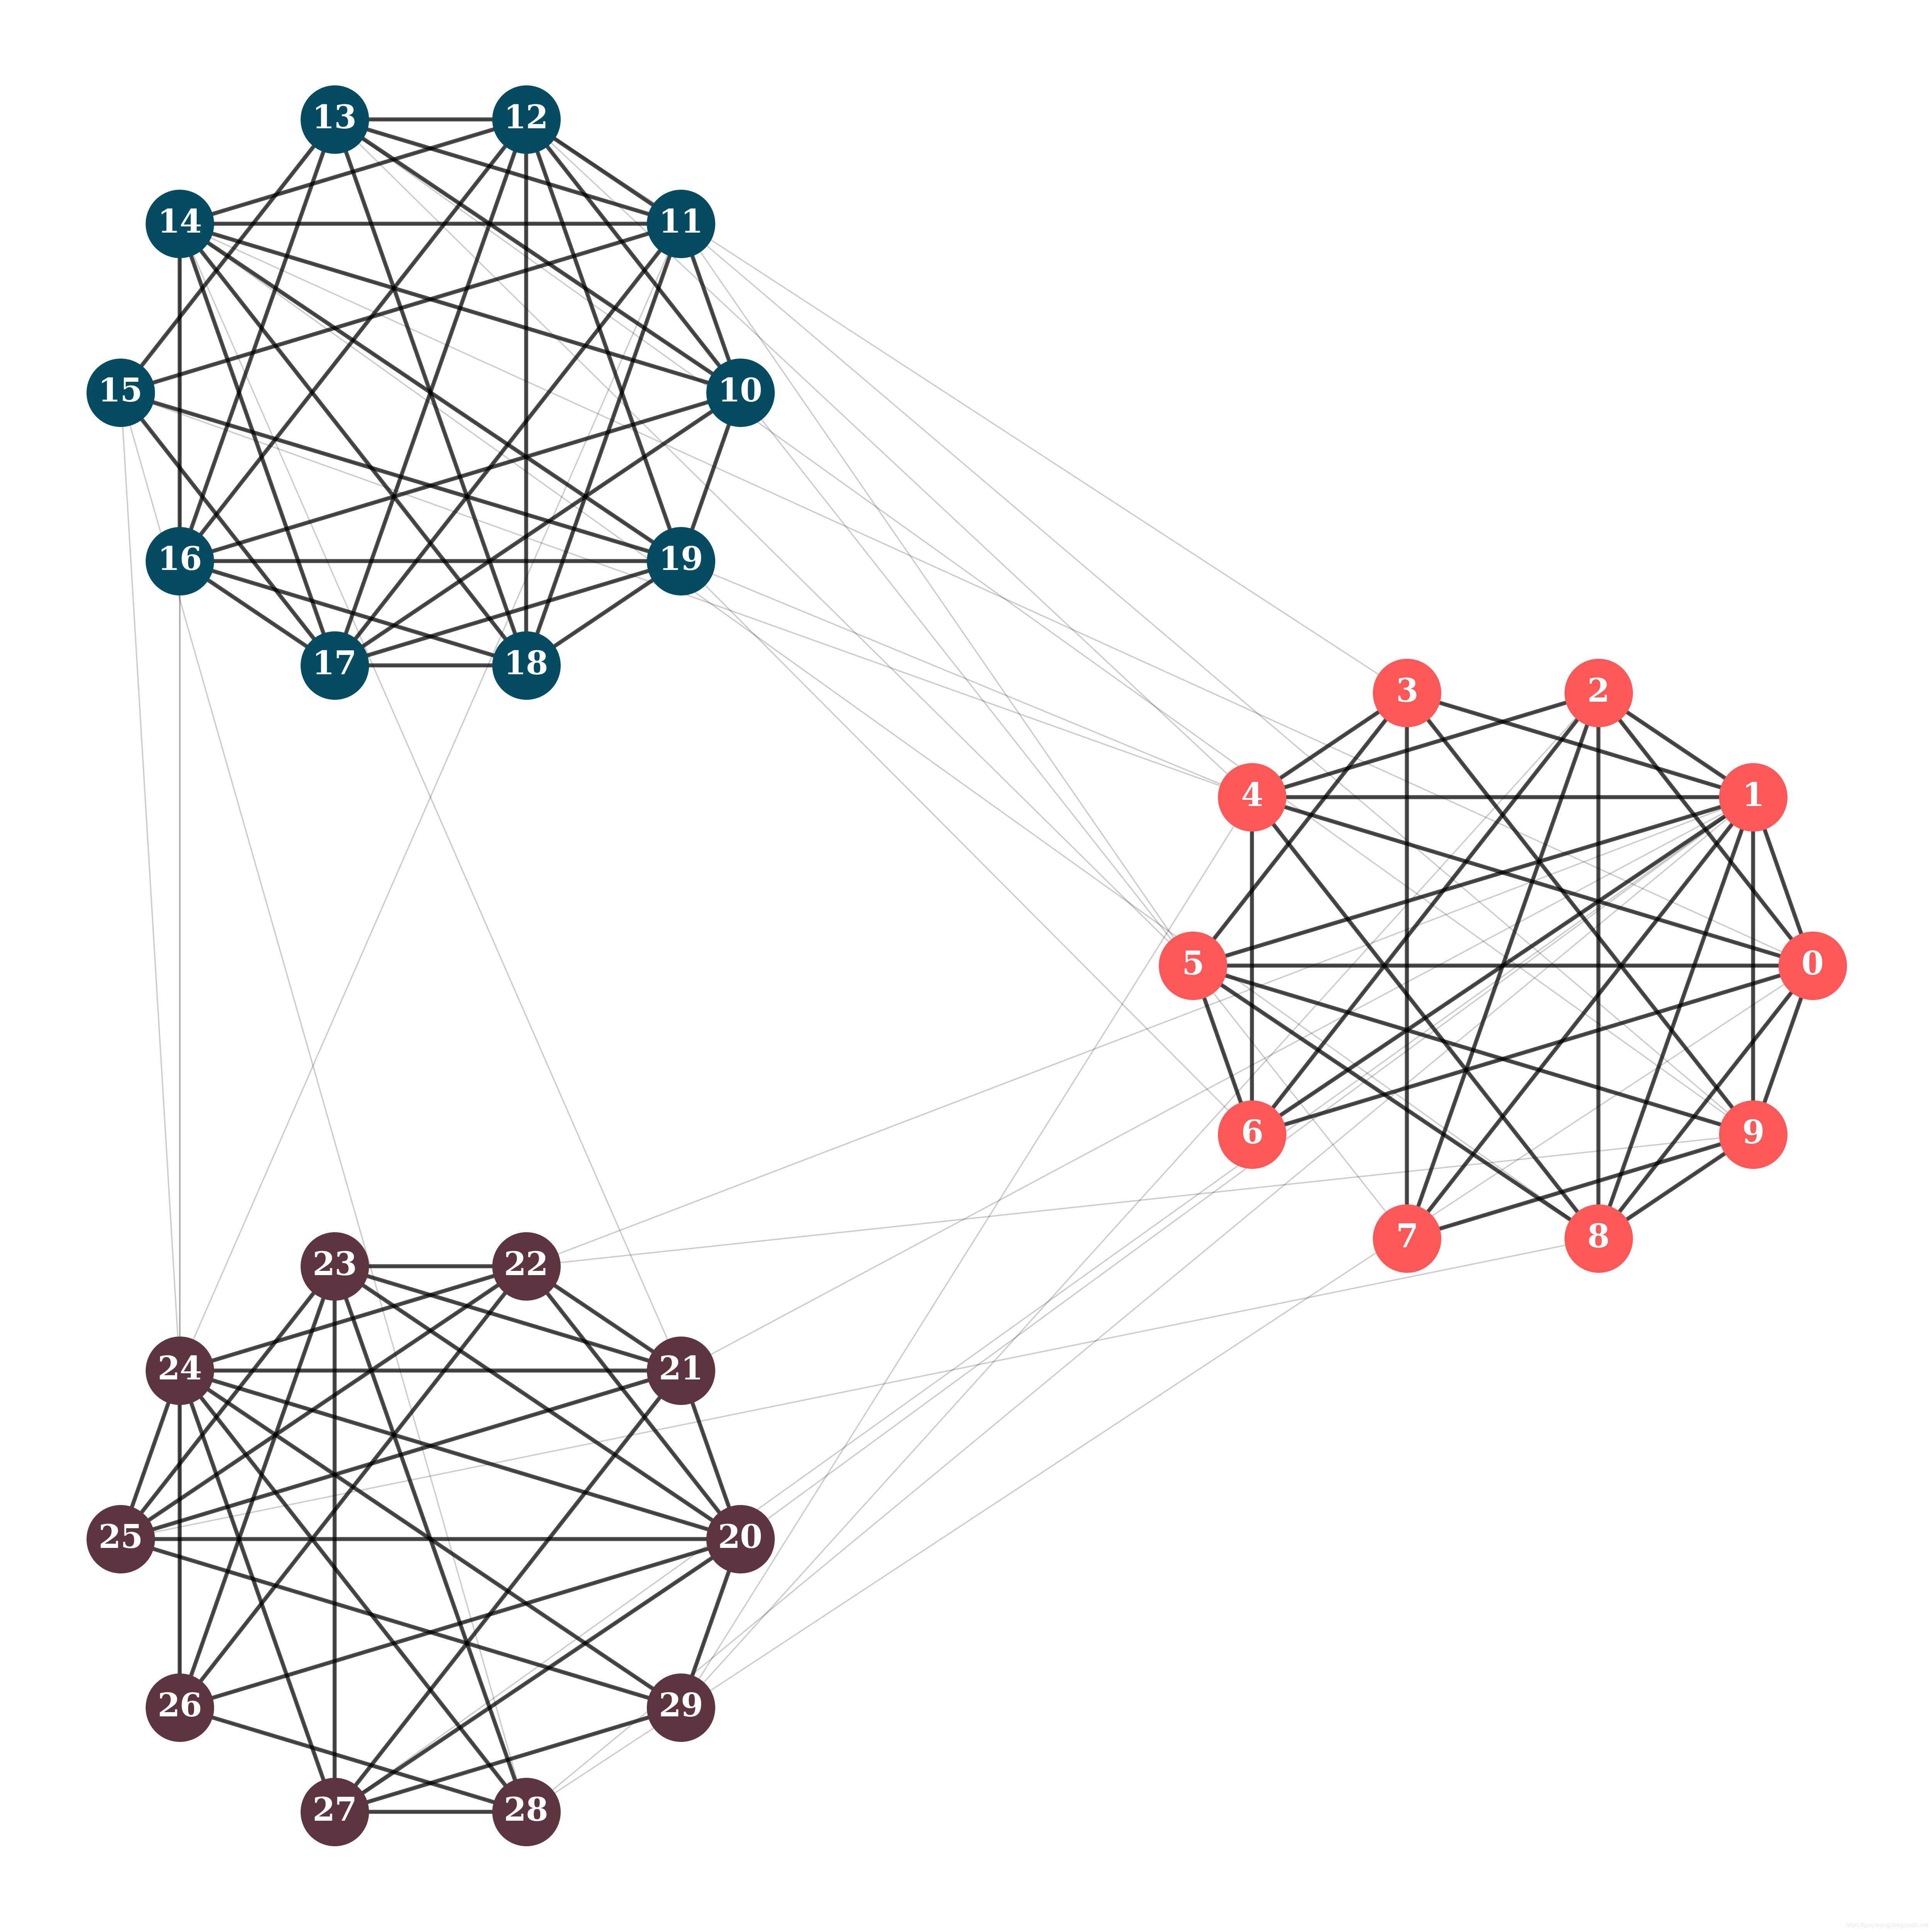
这是原图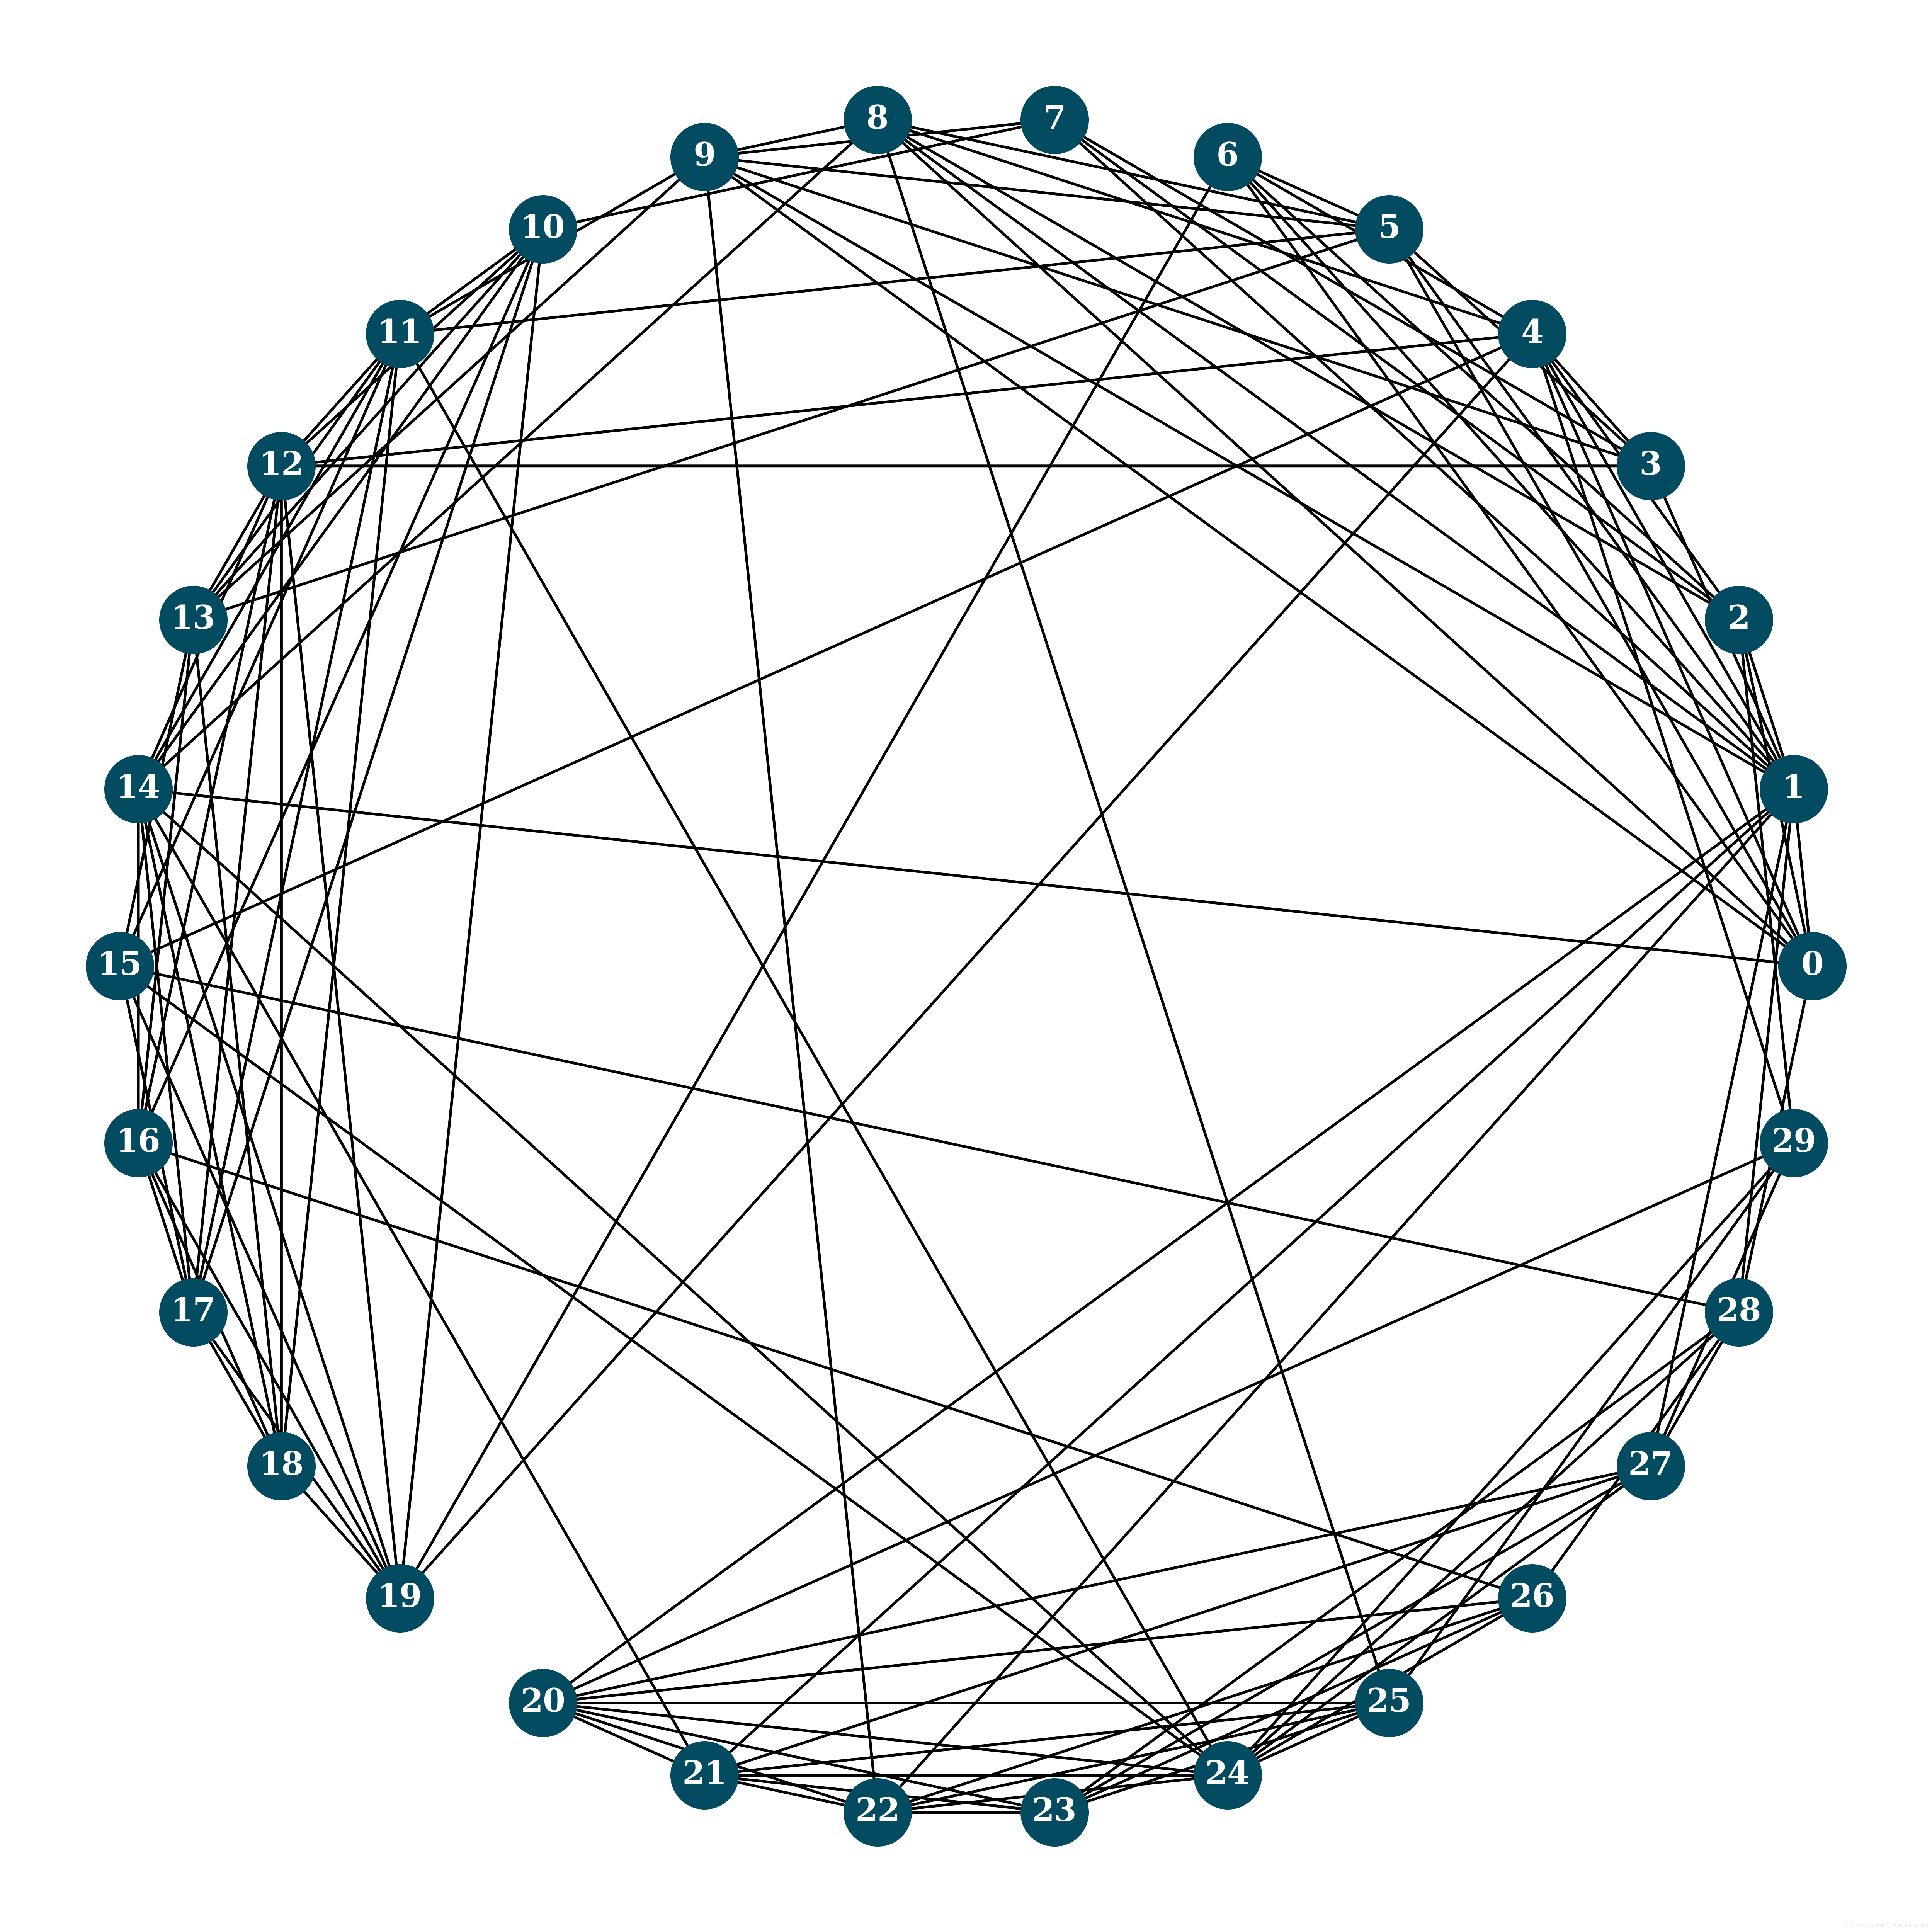 这是采用贪婪算法检测社区之后的可视化效果
代码如下
import networkx as nx
import numpy as np
import matplotlib.pyplot as plt
from matplotlib import cm
from networkx.algorithms import community
import random

# science and nature journal '#e3a6a1', '#bc5f6a', '#19b3b1', '#034b61'
# star sky science-fiction '#b2a59f', '#023459', '#1e646e', '#002c2f'
# delicate & shopping & pettyfashion '#b2d6ca', '#fe5858', '#024b40', '#5d353e'

colors = ['#fe5858', '#034b61', '#5d353e', '#b2d6ca']
options = {'font_family': 'serif', 'font_weight': 'semibold', 'font_size': '12', 'font_color': '#ffffff'}
savefig_path = 'F:/Python/NetworkSci/'

def com_postion(size,scale=1, center=(0, 0), dim=2):
    # generat the postion for each nodes in a community
    num = size
    center = np.asarray(center)
    theta = np.linspace(0, 1, num+1)[:-1] * 2 * np.pi
    theta = theta.astype(np.float32)
    pos = np.column_stack([np.cos(theta), np.sin(theta), np.zeros((num, 0))])
    pos = scale * pos + center
    return pos

def node_postion(one_com,scale=1, center=(0, 0), dim=2):
    # generat the postion for each nodes in a community
    num = len(one_com)
    node = list(one_com)
    center = np.asarray(center)
    theta = np.linspace(0, 1, num+1)[:-1] * 2 * np.pi
    theta = theta.astype(np.float32)
    pos = np.column_stack([np.cos(theta), np.sin(theta), np.zeros((num, 0))])
    pos = scale * pos + center
    pos = dict(zip(node, pos))
    return pos

# ************************************************************************ #
# part 1--creat a graph
# ************************************************************************ #

G = nx.planted_partition_graph(3, 10, 0.7, 0.1)
plt.figure(figsize=(10,10))
pos = nx.shell_layout(G)
nx.draw(G, pos, with_labels=True, **options)
nx.draw_networkx_nodes(G, pos, node_size=600, node_color="#034b61")
plt.savefig(savefig_path + 'original_network.png', format='png', dpi=500)
plt.show()

# ************************************************************************ #
# part 2--community detection
# ************************************************************************ #

com = community.greedy_modularity_communities(G)
num_com = len(com)

# find intra_com links
intra_links = {}
for i in range(num_com):
    intra_links[i] = []

for link in nx.edges(G):
    for i in range(num_com):
        if (link[0] in com[i]) & (link[1] in com[i]):
            intra_links[i].append(link)

com_center = com_postion(num_com, scale=3)   # print(com_center)
pos = dict()
for val in range(num_com):
    node_pos = node_postion(com[val], scale=1.3, center=com_center[val])
    pos.update(node_pos)

plt.figure(figsize=(10,10))
nx.draw(G, pos, with_labels=True, edgelist=[], **options)
nx.draw_networkx_edges(G, pos, alpha=0.2, width=0.5)

for val in range(num_com):
    nx.draw_networkx_nodes(G, pos, node_size=600, nodelist=list(com[val]), node_color=colors[val])
    nx.draw_networkx_edges(G, pos, alpha=0.7, edgelist=intra_links[val], width=1.5)

plt.axis("off")
plt.savefig(savefig_path + 'greedy.png', format='png', dpi=500)
plt.show()
如果觉得我的文章对您有用,请随意打赏。你的支持将鼓励我继续创作!
