社区微信群开通啦,扫一扫抢先加入社区官方微信群

社区微信群
这里是bitcoin-core的使用教程,及如何在PC端搭建冷钱包。
可前往比特币官网下载页下载最新版,如果想用老版本可以去Github看看,或者去这里直接下载。对于PC端,有安装版和压缩版可供选择,这里推荐下载压缩版,就是.zip后缀的,例如bitcoin-0.17.1-win64.zip,因为需要修改默认配置,把200+G的区块文件指定到C盘之外,或者把私钥指定到一个隐秘的地方等等,压缩版将更为方便。
对测试网和RPC功能没想法的看官可以跳过了
编写配置文件,bitcoin.conf是我沿用了Ubuntu上的习惯,内容如下:
##
## bitcoin.conf configuration file. Lines beginning with # are comments.
##

# Network-related settings:

# Run on the test network instead of the real bitcoin network.
#testnet=0
#testnet=1

# Run a regression test network
#regtest=0

# Connect via a SOCKS5 proxy
#proxy=127.0.0.1:9050

# Bind to given address and always listen on it. Use [host]:port notation for IPv6
#bind=<addr>

# Bind to given address and whitelist peers connecting to it. Use [host]:port notation for IPv6
#whitebind=<addr>

##############################################################
##            Quick Primer on addnode vs connect            ##
##  Let's say for instance you use addnode=4.2.2.4          ##
##  addnode will connect you to and tell you about the      ##
##    nodes connected to 4.2.2.4.  In addition it will tell ##
##    the other nodes connected to it that you exist so     ##
##    they can connect to you.                              ##
##  connect will not do the above when you 'connect' to it. ##
##    It will *only* connect you to 4.2.2.4 and no one else.##
##                                                          ##
##  So if you're behind a firewall, or have other problems  ##
##  finding nodes, add some using 'addnode'.                ##
##                                                          ##
##  If you want to stay private, use 'connect' to only      ##
##  connect to "trusted" nodes.                             ##
##                                                          ##
##  If you run multiple nodes on a LAN, there's no need for ##
##  all of them to open lots of connections.  Instead       ##
##  'connect' them all to one node that is port forwarded   ##
##  and has lots of connections.                            ##
##       Thanks goes to [Noodle] on Freenode.               ##
##############################################################

# Use as many addnode= settings as you like to connect to specific peers
#addnode=69.164.218.197
#addnode=10.0.0.2:8333

# Alternatively use as many connect= settings as you like to connect ONLY to specific peers
#connect=69.164.218.197
#connect=10.0.0.1:8333

# Listening mode, enabled by default except when 'connect' is being used
#listen=1

# Maximum number of inbound+outbound connections.
#maxconnections=

#
# JSON-RPC options (for controlling a running Bitcoin/bitcoind process)
#

# server=1 tells Bitcoin-Qt and bitcoind to accept JSON-RPC commands
#server=0
#server=1

# Bind to given address to listen for JSON-RPC connections. Use [host]:port notation for IPv6.
# This option can be specified multiple times (default: bind to all interfaces)
#rpcbind=<addr>

# If no rpcpassword is set, rpc cookie auth is sought. The default `-rpccookiefile` name
# is .cookie and found in the `-datadir` being used for bitcoind. This option is typically used
# when the server and client are run as the same user.
#
# If not, you must set rpcuser and rpcpassword to secure the JSON-RPC api. The first
# method(DEPRECATED) is to set this pair for the server and client:
#rpcuser=Ulysseys
rpcuser=test
#rpcpassword=YourSuperGreatPasswordNumber_DO_NOT_USE_THIS_OR_YOU_WILL_GET_ROBBED_385593
rpcpassword=123456
#
# The second method `rpcauth` can be added to server startup argument. It is set at intialization time
# using the output from the script in share/rpcuser/rpcuser.py after providing a username:
#
# ./share/rpcuser/rpcuser.py alice
# String to be appended to bitcoin.conf:
# rpcauth=alice:f7efda5c189b999524f151318c0c86$d5b51b3beffbc02b724e5d095828e0bc8b2456e9ac8757ae3211a5d9b16a22ae
# Your password:
# DONT_USE_THIS_YOU_WILL_GET_ROBBED_8ak1gI25KFTvjovL3gAM967mies3E=
#
# On client-side, you add the normal user/password pair to send commands:
#rpcuser=alice
#rpcpassword=DONT_USE_THIS_YOU_WILL_GET_ROBBED_8ak1gI25KFTvjovL3gAM967mies3E=
#
# You can even add multiple entries of these to the server conf file, and client can use any of them:
# rpcauth=bob:b2dd077cb54591a2f3139e69a897ac$4e71f08d48b4347cf8eff3815c0e25ae2e9a4340474079f55705f40574f4ec99

# How many seconds bitcoin will wait for a complete RPC HTTP request.
# after the HTTP connection is established.
#rpcclienttimeout=30

# By default, only RPC connections from localhost are allowed.
# Specify as many rpcallowip= settings as you like to allow connections from other hosts,
# either as a single IPv4/IPv6 or with a subnet specification.

# NOTE: opening up the RPC port to hosts outside your local trusted network is NOT RECOMMENDED,
# because the rpcpassword is transmitted over the network unencrypted.

# server=1 tells Bitcoin-Qt to accept JSON-RPC commands.
# it is also read by bitcoind to determine if RPC should be enabled
#rpcallowip=10.1.1.34/255.255.255.0
#rpcallowip=1.2.3.4/24
#rpcallowip=2001:db8:85a3:0:0:8a2e:370:7334/96
#rpcallowip=113.201.135.114/32
#rpcallowip=127.0.0.1/32
rpcallowip=0.0.0.0/0

# Listen for RPC connections on this TCP port:
#rpcport=8332
rpcport=8332

# You can use Bitcoin or bitcoind to send commands to Bitcoin/bitcoind
# running on another host using this option:
#rpcconnect=127.0.0.1

# Create transactions that have enough fees so they are likely to begin confirmation within n blocks (default: 6).
# This setting is over-ridden by the -paytxfee option.
#txconfirmtarget=n

# Miscellaneous options

# Pre-generate this many public/private key pairs, so wallet backups will be valid for
# both prior transactions and several dozen future transactions.
#keypool=100

# Pay an optional transaction fee every time you send bitcoins.  Transactions with fees
# are more likely than free transactions to be included in generated blocks, so may
# be validated sooner.
#paytxfee=0.00

# Enable pruning to reduce storage requirements by deleting old blocks.
# This mode is incompatible with -txindex and -rescan.
# 0 = default (no pruning).
# 1 = allows manual pruning via RPC.
# >=550 = target to stay under in MiB.
#prune=550

# User interface options

# Start Bitcoin minimized
#min=1

# Minimize to the system tray
#minimizetotray=1
#walletnotify=curl http://127.0.0.1:8899/temp/manage/deposit/query/btc/%s
#deprecatedrpc=accounts
#deprecatedrpc=signrawtransaction
本人是从事中心化钱包开发的,这里是相对完整的配置。
编写一个.bat或.cmd后缀的启动脚本,目的是便捷地执行依据启动命令:
bitcoin-qt -conf=D:Softwaresbitcoin-0.17.1binbitcoin.conf -datadir=D:Blocksbitcoin -wallet=D:Walletsbitcoin
bitcoin-qt是指bitcoin-qt.exe的相对路径,在bin路径下,这里这样写的前提是将这个脚本也放在bin路劲下;
-conf是这顶bitcoin.conf的绝对路径,不需要指定特殊的配置的话可以省去;
-datadir是指定区块数据库文件的位置,这个路径预留300+G的空间;
-wallet是指定钱包私钥的位置,钱包启动后会生成wallet.dat文件,这个文件就是私钥(重要性就不再赘述了),可以指定到U盘或其他安全的存储介质。
双击bitcoin-qt.cmd,不是bitcoin-qt.exe哦,会通过cmd启动QT5版本的钱包,是带UI界面的:
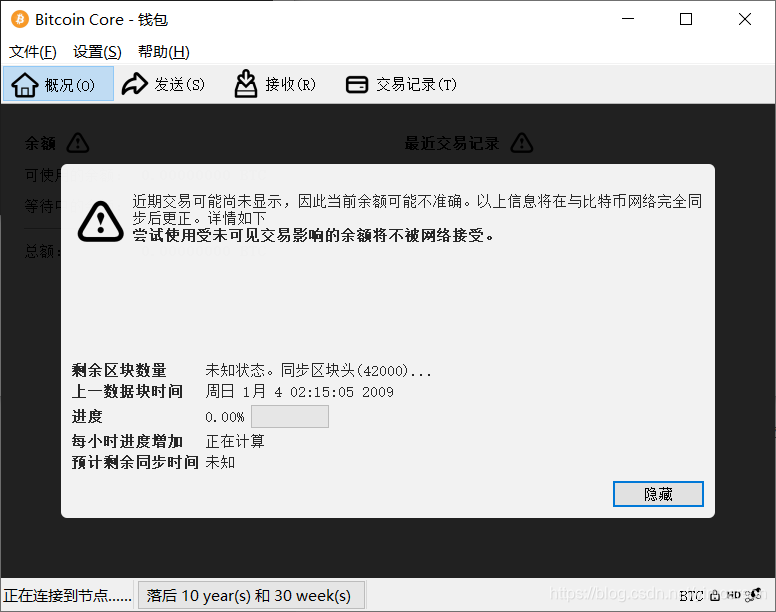
此时钱包回去同步区块数据,这个过程很漫长,跟网络环境有关。

如图,在设置菜单,这里是已经加密的钱包,所以加密钱包置灰了,首次生成私钥是未加密的,点击它,设置密码后会提示重启钱包。完成后可以转移D:Walletsbitcoinwallet.dat这个文件,作为自己的冷钱包私钥,认真保存。需要转账是修改-wallet指向,漫长的区块同步期间可以指向一个不认真的私钥文件,等同步完成后再指向这个认真的私钥文件。
根据上面的加密操作后,在wallet.dat文件中会存储一些地址,点击接受=>请求付款
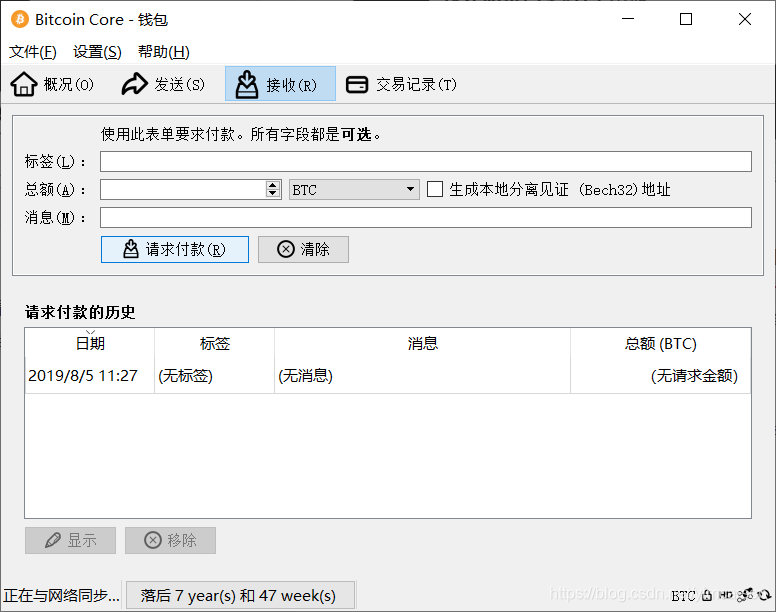

形如3NZe5PT6cjrB2WPcNorCX8wHx28Zo4ARqk的这串码就是比特币地址。
以上是我自己使用bitcoin-core钱包QT版的一些技巧,各位大佬有什么骚操作欢迎留言交流。
如果觉得我的文章对您有用,请随意打赏。你的支持将鼓励我继续创作!
