社区微信群开通啦,扫一扫抢先加入社区官方微信群

社区微信群
   1, Linux版本:CentOS7
   2,  postgresql的版本:10(最新是11),主要方便入手,不用最新的
   3, pipelineDB是基于postgres的stream数据库。完全兼容pg的东西
注意:下一篇写pipelineDB安装使用
 $ rpm -qa | grep postgres                 # 检查PostgreSQL 是否已经安装
 $ rpm -qal | grep postgres                # 检查PostgreSQL 安装位置

#卸载 (检查系统是否已安装postgreSQL,卸载并清除干净。yum库自带的比较老旧)
$ rpm -e postgresql94-contrib-9.4.4-1PGDG.rhel6.x86*64 postgresql94-server-9.4.4-1PGDG.rhel6.x86*64
$ rpm -e postgresql94-libs-9.4.4-1PGDG.rhel6.x86*64 postgresql94-9.4.4-1PGDG.rhel6.x86*64
参考:https://blog.csdn.net/rudy5348/article/details/79299162
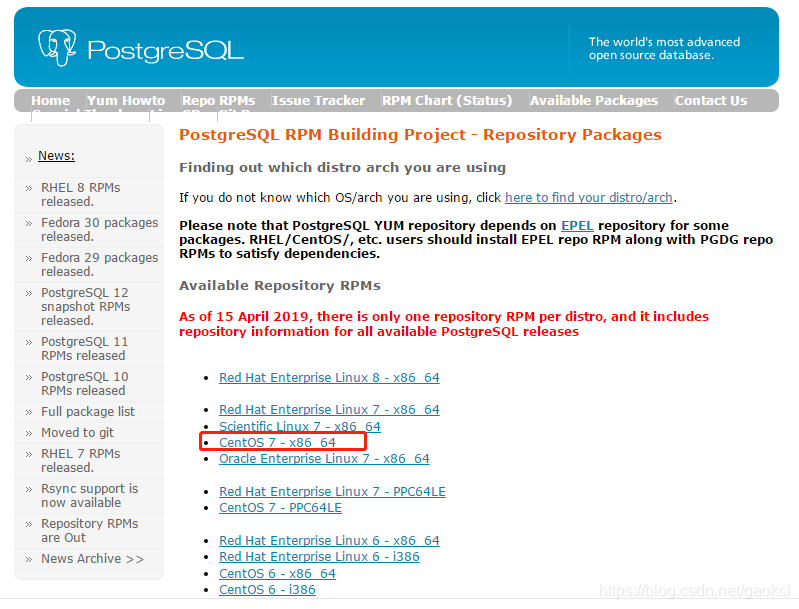
# 1, postgresql11
yum install  https://download.postgresql.org/pub/repos/yum/reporpms/EL-7-x86_64/pgdg-redhat-repo-latest.noarch.rpm   -y

# 2, postgresql10
yum install https://download.postgresql.org/pub/repos/yum/10/redhat/rhel-7-x86_64/pgdg-centos10-10-2.noarch.rpm -y
yum list | grep postgresql     # 先查看postgresql源
yum install postgresql10-contrib  postgresql10-server -y
在这里,如果在装系统开始分配var空间足够大则可以继续,如果分配var空间不够,我们需要更改数据目录,在这里,我们假设var空间足够大。直接开始初始化。
1,Postgresql安装目录是 /usr/pgsql-10
[root@localhost ~]# cd /usr/pgsql-10/
[root@localhost pgsql-10]# ls
bin  doc  include  lib  share
[root@localhost pgsql-10]# cd bin
[root@localhost bin]# /usr/pgsql-10/bin/postgresql-10-setup initdb
Initializing database ... OK
2,Postgresql的数据目录是 /var/lib/pgsql/版本号/data目录
[root@localhost ~]# cd /var/lib/pgsql/10
[root@localhost 10]# ls
backups  data  initdb.log
[root@localhost 10]# vim initdb.log
1,创建其他账户(PipelineDB与ElasticSearch 【搜索引擎】也不能以root的身份运行)
useradd user123
passwd user123
#切换用户
su user123 # 其他用户
su - # root权限
[user123@localhost ~]$ sudo find / -name pipelinedb
[sudo] user123 的密码:
user123 不在 sudoers 文件中。此事将被报告。
您在 /var/spool/mail/root 中有邮件
# user123 不在 sudoers 文件中。此事将被报告。解决如下:
# 先切换到root权限:
su -
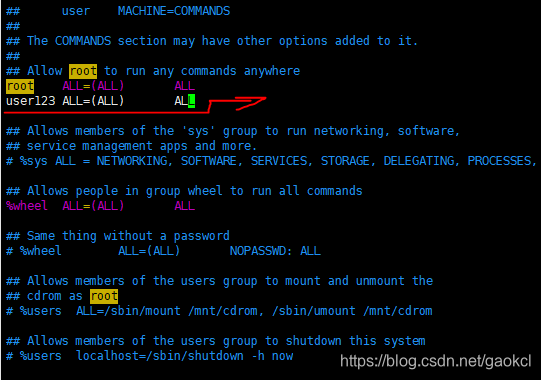
vim /etc/sudoers
# 输入 user123 ALL=(ALL) ALL
# 显示是只读,使用 wq! 保存
reboot # 重启
su user123
su -
vim /etc/sudoers
2,启动数据库并设置开机启动
sudo systemctl start postgresql-10
sudo systemctl enable postgresql-10.service

[root@localhost ~]# sudo systemctl start postgresql-10
[root@localhost ~]# sudo systemctl enable postgresql-10.service
Created symlink from /etc/systemd/system/multi-user.target.wants/postgresql-10.service to /usr/lib/systemd/system/postgresql-10.service.
 postgresql在安装时默认添加用户postgres

 [root@localhost ~]#su - postgres
 [root@localhost ~]#psql

 [root@localhost ~]# su - postgres
-bash-4.2$ psql
psql (10.9)
输入 "help" 来获取帮助信息.

postgres=# ALTER USER postgres WITH PASSWORD '123456';  #设置密码
ALTER ROLE
postgres=# q   #@1,退出 q  2,列出所有库 l  @3,列出所有用户 du  4,列出库下所有表d

-bash-4.2$

1,创建除postgres外的用户

postgres=# create user user123 with password '123456';
CREATE ROLE
postgres=#
创建数据库
postgres=# create database dbtest owner username; -- 创建数据库指定所属者
CREATE DATABASE
postgres=#
将数据库得权限,全部赋给某个用户
postgres=# grant all on database dbtest to username; -- 将dbtest所有权限赋值给username
GRANT
postgres=#
导入整个数据库
psql -U username databasename < /data/dum.sql -- 用户名和数据库名
vi /var/lib/pgsql/10/data/pg_hba.conf
# ----------------------------------
#
# If you want to allow non-local connections, you need to add more
# "host" records.  In that case you will also need to make PostgreSQL
# listen on a non-local interface via the listen_addresses
# configuration parameter, or via the -i or -h command line switches.

# TYPE  DATABASE        USER            ADDRESS                 METHOD
# "local" is for Unix domain socket connections only
local   all             all                                     peer
# IPv4 local connections:
host    all             all             127.0.0.1/32            ident
# IPv6 local connections:
host    all             all             ::1/128                 ident
# Allow replication connections from localhost, by a user with the
# replication privilege.

local   replication     all                                     peer
host    replication     all             127.0.0.1/32            ident
host    replication     all             ::1/128                 ident
改为
# ----------------------------------
#
# If you want to allow non-local connections, you need to add more
# "host" records.  In that case you will also need to make PostgreSQL
# listen on a non-local interface via the listen_addresses
# configuration parameter, or via the -i or -h command line switches.


# TYPE  DATABASE        USER            ADDRESS                 METHOD
# "local" is for Unix domain socket connections only
local   all             all                                     md5
# IPv4 local connections:
host    all             all             127.0.0.1/32            md5
# IPv6 local connections:
host    all             all             ::1/128                 md5
# Allow replication connections from localhost, by a user with the
# replication privilege.

#local   replication     all                                     md5
#host    replication     all             127.0.0.1/32            md5
#host    replication     all             ::1/128                 md5
host     all             all             0.0.0.0/0               md5
我们改 远程访问
安装iptables防火墙 : https://blog.csdn.net/gaokcl/article/details/82908844
这是我的习惯,也可以不改
vim /etc/sysconfig/iptables
 # Generated by iptables-save v1.4.21 on Sun Jul  7 22:43:09 2019
*filter
:INPUT ACCEPT [0:0]
:FORWARD ACCEPT [0:0]
:OUTPUT ACCEPT [6:664]
-A INPUT -m state --state RELATED,ESTABLISHED -j ACCEPT
-A INPUT -p icmp -j ACCEPT
-A INPUT -i lo -j ACCEPT
-A INPUT -p tcp -m state --state NEW -m tcp --dport 22 -j ACCEPT
-A INPUT -m state --state NEW -m tcp -p tcp --dport 3306 -j ACCEPT
-A INPUT -m state --state NEW -m tcp -p tcp --dport 8080 -j ACCEPT
-A INPUT -m state --state NEW -m tcp -p tcp --dport 6379 -j ACCEPT
-A INPUT -j REJECT --reject-with icmp-host-prohibited
-A INPUT -p tcp -m tcp --dport 5342 -j ACCEPT
-A FORWARD -j REJECT --reject-with icmp-host-prohibited
COMMIT
# Completed on Sun Jul  7 22:43:09 2019
~
~
~
~
~
"/etc/sysconfig/iptables" 17L, 715C
vi /var/lib/pgsql/10/data/postgresql.conf

# root权限下,开放 postgresql的5432端口
# 安装iptables : https://blog.csdn.net/gaokcl/article/details/82908844
vim /etc/sysconfig/iptables
-A  INPUT -t tcp -m tcp --dport  5432 -j ACCEPT ,

service iptables restart     # 重启防火墙
service iptables save        # 保存防火墙修改
vi /var/lib/pgsql/10/data/postgresql.conf
# - Connection Settings -
#listen_addresses = 'localhost'         # what IP address(es) to listen on;
# comma-separated list of addresses;
# defaults to 'localhost'; use '*' for all
# (change requires restart)
#port = 5432                            # (change requires restart)
改为
# - Connection Settings -
listen_addresses = '*'         # what IP address(es) to listen on;
# comma-separated list of addresses;
# defaults to 'localhost'; use '*' for all
# (change requires restart)
port = 5432                            # (change requires restart)
重启postgresql
systemctl restart postgresql-10
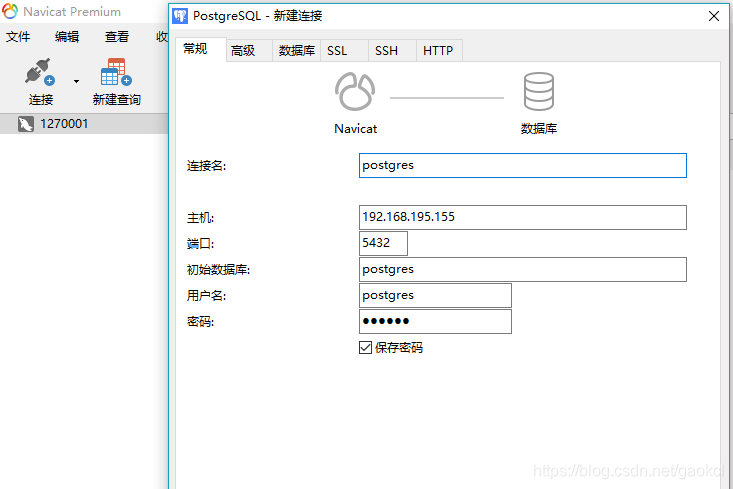
上面是本地的VM安装的Linux系统的postpredb链接,,下面是 远程的链接(像阿里云、腾讯云)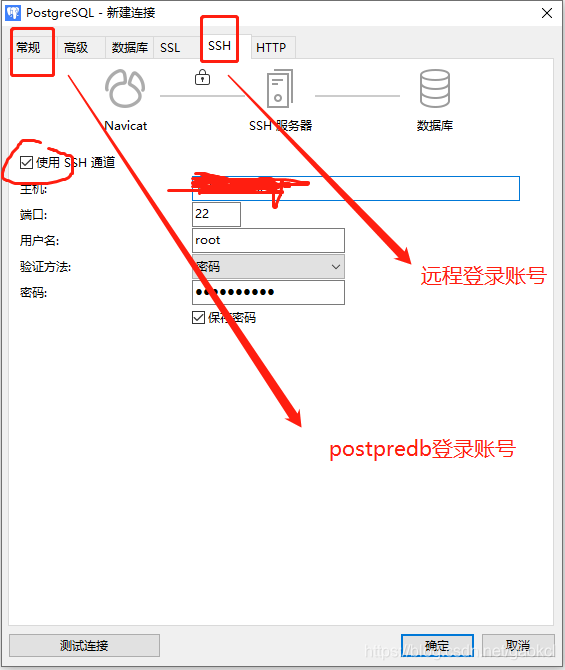
[root@localhost ~]# su - postgres
上一次登录:日 7月 7 22:28:21 CST 2019pts/0 上
-bash-4.2$ psql
口令:
psql (10.9)
输入 "help" 来获取帮助信息.
postgres=# l # 显示消息
数据库列表
名称 | 拥有者 | 字元编码 | 校对规则 | Ctype | 存取权限
-----------+----------+----------+-------------+-------------+-----------------------
postgres | postgres | UTF8 | zh_CN.UTF-8 | zh_CN.UTF-8 |
template0 | postgres | UTF8 | zh_CN.UTF-8 | zh_CN.UTF-8 | =c/postgres +
| | | | | postgres=CTc/postgres
template1 | postgres | UTF8 | zh_CN.UTF-8 | zh_CN.UTF-8 | =c/postgres +
| | | | | postgres=CTc/postgres
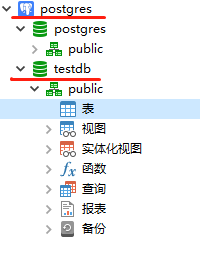
testdb | postgres | UTF8 | zh_CN.UTF-8 | zh_CN.UTF-8 | =Tc/postgres +
| | | | | postgres=CTc/postgres+
| | | | | user123=CTc/postgres
(4 行记录)
postgres=# CREATE DATABASE testdb;  # 创建数据库
postgres=# CREATE USER user123 CREATEDB LOGIN PASSWORD '123456'; # 创建用户
postgres=# GRANT ALL ON DATABASE testdb TO user123; # 将testdb所有权限赋给用户user123
postgres=# drop database testdb;  # 删除数据库
postgres=# drop role user123;  # 删除用户

postgres=# l     # 显示消息

如果觉得我的文章对您有用,请随意打赏。你的支持将鼓励我继续创作!
