社区微信群开通啦,扫一扫抢先加入社区官方微信群

社区微信群
本次实践主要做了如下工作:
本次实验环境是ubuntu18.0。docker的安装参考了博客ubuntu上安装docker。详细的安装过程可参考该博客,需要注意的地方是需要切换到root下,并最好使用阿里云镜像。
允许apt通过https使用repository安装软件包:
添加Docker官方GPG key:
验证key的指纹:
添加稳定版repository:
安装最新版本的docker ce和containerd:
验证:docker --version
docker run hello-world
root@ubuntu:/home/kangze# docker run hello-world
Unable to find image 'hello-world:latest' locally
latest: Pulling from library/hello-world
0e03bdcc26d7: Pull complete
Digest: sha256:1a523af650137b8accdaed439c17d684df61ee4d74feac151b5b337bd29e7eec
Status: Downloaded newer image for hello-world:latest

Hello from Docker!
This message shows that your installation appears to be working correctly.

To generate this message, Docker took the following steps:
 1. The Docker client contacted the Docker daemon.
 2. The Docker daemon pulled the "hello-world" image from the Docker Hub.
    (amd64)
 3. The Docker daemon created a new container from that image which runs the
    executable that produces the output you are currently reading.
 4. The Docker daemon streamed that output to the Docker client, which sent it
    to your terminal.

To try something more ambitious, you can run an Ubuntu container with:
 $ docker run -it ubuntu bash

Share images, automate workflows, and more with a free Docker ID:
 https://hub.docker.com/

For more examples and ideas, visit:
 https://docs.docker.com/get-started/
由于网络原因,直接使用命令
docker run -it ubuntu bash
拉取镜像下载速度会十分缓慢,因此需要更换docker镜像源。
首先要修改拉取docker镜像的源,docker镜像源的存储文件路径如下:
vim /etc/docker/daemon.json
复制以下代码
{
   "registry-mirrors" : ["https://docker.mirrors.ustc.edu.cn"]
}
执行,重启docker服务器
service docker restart
此时,再运行镜像,
docker run -it ubuntu bash
即可快速完成安装。
root@ubuntu:/home/kangze# docker images
REPOSITORY    TAG       IMAGE ID       CREATED         SIZE
ubuntu        latest    f643c72bc252   4 weeks ago     72.9MB
hello-world   latest    bf756fb1ae65   11 months ago   13.3kB
root@ubuntu:/home/kangze# docker --help

Usage:  docker [OPTIONS] COMMAND

A self-sufficient runtime for containers

Options:
      --config string      Location of client config files (default
                           "/root/.docker")
  -c, --context string     Name of the context to use to connect to the
                           daemon (overrides DOCKER_HOST env var and
                           default context set with "docker context use")
  -D, --debug              Enable debug mode
  -H, --host list          Daemon socket(s) to connect to
  -l, --log-level string   Set the logging level
                           ("debug"|"info"|"warn"|"error"|"fatal")
                           (default "info")
      --tls                Use TLS; implied by --tlsverify
      --tlscacert string   Trust certs signed only by this CA (default
                           "/root/.docker/ca.pem")
      --tlscert string     Path to TLS certificate file (default
                           "/root/.docker/cert.pem")
      --tlskey string      Path to TLS key file (default
                           "/root/.docker/key.pem")
      --tlsverify          Use TLS and verify the remote
  -v, --version            Print version information and quit
root@ubuntu:/home/kangze# docker ps
CONTAINER ID   IMAGE     COMMAND   CREATED   STATUS    PORTS     NAMES
root@ubuntu:/home/kangze# docker ps
CONTAINER ID   IMAGE     COMMAND   CREATED   STATUS    PORTS     NAMES
root@ubuntu:/home/kangze#  docker ps -a
CONTAINER ID   IMAGE         COMMAND    CREATED        STATUS                       PORTS     NAMES
c97abff3ab26   ubuntu        "bash"     10 hours ago   Exited (255) 8 minutes ago             angry_lamport
78eec02805cc   hello-world   "/hello"   11 hours ago   Exited (0) 11 hours ago                charming_curie
root@ubuntu:/home/kangze#  docker pull mysql:5.7
5.7: Pulling from library/mysql
6ec7b7d162b2: Pull complete
fedd960d3481: Pull complete
7ab947313861: Pull complete
64f92f19e638: Pull complete
3e80b17bff96: Pull complete
014e976799f9: Pull complete
59ae84fee1b3: Pull complete
7d1da2a18e2e: Pull complete
301a28b700b9: Pull complete
529dc8dbeaf3: Pull complete
bc9d021dc13f: Pull complete
Digest: sha256:c3a567d3e3ad8b05dfce401ed08f0f6bf3f3b64cc17694979d5f2e5d78e10173
Status: Downloaded newer image for mysql:5.7
docker.io/library/mysql:5.7
root@ubuntu:/home/kangze#  mkdir mydock && cd mydock
root@ubuntu:/home/kangze/mydock# vim dockerfile
录入以下内容:
FROM ubuntu
ENTRYPOINT ["top", "-b"]
CMD ["-c"]
构建镜像:
root@ubuntu:/home/kangze/mydock# docker build . -t hello
运行镜像:
root@ubuntu:/home/kangze/mydock# docker run -it --rm hello -H
top - 00:17:21 up 18 min,  0 users,  load average: 0.94, 0.70, 0.73
Threads:   1 total,   1 running,   0 sleeping,   0 stopped,   0 zombie
%Cpu(s):  5.3 us, 10.5 sy,  0.0 ni, 68.4 id, 15.8 wa,  0.0 hi,  0.0 si,  0.0 st
MiB Mem :   3908.4 total,    974.2 free,   1507.9 used,   1426.4 buff/cache
MiB Swap:   2048.0 total,   2048.0 free,      0.0 used.   2160.8 avail Mem

   PID USER      PR  NI    VIRT    RES    SHR S  %CPU  %MEM     TIME+ COMMAND
     1 root      20   0    5968   3060   2632 R   5.0   0.1   0:00.13 top
root@ubuntu:/home/kangze/mydock# docker run -p 3306:3306 --name mysql2 -e MYSQL_ROOT_PASSWORD=root -d mysql:5.7
c88ee576a10c0d1c755fd25077db662011955896e0628e61e72275c9c6364f6c
root@ubuntu:/home/kangze/mydock# docker ps
CONTAINER ID   IMAGE       COMMAND                  CREATED          STATUS          PORTS                               NAMES
c88ee576a10c   mysql:5.7   "docker-entrypoint.s…"   24 seconds ago   Up 21 seconds   0.0.0.0:3306->3306/tcp, 33060/tcp   mysql2
root@ubuntu:/home/kangze# docker run -it --net host mysql:5.7 "sh"
# mysql -h127.0.0.1 -P3306 -uroot -proot
mysql: [Warning] Using a password on the command line interface can be insecure.
Welcome to the MySQL monitor.  Commands end with ; or g.
Your MySQL connection id is 2
Server version: 5.7.32 MySQL Community Server (GPL)

Copyright (c) 2000, 2020, Oracle and/or its affiliates. All rights reserved.

Oracle is a registered trademark of Oracle Corporation and/or its
affiliates. Other names may be trademarks of their respective
owners.

Type 'help;' or 'h' for help. Type 'c' to clear the current input statement.

mysql>
创建数据库 test : create datebase test; 注意以 ;结束
查询数据库: show databases;
设定 test 为当前数据库: use test;
删除数据库 test: drop database test;
显示表: show tables;
显示表 userinfo 结构: describe userinfo
执行查询语句: sql statement;
root@ubuntu:/home/kangze/mydock#  docker exec -it mysql2 bash
root@c88ee576a10c:/#  ls /var/lib/mysql
auto.cnf	 client-key.pem  ibdata1	     private_key.pem  sys
ca-key.pem	 ib_buffer_pool  ibtmp1		     public_key.pem
ca.pem		 ib_logfile0	 mysql		     server-cert.pem
client-cert.pem  ib_logfile1	 performance_schema  server-key.pem
root@ubuntu:/home/kangze# docker rm $(docker ps -a -q) -f -v
39f802cd1564
de67bcea58d9
c88ee576a10c
c97abff3ab26
78eec02805cc
root@ubuntu:/home/kangze# docker volume create mydb
mydb
root@ubuntu:/home/kangze#  docker run --name mysql2 -e MYSQL_ROOT_PASSWORD=root -v mydb:/var/lib/mysql -d mysql:5.7
61b789eff4f7f2c2ed03f30f9e0b5ec3275566299b191a37f7d53d0855c6ec25
root@ubuntu:/home/kangze# docker run --name myclient --link mysql2:mysql -it mysql:5.7 bash
docker network ls
root@ubuntu:/home/kangze# docker network ls
NETWORK ID     NAME      DRIVER    SCOPE
bc72e7782fca   bridge    bridge    local
132a6bd4cd39   host      host      local
b3ebaa71614e   none      null      local
root@ubuntu:/home/kangze#  docker run --name unet -it --rm ubuntu bash
root@37bcb3788f22:/# apt-get update
...
root@37bcb3788f22:/# apt-get install net-tools
...
root@37bcb3788f22:/# apt-get install iputils-ping -y
...
root@37bcb3788f22:/#  ifconfig
eth0: flags=4163<UP,BROADCAST,RUNNING,MULTICAST>  mtu 1500
        inet 172.17.0.4  netmask 255.255.0.0  broadcast 172.17.255.255
        ether 02:42:ac:11:00:04  txqueuelen 0  (Ethernet)
        RX packets 1833  bytes 16996610 (16.9 MB)
        RX errors 0  dropped 0  overruns 0  frame 0
        TX packets 1370  bytes 80000 (80.0 KB)
        TX errors 0  dropped 0 overruns 0  carrier 0  collisions 0
lo: flags=73<UP,LOOPBACK,RUNNING>  mtu 65536
        inet 127.0.0.1  netmask 255.0.0.0
        loop  txqueuelen 1000  (Local Loopback)
        RX packets 0  bytes 0 (0.0 B)
        RX errors 0  dropped 0  overruns 0  frame 0
        TX packets 0  bytes 0 (0.0 B)
        TX errors 0  dropped 0 overruns 0  carrier 0  collisions 0
在容器内ping主机的ip
root@37bcb3788f22:/# ping 172.19.61.154
PING 172.19.61.154 (172.19.61.154) 56(84) bytes of data.
64 bytes from 172.19.61.154: icmp_seq=1 ttl=127 time=1.31 ms
64 bytes from 172.19.61.154: icmp_seq=2 ttl=127 time=2.09 ms
64 bytes from 172.19.61.154: icmp_seq=3 ttl=127 time=1.99 ms
64 bytes from 172.19.61.154: icmp_seq=4 ttl=127 time=2.04 ms
64 bytes from 172.19.61.154: icmp_seq=5 ttl=127 time=2.03 ms
64 bytes from 172.19.61.154: icmp_seq=6 ttl=127 time=2.13 ms
64 bytes from 172.19.61.154: icmp_seq=7 ttl=127 time=1.93 ms
64 bytes from 172.19.61.154: icmp_seq=8 ttl=127 time=2.00 ms
64 bytes from 172.19.61.154: icmp_seq=9 ttl=127 time=2.03 ms
64 bytes from 172.19.61.154: icmp_seq=10 ttl=127 time=2.01 ms
64 bytes from 172.19.61.154: icmp_seq=11 ttl=127 time=2.10 ms
64 bytes from 172.19.61.154: icmp_seq=12 ttl=127 time=2.06 ms
^C
--- 172.19.61.154 ping statistics ---
12 packets transmitted, 12 received, 0% packet loss, time 11025ms
rtt min/avg/max/mdev = 1.310/1.976/2.132/0.207 ms
root@ubuntu:/home/kangze# docker login --username= YOURUSERNAME registry.cn-shanghai.aliyuncs.com
输入开通服务时设置的密码即可登录。
先创建一个命名空间,再创建一个镜像仓库。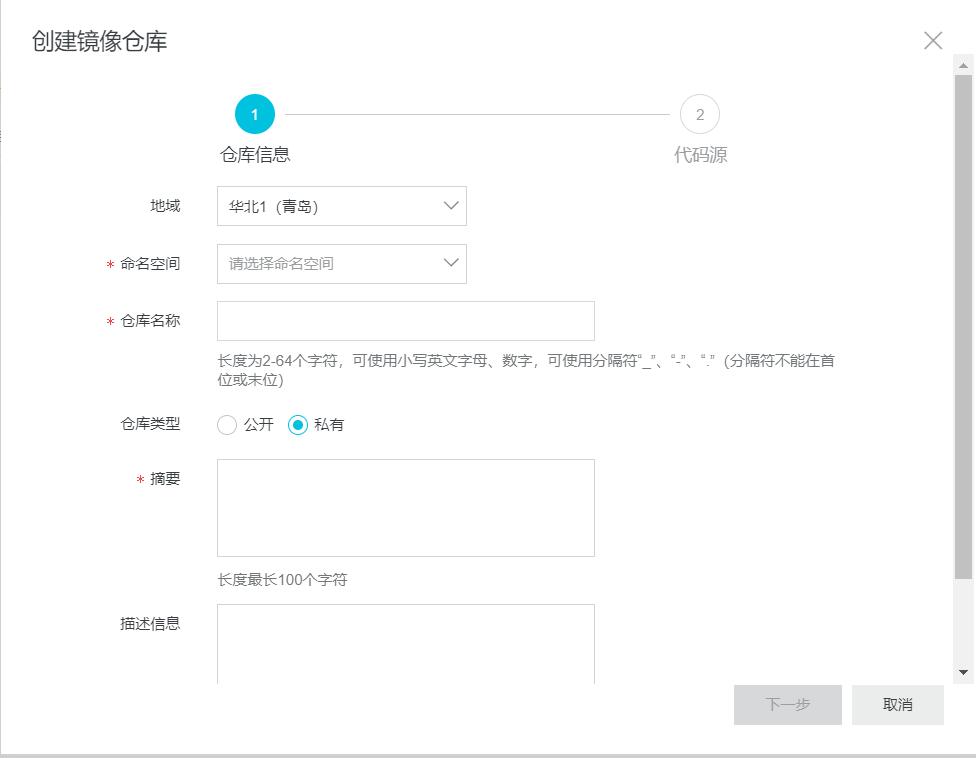

镜像仓库搭建好后使用 “docker push” 命令将该镜像推送至远程。
root@ubuntu:/home/kangze# docker push registry.cn-shanghai.aliyuncs.com/xkzxkz/repo:star
The push refers to repository [registry.cn-shanghai.aliyuncs.com/xkzxkz/repo]
9c27e219663c: Pushed
star: digest: sha256:90659bf80b44ce6be8234e6ff90a1ac34acbeb826903b02cfa0da11c82cbc042 size: 525
其它常用的仓库操作:
• 登陆 docker login --username=<your account> registry.cn-shenzhen.aliyuncs.com
• 标签 docker tag hello-world registry.cn-shenzhen.aliyuncs.com/pmlpml/repo:helloworld
• 上传 docker push registry.cn-shenzhen.aliyuncs.com/pmlpml/repo:hello-world
• 下载 docker push registry.cn-shenzhen.aliyuncs.com/pmlpml/repo:hello-world
• 标签 docker tag registry.cn-shenzhen.aliyuncs.com/pmlpml/repo:hello-world helloworld
• 删除 docker rmi registry.cn-shenzhen.aliyuncs.com/pmlpml/repo:hello-world
• 运行 docker run --rm hello-world
• 退出 docker logout registry.cn-shenzhen.aliyuncs.com
root@ubuntu:/home/kangze# docker info
Client:
 Context:    default
 Debug Mode: false
 Plugins:
  app: Docker App (Docker Inc., v0.9.1-beta3)
  buildx: Build with BuildKit (Docker Inc., v0.5.0-docker)

Server:
 Containers: 3
  Running: 3
  Paused: 0
  Stopped: 0
 Images: 5
 Server Version: 20.10.1
 Storage Driver: overlay2
  Backing Filesystem: extfs
  Supports d_type: true
  Native Overlay Diff: true
 Logging Driver: json-file
 Cgroup Driver: cgroupfs
 Cgroup Version: 1
...
root@ubuntu:/home/kangze# docker ps
CONTAINER ID   IMAGE       COMMAND                  CREATED       STATUS       PORTS                 NAMES
37bcb3788f22   ubuntu      "bash"                   2 hours ago   Up 2 hours                         unet
aa7348ee19ad   mysql:5.7   "docker-entrypoint.s…"   2 hours ago   Up 2 hours   3306/tcp, 33060/tcp   myclient
61b789eff4f7   mysql:5.7   "docker-entrypoint.s…"   2 hours ago   Up 2 hours   3306/tcp, 33060/tcp   mysql2
再通过docker top查看容器中运行的进程信息
root@ubuntu:/home/kangze# docker top 37bcb3788f22
UID                 PID                 PPID                C                   STIME               TTY                 TIME                CMD
root                4266                4232                0                   18:07               pts/0               00:00:00            bash
查看容器日志
root@ubuntu:/home/kangze# docker logs aa7348ee19ad
root@aa7348ee19ad:/# env
MYSQL_PORT_33060_TCP_ADDR=172.17.0.2
MYSQL_PORT=tcp://172.17.0.2:3306
MYSQL_PORT_3306_TCP_ADDR=172.17.0.2
MYSQL_NAME=/myclient/mysql
MYSQL_ENV_MYSQL_ROOT_PASSWORD=root
MYSQL_MAJOR=5.7
MYSQL_PORT_3306_TCP_PORT=3306
HOSTNAME=aa7348ee19ad
MYSQL_ENV_MYSQL_MAJOR=5.7
MYSQL_PORT_3306_TCP=tcp://172.17.0.2:3306
PWD=/
HOME=/root
MYSQL_ENV_GOSU_VERSION=1.12
MYSQL_PORT_33060_TCP_PROTO=tcp
MYSQL_VERSION=5.7.32-1debian10
GOSU_VERSION=1.12
TERM=xterm
MYSQL_PORT_33060_TCP_PORT=33060
MYSQL_PORT_3306_TCP_PROTO=tcp
SHLVL=1
MYSQL_PORT_33060_TCP=tcp://172.17.0.2:33060
PATH=/usr/local/sbin:/usr/local/bin:/usr/sbin:/usr/bin:/sbin:/bin
MYSQL_ENV_MYSQL_VERSION=5.7.32-1debian10
_=/usr/bin/env
发现日志记录了之前所操作命令的输入与输出。
参考了博客https://zhuanlan.zhihu.com/p/143200936
首先在相应的目录下创建一个目录web-server。编写相应的代码,这里只是由于是首次体验,因此编写的代码很简单,用到了gin框架。
package main

import (
    "fmt"
    "html"
    "github.com/gin-gonic/gin"
)

func main() {
    r := gin.Default()
    web := r.Group("/")
	{
		web.GET("Hello",func(c *gin.Context) {
            fmt.Fprintf(c.Writer, "Hello, %q", html.EscapeString(c.Request.URL.Path))
        })

        web.GET("Hi",func(c *gin.Context) {
            fmt.Fprintf(c.Writer, "Hi")
        })

    }
    r.Run(":9999")
}
再创建一个Dockerfile,编写命令如下:
# 选择基础镜像
FROM golang:1.14.3-alpine

# 修改使用国内代理, 否则会很慢
RUN set -ex
&& go env -w GO111MODULE=on
&& go env -w GOPROXY=https://goproxy.cn,direct

# 在镜像中创建项目目录
RUN mkdir /app

# 将宿主项目目录(也是当前目录)下所有文件
# 复制到镜像中的项目目录
ADD . /app

# 工作路径
WORKDIR /app

# 创建项目的可执行文件web-server
RUN go build -o web-server *.go

# 执行web-server
CMD ["/app/web-server"]
通过Dockerfile创建镜像, 在Dockerfile所在目录下执行 docker build -t go-web-server。得到如下输出:
由于Gin框架需要许多依赖,因此会将所需的全部依赖下载。
root@ubuntu:/home/kangze/gopath/src/github.com/github-user/web-server# docker build -t go-web-server .
Sending build context to Docker daemon  8.192kB
Step 1/7 : FROM golang:1.14.3-alpine
1.14.3-alpine: Pulling from library/golang
cbdbe7a5bc2a: Pull complete
408f87550127: Pull complete
fe522b08c979: Pull complete
246889057fdc: Pull complete
526388c839c0: Pull complete
Digest: sha256:d3a08e6a81ef8f25c7b9f4b8f2990fe76790f057ef7f8053e8884511ddd81756
Status: Downloaded newer image for golang:1.14.3-alpine
 ---> 459ae5e869df
Step 2/7 : RUN set -ex && go env -w GO111MODULE=on && go env -w GOPROXY=https://goproxy.cn,direct
 ---> Running in 41b3641e17dd
+ go env -w 'GO111MODULE=on'
+ go env -w 'GOPROXY=https://goproxy.cn,direct'
Removing intermediate container 41b3641e17dd
 ---> f05b3e06da3f
Step 3/7 : RUN mkdir /app
 ---> Running in 9b8789816831
Removing intermediate container 9b8789816831
 ---> 3713715caff9
Step 4/7 : ADD . /app
 ---> f00e63b9b04c
Step 5/7 : WORKDIR /app
 ---> Running in c49c1a507250
Removing intermediate container c49c1a507250
 ---> 800faea74747
Step 6/7 : RUN go build -o web-server *.go
 ---> Running in 033b581d1615
go: downloading github.com/gin-gonic/gin v1.6.3
go: downloading github.com/gin-contrib/sse v0.1.0
go: downloading github.com/mattn/go-isatty v0.0.12
go: downloading github.com/ugorji/go v1.1.7
go: downloading github.com/golang/protobuf v1.3.3
go: downloading github.com/go-playground/validator/v10 v10.2.0
go: downloading gopkg.in/yaml.v2 v2.2.8
go: downloading golang.org/x/sys v0.0.0-20200116001909-b77594299b42
go: downloading github.com/leodido/go-urn v1.2.0
go: downloading github.com/go-playground/universal-translator v0.17.0
go: downloading github.com/ugorji/go/codec v1.1.7
go: downloading github.com/go-playground/locales v0.13.0
Removing intermediate container 033b581d1615
 ---> 76477528bb31
Step 7/7 : CMD ["/app/web-server"]
 ---> Running in fccf05908685
Removing intermediate container fccf05908685
 ---> 97db81afc01e
Successfully built 97db81afc01e
Successfully tagged go-web-server:latest
通过docker images查看刚刚创建好的镜像
root@ubuntu:/home/kangze/gopath/src/github.com/github-user/web-server# docker images
REPOSITORY                                      TAG             IMAGE ID       CREATED          SIZE
go-web-server                                   latest          97db81afc01e   37 seconds ago   453MB
创建新的容器并运行该程序
root@ubuntu:/home/kangze/gopath/src/github.com/github-user/web-server# docker run -p 8080:9999 -it go-web-server
-p 8080:9999 - 宿主端口8080映射到容器端口9999
[GIN-debug] [WARNING] Creating an Engine instance with the Logger and Recovery middleware already attached.

[GIN-debug] [WARNING] Running in "debug" mode. Switch to "release" mode in production.
 - using env:	export GIN_MODE=release
 - using code:	gin.SetMode(gin.ReleaseMode)

[GIN-debug] GET    /Hello                    --> main.main.func1 (3 handlers)
[GIN-debug] GET    /Hi                       --> main.main.func2 (3 handlers)
[GIN-debug] Listening and serving HTTP on :9999
可以看到正在监听,打开浏览器,访问相应的url,可以看到对应的内容。

本次实验熟悉了docker的基本使用,可以通过dockers将应用程序与基础架构分开,通过docker可以使开发的应用程序在标准化环境中工作,从而简化了开发的生命周期。
如果觉得我的文章对您有用,请随意打赏。你的支持将鼓励我继续创作!
