本文转自:http://blog.csdn.net/smartbetter/article/details/53117527
蓝牙技术在智能硬件方面有很多用武之地,今天我就为大家分享一下蓝牙在Android系统下的使用方法技巧,并实现一下两个终端间数据的传输。
蓝牙(Bluetooth)是一种短距离的无线通信技术标准,蓝牙协议分为4层,即核心协议层、电缆替代协议层、电话控制协议层和采纳的其它协议层。
这4种协议中最重要的是核心协议。蓝牙的核心协议包括基带、链路管理、逻辑链路控制和适应协议四部分。其中链路管理(LMP)负责蓝牙组件间连接的建立。逻辑链路控制与适应协议(L2CAP)位于基带协议层上,属于数据链路层,是一个为高层传输和应用层协议屏蔽基带协议的适配协议。
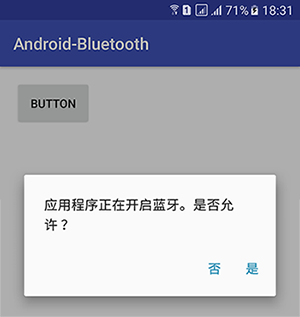
1.打开和关闭蓝牙
第一种方法相对简单,直接调用系统对话框启动蓝牙:
在AndroidManifest文件中添加需要的权限,高版本也不需要动态授权:
<uses-permission android:name="android.permission.BLUETOOTH" />
startActivityForResult(new Intent(BluetoothAdapter.ACTION_REQUEST_ENABLE), 1);
如果不想让用户看到这个对话框,那么我们还可以选择第二种方法,进行静默开启蓝牙。
第二种方法,静默开启,不会有方法一的对话框:
在AndroidManifest文件中添加需要的权限:
<uses-permission android:name="android.permission.BLUETOOTH" />
<uses-permission android:name="android.permission.BLUETOOTH_ADMIN" />
<uses-permission android:name="android.permission.ACCESS_FINE_LOCATION" />
<uses-permission android:name="android.permission.ACCESS_COARSE_LOCATION" />
<uses-feature
android:name="android.hardware.bluetooth_le"
android:required="true" />
由于蓝牙所需要的权限包含Dangerous Permissions,所以我们需要在Java代码中进行动态授权处理:
private static final int REQUEST_BLUETOOTH_PERMISSION=10;
private void requestBluetoothPermission(){
if (Build.VERSION.SDK_INT >= 23) {
int checkCallPhonePermission = ContextCompat.checkSelfPermission(this,
Manifest.permission.ACCESS_COARSE_LOCATION);
if(checkCallPhonePermission != PackageManager.PERMISSION_GRANTED){
if(ActivityCompat.shouldShowRequestPermissionRationale(this,
Manifest.permission.ACCESS_COARSE_LOCATION))
Toast.makeText(this,"Need bluetooth permission.",
Toast.LENGTH_SHORT).show();
ActivityCompat.requestPermissions(this ,new String[]
{Manifest.permission.ACCESS_COARSE_LOCATION},REQUEST_BLUETOOTH_PERMISSION);
return;
}else{
}
} else {
}
}
- 1
- 2
- 3
- 4
- 5
- 6
- 7
- 8
- 9
- 10
- 11
- 12
- 13
- 14
- 15
- 16
- 17
- 18
- 19
- 20
- 21
- 22
- 23
- 1
- 2
- 3
- 4
- 5
- 6
- 7
- 8
- 9
- 10
- 11
- 12
- 13
- 14
- 15
- 16
- 17
- 18
- 19
- 20
- 21
- 22
- 23
接下来我们就可以静默开启蓝牙了:
BluetoothAdapter mBluetoothAdapter = BluetoothAdapter.getDefaultAdapter();
mBluetoothAdapter.enable();
下面我们来看一下如何通过代码搜索蓝牙设备。
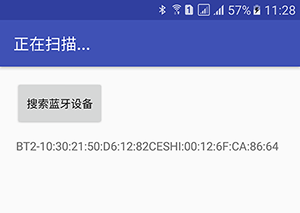
2.通过代码搜索蓝牙设备
搜索分为主动搜索和被动搜索。
我们开始进行主动搜索:
(1)创建BluetoothAdapter对象
TextView tvDevices = (TextView)findViewById(R.id.tv_devices);
BluetoothAdapter mBluetoothAdapter = BluetoothAdapter.getDefaultAdapter();
(2)我们先获取并显示一下已经配对的蓝牙设备列表
Set<BluetoothDevice> pairedDevices = mBluetoothAdapter.getBondedDevices();
if (pairedDevices.size() > 0) {
for (BluetoothDevice device : pairedDevices) {
tvDevices.append(device.getName() + ":" + device.getAddress());
}
}
(3)下面我们定义广播接收器
IntentFilter filter = new IntentFilter();
filter.addAction(BluetoothDevice.ACTION_FOUND);
filter.addAction(BluetoothAdapter.ACTION_DISCOVERY_FINISHED);
filter.setPriority(Integer.MAX_VALUE);
this.registerReceiver(receiver, filter);
蓝牙设备的广播接收器如下:
/**
* 定义广播接收器
*/
private final BroadcastReceiver receiver = new BroadcastReceiver() {
@Override
public void onReceive(Context context, Intent intent) {
String action = intent.getAction();
if (BluetoothDevice.ACTION_FOUND.equals(action)) {
BluetoothDevice device = intent.getParcelableExtra(BluetoothDevice.EXTRA_DEVICE);
if (device.getBondState() != BluetoothDevice.BOND_BONDED) {
tvDevices.append(device.getName() + ":"+ device.getAddress());
}
} else if (BluetoothAdapter.ACTION_DISCOVERY_FINISHED.equals(action)) {
}
}
};
- 1
- 2
- 3
- 4
- 5
- 6
- 7
- 8
- 9
- 10
- 11
- 12
- 13
- 14
- 15
- 16
- 17
- 1
- 2
- 3
- 4
- 5
- 6
- 7
- 8
- 9
- 10
- 11
- 12
- 13
- 14
- 15
- 16
- 17
(4)我们创建一个Button按钮,当点击Button时进行搜索,Button点击事件如下:
if (mBluetoothAdapter.isDiscovering()) {
mBluetoothAdapter.cancelDiscovery();
}
mBluetoothAdapter.startDiscovery();
3.蓝牙的UUID
两个蓝牙设备进行连接时需要使用同一个UUID。但很多读者可能发现,有很多型号的手机(可能是非Android系统的手机)之间使用了不同的程序也可以使用蓝牙进行通讯。从表面上看,它们之间几乎不可能使用同一个UUID。
UUID的格式如下:
xxxxxxxx-xxxx-xxxx-xxxx-xxxxxxxxxxxx
UUID的格式被分成5段,其中中间3段的字符数相同,都是4,第1段是8个字符,最后一段是12个字符。所以UUID实际上是一个8-4-4-4-12的字符串。
实际上,UUID和TCP的端口一样,也有一些默认的值。例如,将蓝牙模拟成串口的服务就使用了一个标准的UUID:
00001101-0000-1000-8000-00805F9B34FB
除此之外,还有很多标准的UUID,如下面就是两个标准的UUID:
信息同步服务:00001104-0000-1000-8000-00805F9B34FB
文件传输服务:00001106-0000-1000-8000-00805F9B34FB
4.蓝牙终端间数据传输
通过蓝牙传输数据与Socket类似。在网络中使用Socket和ServerSocket控制客户端和服务端的数据读写。而蓝牙通讯也由客户端和服务端Socket来完成。蓝牙客户端Socket是BluetoothSocket,蓝牙服务端Socket是BluetoothServerSocket。这两个类都在android.bluetooth包中。
无论是BluetoothSocket,还是BluetoothServerSocket,都需要一个UUID(全局唯一标识符,Universally Unique Identifier),UUID相当于Socket的端口,而蓝牙地址相当于Socket的IP。
我们开始进行模拟一个蓝牙数据的传输:
首先来看客户端:
(1)定义全局常量变量
private ListView lvDevices;
private BluetoothAdapter mBluetoothAdapter;
private List<String> bluetoothDevices = new ArrayList<String>();
private ArrayAdapter<String> arrayAdapter;
private final UUID MY_UUID = UUID
.fromString("abcd1234-ab12-ab12-ab12-abcdef123456");
private BluetoothSocket clientSocket;
private BluetoothDevice device;
private OutputStream os;
(2)在onCreate方法中做初始化操作
mBluetoothAdapter = BluetoothAdapter.getDefaultAdapter();
lvDevices = (ListView) findViewById(R.id.lv_devices);
Set<BluetoothDevice> pairedDevices = mBluetoothAdapter.getBondedDevices();
if (pairedDevices.size() > 0) {
for (BluetoothDevice device : pairedDevices) {
bluetoothDevices.add(device.getName() + ":"+ device.getAddress());
}
}
arrayAdapter = new ArrayAdapter<String>(this,
android.R.layout.simple_list_item_1, android.R.id.text1,bluetoothDevices);
lvDevices.setAdapter(arrayAdapter);
lvDevices.setOnItemClickListener(this);
IntentFilter filter = new IntentFilter(BluetoothDevice.ACTION_FOUND);
this.registerReceiver(receiver, filter);
filter = new IntentFilter(BluetoothAdapter.ACTION_DISCOVERY_FINISHED);
this.registerReceiver(receiver, filter);
- 1
- 2
- 3
- 4
- 5
- 6
- 7
- 8
- 9
- 10
- 11
- 12
- 13
- 14
- 15
- 16
- 17
- 18
- 19
- 20
- 21
- 1
- 2
- 3
- 4
- 5
- 6
- 7
- 8
- 9
- 10
- 11
- 12
- 13
- 14
- 15
- 16
- 17
- 18
- 19
- 20
- 21
蓝牙设备的广播接收器如下:
/**
* 定义广播接收器
*/
private final BroadcastReceiver receiver = new BroadcastReceiver() {
@Override
public void onReceive(Context context, Intent intent) {
String action = intent.getAction();
if (BluetoothDevice.ACTION_FOUND.equals(action)) {
BluetoothDevice device = intent.getParcelableExtra(BluetoothDevice.EXTRA_DEVICE);
if (device.getBondState() != BluetoothDevice.BOND_BONDED) {
bluetoothDevices.add(device.getName() + ":" + device.getAddress());
arrayAdapter.notifyDataSetChanged();
}
} else if (BluetoothAdapter.ACTION_DISCOVERY_FINISHED.equals(action)) {
}
}
};
- 1
- 2
- 3
- 4
- 5
- 6
- 7
- 8
- 9
- 10
- 11
- 12
- 13
- 14
- 15
- 16
- 17
- 18
- 19
- 1
- 2
- 3
- 4
- 5
- 6
- 7
- 8
- 9
- 10
- 11
- 12
- 13
- 14
- 15
- 16
- 17
- 18
- 19
(4)我们创建一个Button按钮,当点击Button时进行搜索,Button点击事件如下:
if (mBluetoothAdapter.isDiscovering()) {
mBluetoothAdapter.cancelDiscovery();
}
mBluetoothAdapter.startDiscovery();
(5)接下来我们设置列表的点击事件:
                            版权声明:本文来源CSDN,感谢博主原创文章,遵循 CC 4.0 by-sa 版权协议,转载请附上原文出处链接和本声明。

                            原文链接:https://blog.csdn.net/qq_24531461/article/details/54612795

                            站方申明:本站部分内容来自社区用户分享,若涉及侵权,请联系站方删除。

