社区微信群开通啦,扫一扫抢先加入社区官方微信群

社区微信群
很多时候线上服务的配置需要进行修改,但是我们不想或者没办法重启服务来让配置生效,那么这时候应该怎么办呢?
在Spring Cloud中,spring cloud config所提供的分布式配置中心能完美的解决以上问题,spring cloud config将配置文件存放在配置服务内存中或者托管在远程git仓库中。然后通过一个配置中心来获取配置信息,这样,如果需要维护配置信息,则只需要在本地修改配置文件,然后保存到远程git仓库上即可,十分方便。同时为了保证配置中心的稳定,也可以集群部署。
主要在上一篇的内容上进行扩展.
PS.一下Spring Boot项目都为2.X版本
{spring.application.name}-{type}.properties。myServiceI-{type}.properties。myServiceI-dev.properties和myServiceI-prod.propertiesname=devConfigname=prodConfig <dependency>
<groupId>org.springframework.cloud</groupId>
<artifactId>spring-cloud-starter-netflix-eureka-client</artifactId>
</dependency>
<dependency>
<groupId>org.springframework.cloud</groupId>
<artifactId>spring-cloud-config-server</artifactId>
</dependency>
(2)application.properties配置
#服务端口
server.port=8091
#服务名称
spring.application.name=myConfigServer
#服务注册中心
eureka.client.service-url.defautZone=http://serviceCenter:8761/eureka/
#服务的git仓库地址
spring.cloud.config.server.git.uri=https://gitee.com/SecondMagic/config.git
#配置文件所在的目录
spring.cloud.config.server.git.search-paths=/**
#配置文件所在的分支
spring.cloud.config.label=master
#git仓库的用户名
spring.cloud.config.username=username
#git仓库的密码
spring.cloud.config.password=password

#spring 2.X actuator
#http://ip:port/actuator/refresh
management.endpoints.web.exposure.include=refresh,health,info
这里有一个大坑,现在大部分的教程都是基于Spring Boot 1.X版本的,但是对于spring cloud config的配置,1.X和2.X版本是有一些不同的。在1.X中是不用配置management.endpoints.web.exposure.include,然后在手动更新配置时用的路径为http://服务项目ip:服务项目port/refresh。但是在2.X中,是不存在/refresh该路径的,需要我们自行配置management.endpoints.web.exposure.include=refresh,health,info,然后访问路径为http://服务项目ip:服务项目port/actuator/refresh。这个坑了我好久= =。
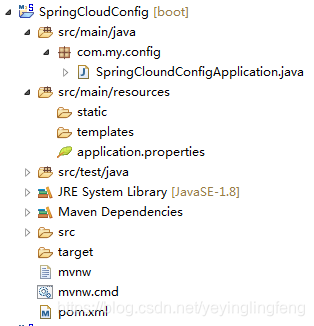
(3)启动文件添加@EnableConfigServer
package com.my.config;

import org.springframework.boot.SpringApplication;
import org.springframework.boot.autoconfigure.SpringBootApplication;
import org.springframework.cloud.config.server.EnableConfigServer;
import org.springframework.cloud.netflix.eureka.EnableEurekaClient;

@SpringBootApplication
@EnableConfigServer
@EnableEurekaClient
public class SpringCloundConfigApplication {

	public static void main(String[] args) {
		SpringApplication.run(SpringCloundConfigApplication.class, args);
	}
}
整体结构如下
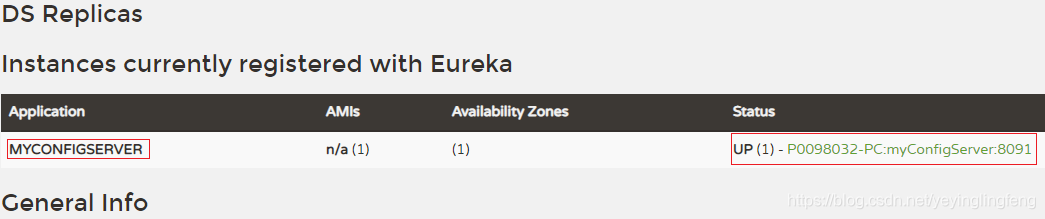
现在启动上一篇中的服务注册中心和这里的配置中心
可以从注册界面看到配置中心服务已经注册。
然后可以通过http://localhost:8091/myServiceI/dev或http://localhost:8091/myServiceI-dev.properties或http://localhost:8091/master/myServiceI-dev.properties
来查看配置信息
{“name”:“myServiceI”,“profiles”:[“dev”],“label”:null,“version”:“91bd9f2f8989eb798c789988242b1a6fbbbb0fde”,“state”:null,“propertySources”:[{“name”:“https://gitee.com/SecondMagic/config.git/myServiceI-dev.properties",“source”:{“name”:"devConfig”}}]}
	<dependency>
  		<groupId>org.springframework.cloud</groupId>
  		<artifactId>spring-cloud-starter-config</artifactId>
  	</dependency>
  	#更新
  	<dependency>
  		<groupId>org.springframework.boot</groupId>
  		<artifactId>spring-boot-starter-actuator</artifactId>
  	</dependency>
(2)application.properties配置
在原有基础上添加如下配置
  #spring 2.X actuator
  #http://ip:port/actuator/refresh
  management.endpoints.web.exposure.include=refresh,health,info
(3)新建bootstrap.properties配置文件(和application.properties在同一文件夹下)
我这里使用的是prod配置文件
#config
#开启配置服务发现
spring.cloud.config.discovery.enabled=true
#配置服务实例名称
spring.cloud.config.discovery.service-id=myConfigServer
#配置文件所在分支
spring.cloud.config.label=master
spring.cloud.config.profile=prod
#配置服务中心
spring.cloud.config.uri=http://localhost:8091/
至于这里为什么需要新建一个配置文件而不是在application.properties中直接添加config配置,是因为在项目启动时bootstrap.properties配置文件会先于application.properties加载,详细原因可以百度。
(4)修改服务接口,将上一篇中的/getInfo接口修改下
@RefreshScope代表刷新配置,是actuator提供的
package com.my.serviceI.controller;

import org.springframework.beans.factory.annotation.Value;
import org.springframework.cloud.context.config.annotation.RefreshScope;
import org.springframework.stereotype.Controller;
import org.springframework.web.bind.annotation.RequestMapping;
import org.springframework.web.bind.annotation.ResponseBody;

@Controller
@RefreshScope
@RequestMapping(value="/Api")
public class ServiceApiController {
  //获取配置信息
  @Value("${name}")
  private String name;

  @ResponseBody
  @RequestMapping(value="/getInfo")
  public String getInfo() {
  	return "123+"+name;
  }
}
整体结构
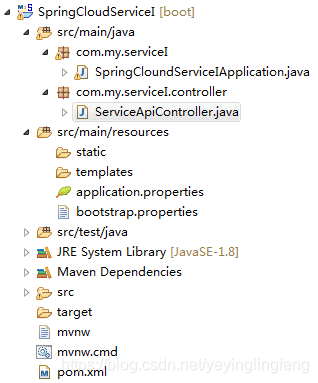
启动服务项目,可以在注册界面中查看到服务项目信息。

然后访问接口http://localhost:8762/myServiceI/Api/getInfo
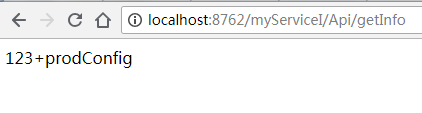
看下配置文件,恩,确实是这个
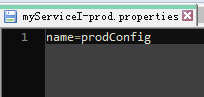
然后修改下配置,改成
name=prodConfigII
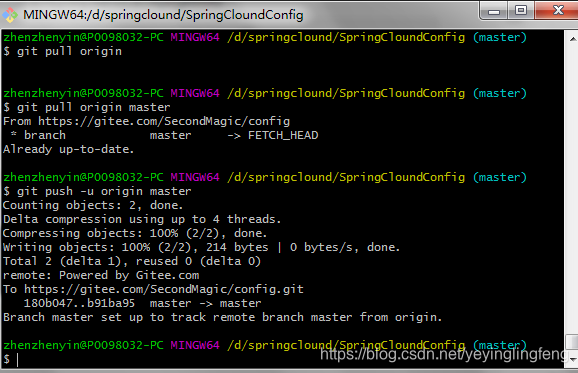
修改完后上传到码云上
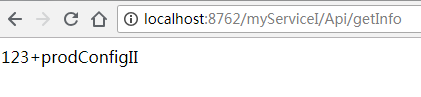
再次访问服务接口http://localhost:8762/myServiceI/Api/getInfo
嗯?好像没有更新成功?
想要刷新配置还需要一步操作,用POST方式访问 http://localhost:8762/myServiceI/actuator/refresh,这样就会将myServiceI服务的标有@RefreshScope的部分中的配置信息进行刷新了。
或者通过git工具执行
curl -X POST http://localhost:8762/myServiceI/actuator/refresh

然后再次访问接口http://localhost:8762/myServiceI/Api/getInfo
OK,成功刷新了。
但是该方法如果有很多个服务的话,需要手动一个一个的刷新,当服务数量到一定量级时就不靠谱了,所以需要使用MQ+spring-could-bus 消息总线模式来批量更新配置信息。
还有一个附加的,就是在服务端在从配置中心获取配置信息时,如果出现了网络波动,导致项目启动时无法获取信息的话,可以使用如下配置来规避。
还是在SpringCloudServiceI项目上进行扩展
pom.xml在原有基础上添加依赖
	    <!--添加  重试机制 的依赖
   		 因网络的抖动等原因导致在启动时候访问config-server没有访问成功从而报错,
    	希望config-client能重试几次,故重试机制
    	-->
    	<dependency>
        	<groupId>org.springframework.retry</groupId>
       		<artifactId>spring-retry</artifactId>
    	</dependency>
    	<dependency>
        	<groupId>org.springframework.boot</groupId>
        	<artifactId>spring-boot-starter-aop</artifactId>
    	</dependency>
application.properties在原有基础上添加配置
#retry
#和重试机制相关的配置有如下四个:
# 配置重试次数,默认为6
spring.cloud.config.retry.max-attempts=6
# 间隔乘数,默认1.1
spring.cloud.config.retry.multiplier=1.1
# 初始重试间隔时间,默认1000ms
spring.cloud.config.retry.initial-interval=1000
# 最大间隔时间,默认2000ms
spring.cloud.config.retry.max-interval=2000
bootstrap.properties在原有基础上添加配置
#启动失败时能够快速响应
#spring.cloud.config.fail-fast=true
如果觉得我的文章对您有用,请随意打赏。你的支持将鼓励我继续创作!
