社区微信群开通啦,扫一扫抢先加入社区官方微信群

社区微信群
Spring Boot是一个独立的、工业级的( production-grade) 基于Spring框架的应用。Spring Boot非常开放,在Spring Paltform的基础上集成了很多第三方类库,使得Spring Boot开发非常简单,开箱即用,只需要简单的配置,就可以把应用跑起来。实际上,java的发展是比较缓慢的,也比较臃肿,如果你想搭建一个java ee的简单例子,不依赖于任何框架,实际上,就算依赖其他框架,搭建的步骤和配置都非常繁琐,感谢Pivotal,提供了如此便利、稳定的框架。
让我们来看看Python搭建一个Web的Helloworld,就知道有多简单了。
好了,打开PyCharm,创建一个Python项目,这里略过。
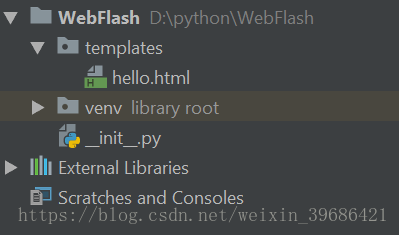
想看看项目骨架,项目命名为WebFlash
/templates/hello.html
<!doctype html>
<title>Hello from Flask</title>
{% if name %}
  <h1>Hello {{ name }}!</h1>
{% else %}
  <h1>Hello, World!</h1>
{% endif %}
__init__.py
from flask import render_template
from flask import Flask
app = Flask(__name__)
@app.route('/hello/')
@app.route('/hello/<name>')
def hello(name=None):
return render_template('hello.html', name=name)
if __name__ == '__main__':
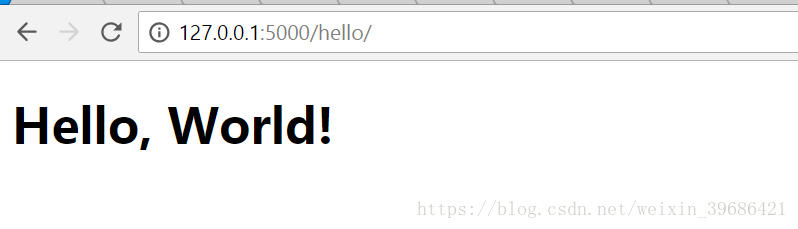
app.run()在PyCharm里面启动项目
能看到应用已经跑起来了,通过浏览器访问页面http://127.0.0.1:5000/hello
Nice,一个Python的hello world就跑起来了。
搭建Spring Boot需要依赖JDK和Maven,当然也可以用Gradle,这里我用了Maven,开发工具是STS。
用STS创建一个Spring Boot项目,也可以通过curl的方式下载项目骨架,这里略过。
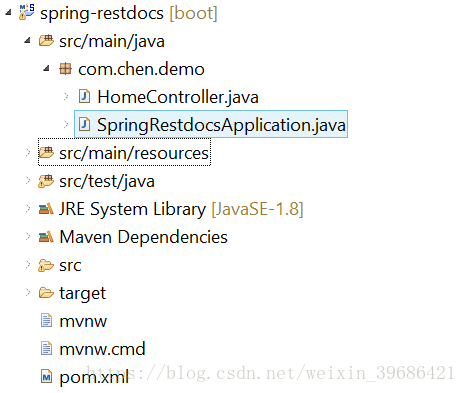
SpringRestdocsApplication.java如下:
package com.chen.demo;

import org.springframework.boot.SpringApplication;
import org.springframework.boot.autoconfigure.SpringBootApplication;

@SpringBootApplication
public class SpringRestdocsApplication {

	public static void main(String[] args) {
		SpringApplication.run(SpringRestdocsApplication.class, args);
	}
}
HomeController.java如下:
package com.chen.demo;

import java.util.Collections;
import java.util.Map;

import org.springframework.web.bind.annotation.GetMapping;
import org.springframework.web.bind.annotation.RestController;

@RestController
public class HomeController {

	@GetMapping("/")
	public Map<String, Object> greeting() {
		return Collections.singletonMap("message", "Hello World");
	}
}
pom.xml如下:
<?xml version="1.0" encoding="UTF-8"?>
<project xmlns="http://maven.apache.org/POM/4.0.0" xmlns:xsi="http://www.w3.org/2001/XMLSchema-instance"
	xsi:schemaLocation="http://maven.apache.org/POM/4.0.0 http://maven.apache.org/xsd/maven-4.0.0.xsd">
	<modelVersion>4.0.0</modelVersion>

	<groupId>com.chen</groupId>
	<artifactId>demo</artifactId>
	<version>0.0.1</version>
	<packaging>jar</packaging>

	<name>spring-restdocs</name>
	<description>Spring API RestDocs for Spring Boot</description>

	<parent>
		<groupId>org.springframework.boot</groupId>
		<artifactId>spring-boot-starter-parent</artifactId>
		<version>1.5.10.RELEASE</version>
		<relativePath/> <!-- lookup parent from repository -->
	</parent>

	<properties>
		<project.build.sourceEncoding>UTF-8</project.build.sourceEncoding>
		<project.reporting.outputEncoding>UTF-8</project.reporting.outputEncoding>
		<java.version>1.8</java.version>
	</properties>

	<dependencies>
		<dependency>
            <groupId>org.springframework.boot</groupId>
            <artifactId>spring-boot-starter-web</artifactId>
        </dependency>

		<dependency>
			<groupId>org.springframework.boot</groupId>
			<artifactId>spring-boot-starter-test</artifactId>
			<scope>test</scope>
		</dependency>

		<dependency>
            <groupId>org.springframework.restdocs</groupId>
            <artifactId>spring-restdocs-mockmvc</artifactId>
            <scope>test</scope>
        </dependency>
	</dependencies>

	<build>
		<plugins>
			<plugin>
				<groupId>org.springframework.boot</groupId>
				<artifactId>spring-boot-maven-plugin</artifactId>
			</plugin>
			<plugin>
    <groupId>org.asciidoctor</groupId>
    <artifactId>asciidoctor-maven-plugin</artifactId>
    <executions>
        <execution>
            <id>generate-docs</id>
            <phase>prepare-package</phase>
            <goals>
                <goal>process-asciidoc</goal>
            </goals>
            <configuration>
                <sourceDocumentName>index.adoc</sourceDocumentName>
                <backend>html</backend>
                <attributes>
                    <snippets>${project.build.directory}/snippets</snippets>
                </attributes>
            </configuration>
        </execution>
    </executions>
</plugin>
		</plugins>
	</build>


</project>
到项目的工程目录下,执行
mvn clean package构建完成之后,demo-0.0.1.jar就生成在/target目录下了,执行以下命令:
java -jar target/demo-0.0.1.jar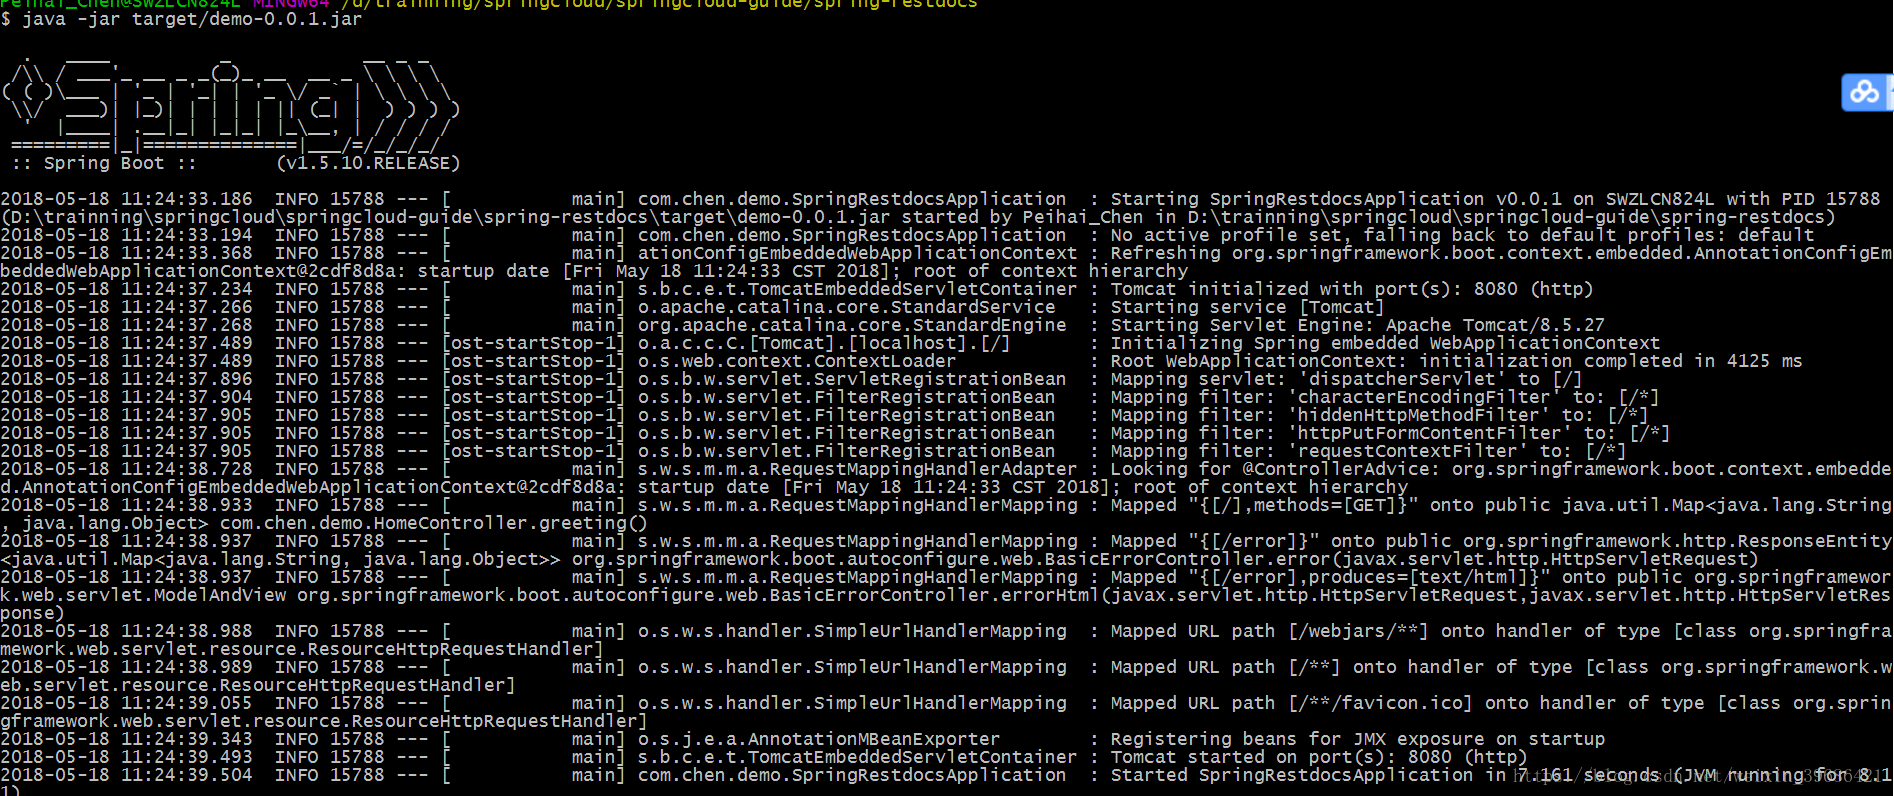
启动完成后,通过curl命令访问服务或者浏览器访问:
curl http://localhost:8080

一个简单的Spring Boot微服务就完成了,非常的简单,我们甚至都没看到Tomcat、Jetty,它们是怎么去加载的呢?恩,刨根问底,下篇继续。
如果觉得我的文章对您有用,请随意打赏。你的支持将鼓励我继续创作!