社区微信群开通啦,扫一扫抢先加入社区官方微信群

社区微信群
Elasticsearch 是一个基于 Lucene 的 Java 开发的企业级搜索引擎,是一个分布式、可扩展、实时的搜索与数据分析引擎,它能从项目一开始就赋予你的数据以搜索、分析和探索的能力,基于 RESTful web 接口。设计用于云计算中,能够达到实时搜索,稳定,可靠,快速,安装使用方便。
这里 Linux 选择 CentOS 7.2。
官方安装参考文档: https://www.elastic.co/cn/downloads/elasticsearch。
# //安装jdk1.8
# wget -P /usr/local https://artifacts.elastic.co/downloads/elasticsearch/elasticsearch-6.8.0.tar.gz
# cd /usr/local
# tar -xzf elasticsearch-6.8.0.tar.gz
# cd elasticsearch-6.8.0
# vim ./config/elasticsearch.yml      //编辑ES的相关配置
cluster.name: es           //集群名称, 以此作为是否同一集群的判断条件
node.name: node-1          //节点名称, 以此作为集群中不同节点的区分条件
path.data: /data/es        //数据存储地址
path.log: /export/Logs/es  //日志存储地址
network.host: 0.0.0.0      //网络地址, 改成自己的ip或者0.0.0.0
http.port: 9200            //网络端口
http.cors.enabled: true
http.cors.allow-origin: "*"
# adduser elk          //如果已经有elk用户,忽略这一步
# passwd elk           //给elk用户设置密码
# chown -R elk:elk /usr/local/elasticsearch-6.8.0 /data/es /export/Logs/es
# su elk          //elasticsearch自5版本之后,处于安全考虑,不允许使用root用户运行

# cd /usr/local/elasticsearch-6.8.0
# ./bin/elasticsearch -d              //后台启动, 前台启动命令是./bin/elasticsearch
访问 http://<ES服务器ip>:9200,如果得到服务器的 json 响应数据则安装成功。
停止 ES:
# jps
# kill -9 <ES进程号>
遇到的坑:
1、提示内存不足:Cannot allocate memory
解决方法:vim ./config/jvm.options 然后修改jvm参数为 -Xms512m 和 -Xmx512m
2、警告:OpenJDK 64-Bit Server VM warning: If the number of processors is expected to increase from one, then you should configure the number of parallel GC threads appropriately using -XX:ParallelGCThreads=N
解决方法:vim ./config/jvm.options 然后增加jvm参数 -XX:-AssumeMP
3、错误: bootstrap checks failed, 1: max file descriptors 4096 for elasticsearch process is too low, increase to at least 65536, 2: max virtual memory areas vm.max_map_count 65530 is too low, increase to at least 262144.
解决方法:vim /etc/security/limits.conf 然后编辑配置
* soft nofile 65536
* hard nofile 131072
* soft nproc 2048
* hard nproc 4096
vim /etc/sysctl.conf 然后编辑配置 vm.max_map_count=655360
保存退出 vim,最后运行 sysctl -p 命令让写入的配置立即生效。
一主两从。按照上面步骤安装 ElasticSearch,然后编辑 master 服务器上的 ElasticSearch:
# cd elasticsearch-6.8.0
# vim ./config/elasticsearch.yml      //编辑配置文件
cluster.name: es
node.master: true
node.name: node-1
path.data: /data/es
path.log: /export/Logs/es
network.host: 0.0.0.0
http.port: 9200
http.cors.enabled: true
http.cors.allow-origin: "*"
编辑 slave 服务器上的 ElasticSearch:
# vim ./config/elasticsearch.yml //编辑配置文件
cluster.name: es
discovery.zen.ping.unicast.hosts: ["192.168.2.20"]   //master服务器的ip
node.name: node-2
path.data: /data/es
path.log: /export/Logs/es
network.host: 0.0.0.0
http.port: 9200
http.cors.enabled: true
http.cors.allow-origin: "*"
启动服务,另一台从服务器配置相似。
官方安装参考文档: https://www.elastic.co/cn/downloads/kibana。
# wget -P /usr/local https://artifacts.elastic.co/downloads/kibana/kibana-6.8.0-linux-x86_64.tar.gz   //下载与Elasticsearch一样的版本
# cd /usr/local
# tar -xzf kibana-6.8.0-linux-x86_64.tar.gz
# cd kibana-6.8.0-linux-x86_64
# vim ./config/kibana.yml        //编辑Kibana的相关配置
server.port: 5601                           //访问kibana用的端口
server.host: "0.0.0.0"                      //访问kibana用的地址,改成自己的ip或者0.0.0.0
elasticsearch.hosts: ["http://localhost:9200"] //待访问ES的地址
# ./bin/kibana &                  //后台启动
# exit                              //一定需要执行
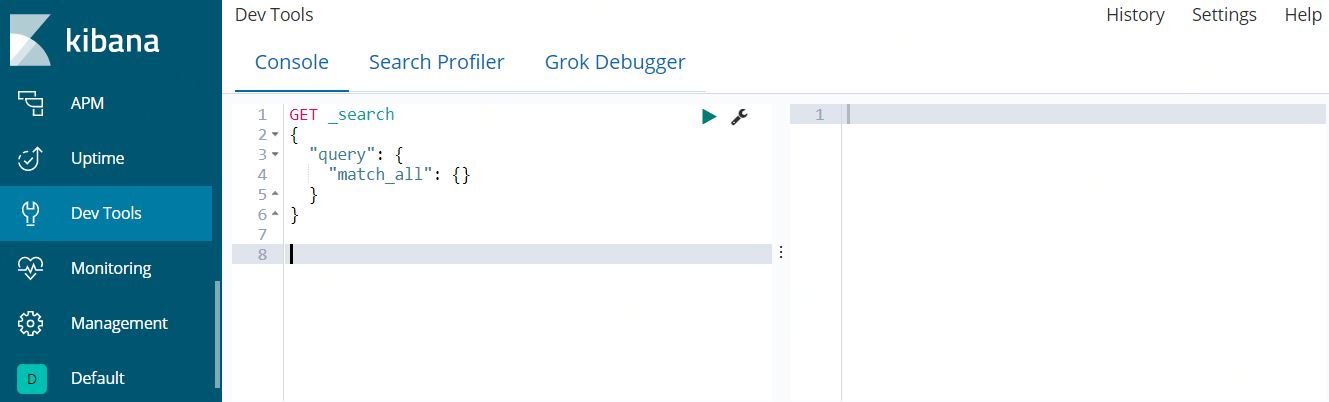
访问 http://<ES服务器ip>:5601 即可看到 Kibana 的界面,我们可以通过 Kibana DevTools 与 ES 进行交互。
停止 kibana:
# fuser -n tcp 5601            //通过端口查询进程号
# kill -9 <进程号>
如果觉得我的文章对您有用,请随意打赏。你的支持将鼓励我继续创作!
