社区微信群开通啦,扫一扫抢先加入社区官方微信群

社区微信群
//创建cookie
Cookie cookie = new Cookie("key","value");
//把cookie写回给浏览器
response.addCookie(cookie);
        * 获取Cookie:Cookie[ ] request.getCookies( );
            * 获取Cookie的名称:getName( );
            * 获取Cookie的value值:getValue( );
//获取浏览器的cookie
 Cookie[] cookies = request.getCookies();
 //判断cookies是否为空
 if (cookies != null){
     //如果不为空,遍历Cookie数组
     for (Cookie cookie:cookies) {
        //查找name为key的cookie
         if("key".equals(cookie.getName())){
             System.out.println(cookie.getName()+":"+cookie.getValue());
         }
     }
 }
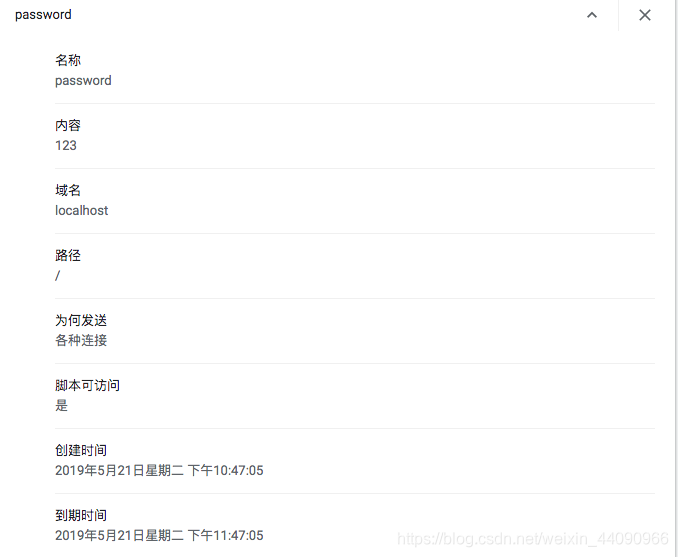
//创建cookie
Cookie cookie = new Cookie("password", "123");
//给cookie1设置存活时间
cookie1.setMaxAge(3600);
//写回给浏览器
response.addCookie(cookie);
//创建一个与要删除的cookie2同名同路径的cookie,覆盖掉要删除的cookie2
Cookie cookie = new Cookie("name3", "111");
cookie.setPath(request.getContextPath()+"/aa");
//设置这个cookie存活时间为0删除这个cookie
cookie.setMaxAge(0);
//写回浏览器
response.addCookie(cookie);
//删除后
//创建cookie
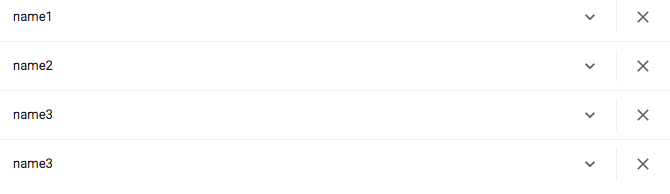
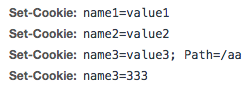
Cookie cookie = new Cookie("name1", "value1");
Cookie cookie1 = new Cookie("name2", "value2");
Cookie cookie2 = new Cookie("name3", "value3");
Cookie cookie3 = new Cookie("name3", "333");
//设置cookie2的路径,request.getContextPath()获取项目的动态路径
cookie2.setPath(request.getContextPath()+"/aa");
//写回给浏览器
response.addCookie(cookie);
response.addCookie(cookie1);
response.addCookie(cookie2);
response.addCookie(cookie3);
//获取浏览器的Cookie,访问的url不包括cookie3的/aa路径,所以不会携带cookie3

打开浏览器,选择设置
进入设置页面,往下拉,选择高级
在高级的下拉中选择网站设置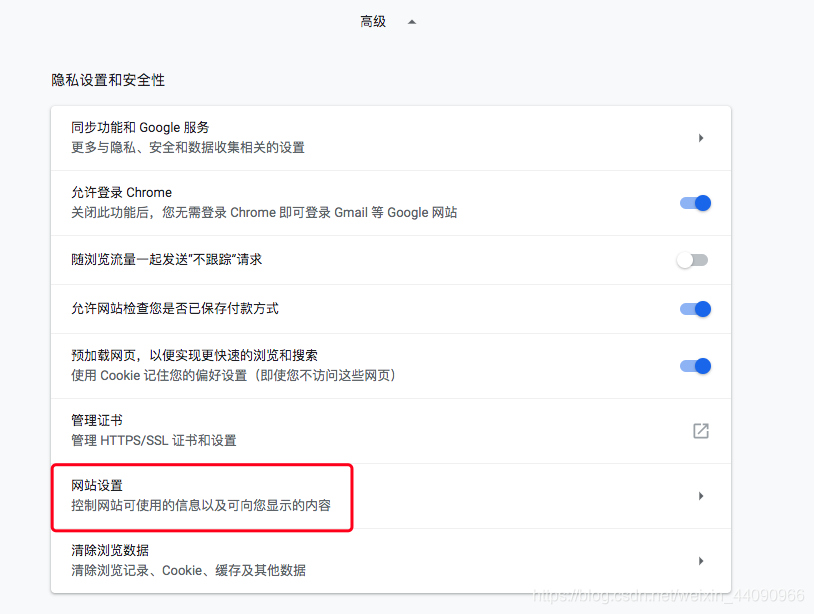
选择Cookie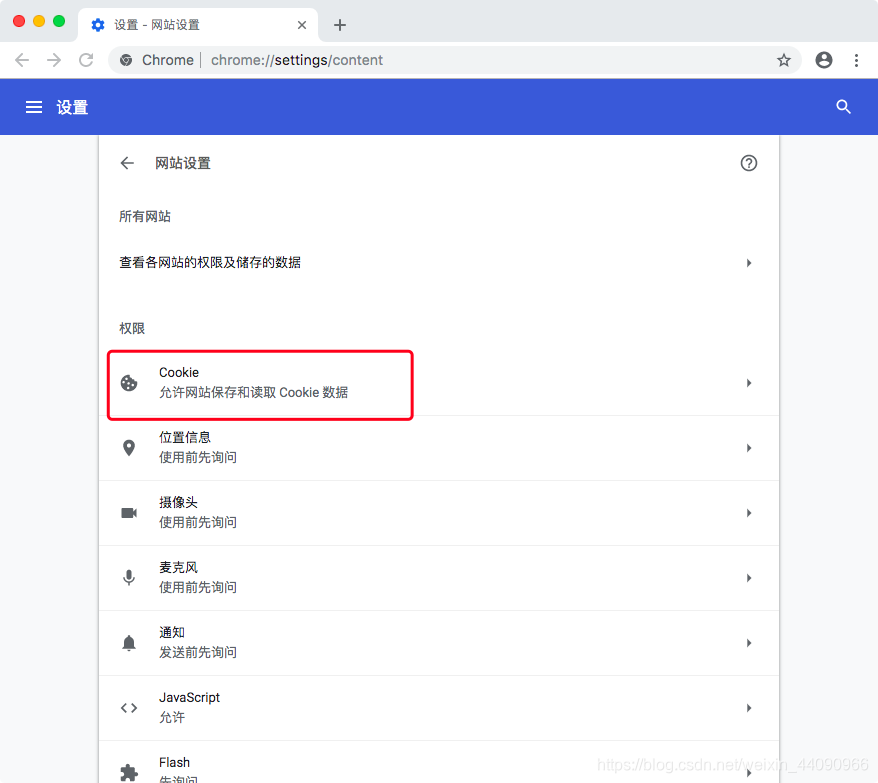
选择查看所有Cookie和网站数据
点击相应的Cookie就可以查看它的信息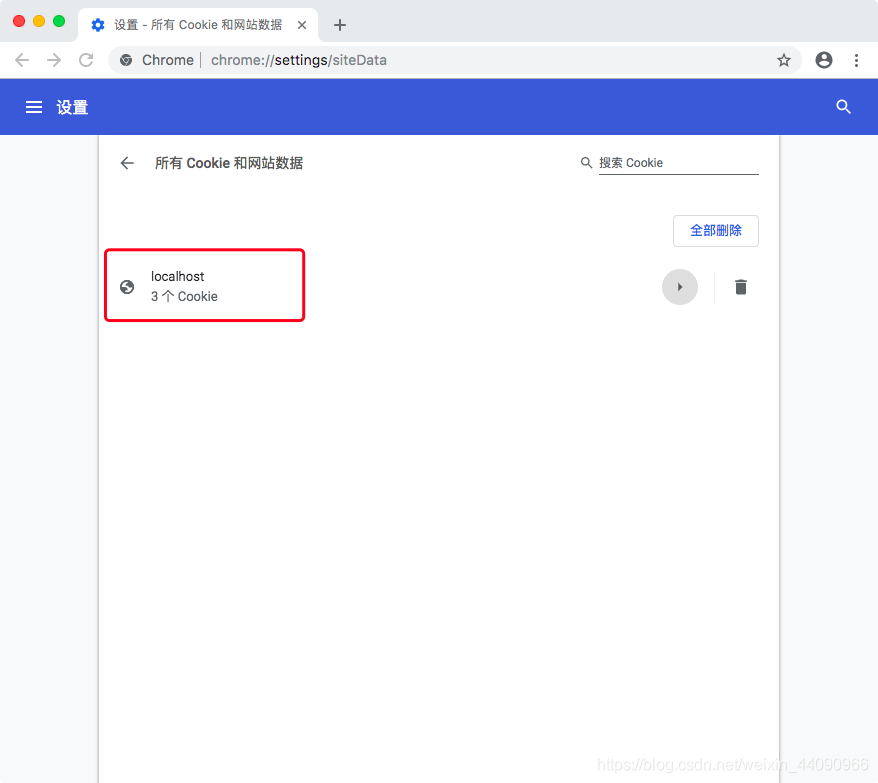
1、需求:
2、步骤:
//设置浏览器解码格式为utf-8
response.setContentType("text/html;charset=utf-8");
//获取所有的Cookie值
Cookie[] cookies = request.getCookies();
if(cookies==null){
    //若Cookie为空,说明第一次访问
    //System.out.println("欢迎访问");
    response.getWriter().print("欢迎访问?");
}else {
    //从Cookie数组中查找含有上一次访问时间的Cookie
    for (Cookie cookie:cookies
            ) {
        //若有,说明不是第一次访问
        if("lasttime".equals(cookie.getName())){
            //System.out.println(“您上一次的访问时间为"+cookie.getValue());
            response.getWriter().print("您上一次的访问时间为:"+cookie.getValue());
        }else {
            //若没有,说明第一次访问
            //System.out.println("欢迎访问");
            response.getWriter().print("欢迎访问?");
        }
    }
}
//获取当前时间
    //以指定的模式 创建一个日期格式化对象
SimpleDateFormat simpleDateFormat=new SimpleDateFormat("yyyy-MM-dd HH:mm:ss");
    //创建一个日期对象,表示当前日期
Date date=new Date();
    //使用simpleDateFormat来格式化日期对象
String time=simpleDateFormat.format(date);
//把当前时间放人Cookie中
Cookie cookie = new Cookie("lasttime", time);
//返回给浏览器
response.addCookie(cookie);

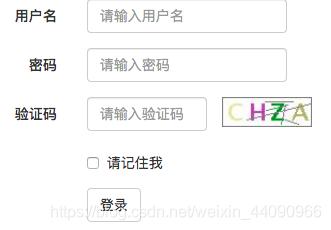
1、需求:
把验证码添加到登录案例中
对验证码进行校验:
JSP代码
<%@ page contentType="text/html;charset=UTF-8" language="java" %>
<html>
<head>
  <meta charset="UTF-8">
  <!--创建视口-->
  <meta name="viewport" content="width=device-width,nitial-scale=1">
  <title>Title</title>
  <!--导入jQuery文件-->
  <script type="text/javascript" src="js/jquery-1.11.0.js"></script>
  <!--导入bootstrap.css文件-->
  <link rel="stylesheet" href="css/bootstrap.css"/>
  <!--导入bootstrap.js文件-->
  <script type="text/javascript" src="js/bootstrap.js"></script>
  <script type="text/javascript">
      $(function () {
          //绑定图片的点击事件
          $("#img").click(function () {
              //一点击,重新发送请求,更换验证码
              $("#img").attr("src","code?data="+new Date);
          })
      })
  </script>
</head>
<body>
<div>

  <!--from水平表单-->
  <form class="form-horizontal " role="form" method="post" action="yzm">
    <div class="form-group">
      <label for="username" class="col-sm-2 control-label">用户名</label>
      <div class="col-sm-10">
        <input style="width: 200px" type="text" name="username" class="form-control" id="username" placeholder="请输入用户名" >
      </div>
    </div>
    <div class="form-group">
      <label for="password" class="col-sm-2 control-label">密码</label>
      <div class="col-sm-10">
        <input style="width: 200px" type="password" name="password" class="form-control" id="password" placeholder="请输入密码" >
      </div>
    </div>
    <div class="form-group">
      <label for="password" class="col-sm-2 control-label">验证码</label>
      <div class="col-sm-10">
        <input style="width: 120px" type="text" name="code" class="form-control col-sm-8 " id="code" placeholder="请输入验证码"  >
        <img src="code" id="img" class="col-sm-4" style="vertical-align:middle;width: 120px"/>
          <%=request.getAttribute("msg")==null?"":request.getAttribute("msg")%>
      </div>
    </div>
    <div class="form-group">
      <div class="col-sm-offset-2 col-sm-10">
        <div class="checkbox">
          <label>
            <input type="checkbox">请记住我
          </label>
        </div>
      </div>
    </div>
    <div class="form-group">
      <div class="col-sm-offset-2 col-sm-10">
        <input  type="submit" class="btn btn-default" value="登录" />
      </div>
    </div>
  </form>
</div>
</body>
</html>
package Servlet3;

import java.awt.Color;
import java.awt.Font;
import java.awt.Graphics;
import java.awt.image.BufferedImage;
import java.io.IOException;
import java.util.Random;

import javax.imageio.ImageIO;
import javax.servlet.ServletException;
import javax.servlet.annotation.WebServlet;
import javax.servlet.http.HttpServlet;
import javax.servlet.http.HttpServletRequest;
import javax.servlet.http.HttpServletResponse;
import javax.servlet.http.HttpSession;

@WebServlet(name = "CodeServlet",urlPatterns = {"/code"})
public class CodeServlet extends HttpServlet {

   public void doGet(HttpServletRequest request, HttpServletResponse response) throws ServletException, IOException {

      // 使用java图形界面技术绘制一张图片

      int charNum = 4;
      int width = 21 * 4;
      int height = 28;

      // 1. 创建一张内存图片
      BufferedImage bufferedImage = new BufferedImage(width, height, BufferedImage.TYPE_INT_RGB);

      // 2.获得绘图对象
      Graphics graphics = bufferedImage.getGraphics();

      // 3、绘制背景颜色
      graphics.setColor(Color.WHITE);
      graphics.fillRect(0, 0, width, height);

      // 4、绘制图片边框
      graphics.setColor(Color.GRAY);
      graphics.drawRect(0, 0, width - 1, height - 1);

      // 5、输出验证码内容
      graphics.setColor(Color.RED);
      graphics.setFont(new Font("宋体", Font.BOLD, 22));

      // 随机输出4个字符
      String s = "ABCDEFGHGKLMNPQRSTUVWXYZ23456789";
      Random random = new Random();

      // session中要用到
      String msg = "";

      int x = 5;
      for (int i = 0; i < charNum; i++) {
         int index = random.nextInt(32);
         String content = String.valueOf(s.charAt(index));

         msg += content;
         graphics.setColor(new Color(random.nextInt(255), random.nextInt(255), random.nextInt(255)));
         graphics.drawString(content, x, 22);
         x += 20;
      }
      //获取Session
        HttpSession session = request.getSession();
      //把生成的验证码存入Session中
      session.setAttribute("code",msg);

      // 6、绘制干扰线
      graphics.setColor(Color.GRAY);
      for (int i = 0; i < 5; i++) {
         int x1 = random.nextInt(width);
         int x2 = random.nextInt(width);

         int y1 = random.nextInt(height);
         int y2 = random.nextInt(height);
         graphics.drawLine(x1, y1, x2, y2);
      }

      // 释放资源
      graphics.dispose();

      // 图片输出 ImageIO
      ImageIO.write(bufferedImage, "jpg", response.getOutputStream());

   }

   public void doPost(HttpServletRequest request, HttpServletResponse response) throws ServletException, IOException {

   }
}
package Servlet3;
import javax.servlet.ServletException;
import javax.servlet.annotation.WebServlet;
import javax.servlet.http.HttpServlet;
import javax.servlet.http.HttpServletRequest;
import javax.servlet.http.HttpServletResponse;
import javax.servlet.http.HttpSession;
import java.io.IOException;
@WebServlet(name = "YzmServlet",urlPatterns = {"/yzm"})
public class YzmServlet extends HttpServlet {
protected void doPost(HttpServletRequest request, HttpServletResponse response) throws ServletException, IOException {
//获取前台输入的验证码
String code = request.getParameter("code");
//获取Session
HttpSession session = request.getSession();
//获取Session中存的随机生成的验证码
String code1 = (String) session.getAttribute("code”);
//清空Session,保证点击登录时,验证码是最新的
session.removeAttribute("code");
//若前台输入的验证码为空或者都为空格
if(code==null || code.trim().length()==0){
//System.out.println("请输入验证码");
//把错误信息放入request域中
request.setAttribute("msg","请输入验证码");
//请求转发
request.getRequestDispatcher("/index.jsp").forward(request,response);
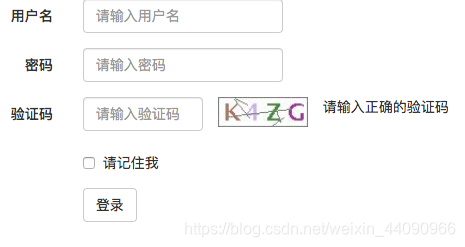
}else if(!(code.equalsIgnoreCase(code1))){
//判断输入的验证码是否和Session中存的一致,忽略大小写
//System.out.println("请输入正确的验证码");
request.setAttribute("msg","请输入正确的验证码");
//请求转发
request.getRequestDispatcher("/index.jsp").forward(request,response);
}
}
protected void doGet(HttpServletRequest request, HttpServletResponse response) throws ServletException, IOException {
}
}
如果觉得我的文章对您有用,请随意打赏。你的支持将鼓励我继续创作!
