
Spring 4 MVC+Hibernate 4+MySQL+Maven使用注解集成实例
转自:通过注解的方式集成Spring 4 MVC+Hibernate 4+MySQL+Maven,开发项目样例
2017-01-23
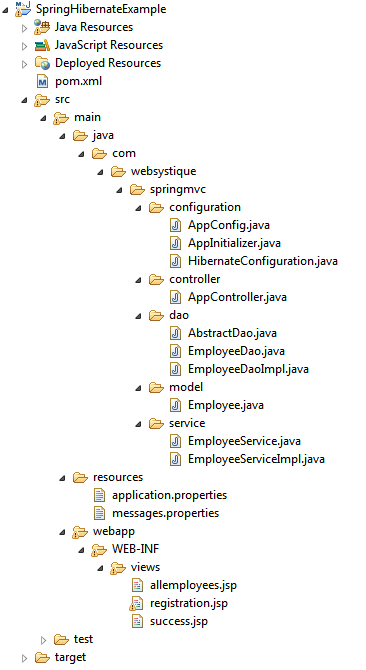
第1步:创建目录结构
第2步:更新 pom.xml
第3步:配置hibernate
3.1 com.websystique.springmvc.configuration.HibernateConfiguration
3.2 /src/main/resources/application.properties
第4步:配置Spring MVC
4.1 com.websystique.springmvc.configuration.AppConfig
4.2 /src/main/resources/messages.properties
第5步:配置初始化类
5.1 com.websystique.springmvc.configuration.AppInitializer
第6步:添加控制器以处理请求
6.1 com.websystique.springmvc.controller.AppController
第7步:添加DAO层
7.1 com.websystique.springmvc.dao.AbstractDao
7.2 com.websystique.springmvc.dao.EmployeeDao
7.3 com.websystique.springmvc.dao.EmployeeDaoImpl
第8步:添加服务层
8.1 com.websystique.springmvc.service.EmployeeService
8.2 com.websystique.springmvc.service.EmployeeServiceImpl
第9步:创建领域对象(普通的java bean对象)
9.1 com.websystique.springmvc.model.Employee
第10步:添加JSP视图 WEB-INF/views/allemployees.jsp
10.1 WEB-INF/views/allemployees.jsp [ 主页包含所有已经存在的员工]
10.2 WEB-INF/views/registration.jsp [注册页面用来创建和保存员工信息到数据库]
10.3 WEB-INF/views/success.jsp [成功页面包含新员工创建成功的确认信息并重定向到员工列表页面]
第11步:创建数据表
第12步:创建,部署和运行程序
源代码 : SpringHibernateExample.zip
注意:若没有springmvc基础,在看此篇前可看下这篇文章Spring4 MVC HelloWord实例 ,这篇文章是主要讲述MVC中的control层如何操作model和返回view,且以xml文件进行bean注入。
使用基于注解的配置集成Spring和Hibernate。 我们将开发包含表单要求用户输入一个简单的CRUD为导向Web应用程序,使用Hibernate保存输入的数据到 MySQL 数据库,从数据库和更新检索记录或删除它们在事务中,全部采用注解配置。
使用以下技术:
- Spring 4.0.6.RELEASE
- Hibernate Core 4.3.6.Final
- validation-api 1.1.0.Final
- hibernate-validator 5.1.3.Final
- MySQL Server 5.6
- Maven 3
- JDK 1.7
- Tomcat 8.0.21
- Eclipse JUNO Service Release 2
- TestNG 6.9.4
- Mockito 1.10.19
- DBUnit 2.2
- H2 Database 1.4.187
第1步:创建目录结构
第2步:更新 pom.xml


<?xml version="1.0"?>

<project xsi:schemaLocation="http://maven.apache.org/POM/4.0.0 http://maven.apache.org/xsd/maven-4.0.0.xsd"
    xmlns="http://maven.apache.org/POM/4.0.0" xmlns:xsi="http://www.w3.org/2001/XMLSchema-instance">

    <modelVersion>4.0.0</modelVersion>
    <groupId>com.websystique.springmvc</groupId>
    <artifactId>SpringHibernateExample</artifactId>
    <packaging>war</packaging>
    <version>1.0.0</version>
    <name>SpringHibernateExample</name>

    <properties>
        <springframework.version>4.0.6.RELEASE</springframework.version>
        <hibernate.version>4.3.6.Final</hibernate.version>
        <mysql.version>5.1.31</mysql.version>
        <joda-time.version>2.3</joda-time.version>
        <testng.version>6.9.4</testng.version>
        <mockito.version>1.10.19</mockito.version>
        <h2.version>1.4.187</h2.version>
        <dbunit.version>2.2</dbunit.version>
    </properties>

    <dependencies>
        <!-- Spring -->
        <dependency>
            <groupId>org.springframework</groupId>
            <artifactId>spring-core</artifactId>
            <version>${springframework.version}</version>
        </dependency>
        <dependency>
            <groupId>org.springframework</groupId>
            <artifactId>spring-web</artifactId>
            <version>${springframework.version}</version>
        </dependency>
        <dependency>
            <groupId>org.springframework</groupId>
            <artifactId>spring-webmvc</artifactId>
            <version>${springframework.version}</version>
        </dependency>
        <dependency>
            <groupId>org.springframework</groupId>
            <artifactId>spring-tx</artifactId>
            <version>${springframework.version}</version>
        </dependency>
        <dependency>
            <groupId>org.springframework</groupId>
            <artifactId>spring-orm</artifactId>
            <version>${springframework.version}</version>
        </dependency>

        <!-- Hibernate -->
        <dependency>
            <groupId>org.hibernate</groupId>
            <artifactId>hibernate-core</artifactId>
            <version>${hibernate.version}</version>
        </dependency>

        <!-- jsr303 validation -->
        <dependency>
            <groupId>javax.validation</groupId>
            <artifactId>validation-api</artifactId>
            <version>1.1.0.Final</version>
        </dependency>
        <dependency>
            <groupId>org.hibernate</groupId>
            <artifactId>hibernate-validator</artifactId>
            <version>5.1.3.Final</version>
        </dependency>

        <!-- MySQL -->
        <dependency>
            <groupId>mysql</groupId>
            <artifactId>mysql-connector-java</artifactId>
            <version>${mysql.version}</version>
        </dependency>

        <!-- Joda-Time -->
        <dependency>
            <groupId>joda-time</groupId>
            <artifactId>joda-time</artifactId>
            <version>${joda-time.version}</version>
        </dependency>

        <!-- To map JodaTime with database type -->
        <dependency>
            <groupId>org.jadira.usertype</groupId>
            <artifactId>usertype.core</artifactId>
            <version>3.0.0.CR1</version>
        </dependency>

        <!-- Servlet+JSP+JSTL -->
        <dependency>
            <groupId>javax.servlet</groupId>
            <artifactId>javax.servlet-api</artifactId>
            <version>3.1.0</version>
        </dependency>
        <dependency>
            <groupId>javax.servlet.jsp</groupId>
            <artifactId>javax.servlet.jsp-api</artifactId>
            <version>2.3.1</version>
        </dependency>
        <dependency>
            <groupId>javax.servlet</groupId>
            <artifactId>jstl</artifactId>
            <version>1.2</version>
        </dependency>


        <!-- Testing dependencies -->
        <dependency>
            <groupId>org.springframework</groupId>
            <artifactId>spring-test</artifactId>
            <version>${springframework.version}</version>
            <scope>test</scope>
        </dependency>
        <dependency>
            <groupId>org.testng</groupId>
            <artifactId>testng</artifactId>
            <version>${testng.version}</version>
            <scope>test</scope>
        </dependency>
        <dependency>
            <groupId>org.mockito</groupId>
            <artifactId>mockito-all</artifactId>
            <version>${mockito.version}</version>
            <scope>test</scope>
        </dependency>
        <dependency>
            <groupId>com.h2database</groupId>
            <artifactId>h2</artifactId>
            <version>${h2.version}</version>
            <scope>test</scope>
        </dependency>
        <dependency>
            <groupId>dbunit</groupId>
            <artifactId>dbunit</artifactId>
            <version>${dbunit.version}</version>
            <scope>test</scope>
        </dependency>

    </dependencies>

    <build>
        <pluginManagement>
            <plugins>
                <plugin>
                    <groupId>org.apache.maven.plugins</groupId>
                    <artifactId>maven-war-plugin</artifactId>
                    <version>2.4</version>
                    <configuration>
                        <warSourceDirectory>src/main/webapp</warSourceDirectory>
                        <warName>SpringHibernateExample</warName>
                        <failOnMissingWebXml>false</failOnMissingWebXml>
                    </configuration>
                </plugin>
            </plugins>
        </pluginManagement>
        <finalName>SpringHibernateExample</finalName>
    </build>
</project>
注意:
- maven的war包插件(maven-war-plugin)的声明:由于我们使用全注解方式进行配置。甚至在我们的工程当中没有包含web.xml文件。所以我们要配置这个插件,以避免maven在构建war包的时候失败。
- 验证用户的输入:在这个样例工程中,由于使用表单接受用户的输入。所以需要验证用户的输入。这里将选择JSR303 进行验证。所以我们要引入验证接口(validation-api)来说明这种规范。hibernate验证(hibernate-validator)正好是这种规范的一种实现。hibernate验证(hibernate-validator)同时也通过了他特有的注解校验(@Email, @NotEmpty等),这些并不是规范所囊括的。
- 其他依赖:我们也包含了(JSP/Servlet/Jstl)依赖。在我们代码中使用servelet api和jstl视图的时候需要。总而验证,容器需要包含这些jar包。所以我们在pom.xml文件当中去设置,这样maven才能下载他们。我们同时也需要测试依赖。测试部分将在下面的章节中讨论。剩下的部分是Spring,hibernate和Joda-Time等的依赖了。
第3步:配置hibernate
3.1 com.websystique.springmvc.configuration.HibernateConfiguration
package com.websystique.springmvc.configuration;

import java.util.Properties;

import javax.sql.DataSource;

import org.hibernate.SessionFactory;
import org.springframework.beans.factory.annotation.Autowired;
import org.springframework.context.annotation.Bean;
import org.springframework.context.annotation.ComponentScan;
import org.springframework.context.annotation.Configuration;
import org.springframework.context.annotation.PropertySource;
import org.springframework.core.env.Environment;
import org.springframework.jdbc.datasource.DriverManagerDataSource;
import org.springframework.orm.hibernate4.HibernateTransactionManager;
import org.springframework.orm.hibernate4.LocalSessionFactoryBean;
import org.springframework.transaction.annotation.EnableTransactionManagement;

@Configuration
@EnableTransactionManagement
@ComponentScan({ "com.websystique.springmvc.configuration" })
@PropertySource(value = { "classpath:application.properties" })
public class HibernateConfiguration {

    @Autowired
    private Environment environment;

    @Bean
    public LocalSessionFactoryBean sessionFactory() {
        LocalSessionFactoryBean sessionFactory = new LocalSessionFactoryBean();
        sessionFactory.setDataSource(dataSource());
        sessionFactory.setPackagesToScan(new String[] { "com.websystique.springmvc.model" });
        sessionFactory.setHibernateProperties(hibernateProperties());
        return sessionFactory;
     }

    @Bean
    public DataSource dataSource() {
        DriverManagerDataSource dataSource = new DriverManagerDataSource();
        dataSource.setDriverClassName(environment.getRequiredProperty("jdbc.driverClassName"));
        dataSource.setUrl(environment.getRequiredProperty("jdbc.url"));
        dataSource.setUsername(environment.getRequiredProperty("jdbc.username"));
        dataSource.setPassword(environment.getRequiredProperty("jdbc.password"));
        return dataSource;
    }

    private Properties hibernateProperties() {
        Properties properties = new Properties();
        properties.put("hibernate.dialect", environment.getRequiredProperty("hibernate.dialect"));
        properties.put("hibernate.show_sql", environment.getRequiredProperty("hibernate.show_sql"));
        properties.put("hibernate.format_sql", environment.getRequiredProperty("hibernate.format_sql"));
        return properties;
    }

    @Bean
    @Autowired
    public HibernateTransactionManager transactionManager(SessionFactory s) {
       HibernateTransactionManager txManager = new HibernateTransactionManager();
       txManager.setSessionFactory(s);
       return txManager;
    }
}
注意:
- @Configuration 注解表示这个类包含一个或多个使用了 @Bean 注解了的方法。将被spring容器所管理以产生beans。在这里。这个类代表hibernate配置。
- @ComponentScan 注解等同于XML配置文件中的context:component-scan base-package="..." 声明。用它来表示去哪里查找spring管理的beans/classes
- @EnableTransactionManagement 注解等同于SpringXMl中的tx:*命名空间声明。它将启用Spring注解驱动的事务管理功能。
- @PropertySource注解用于声明一组属性(在程序的classpath路径下的properties文件中定义),在spring运行环境下。通过他可以在不同运行环境下进行变更以提供不同的值。
- 由于@PropertySource注解提供的便利,我们可以在properties文件中提供具体的值,通过Spring’s Environment来提取这些值。
方法sessionFactory() 将创建LocalSessionFactoryBean,它映射配置:dataSource和hibernate属性文件配置(就像hibernate.properties文件)。
一旦SessionFactory创建,它将被注入bean方法transactionManager 中,最终可能对sessionFactory所创建的sesstions提供事务支持。
3.2 /src/main/resources/application.properties
jdbc.driverClassName = com.mysql.jdbc.Driver
jdbc.url = jdbc:mysql://localhost:3306/websystique
jdbc.username = myuser
jdbc.password = mypassword
hibernate.dialect = org.hibernate.dialect.MySQLDialect
hibernate.show_sql = true
hibernate.format_sql = true
第4步:配置Spring MVC
4.1 com.websystique.springmvc.configuration.AppConfig
package com.websystique.springmvc.configuration;

import org.springframework.context.MessageSource;
import org.springframework.context.annotation.Bean;
import org.springframework.context.annotation.ComponentScan;
import org.springframework.context.annotation.Configuration;
import org.springframework.context.support.ResourceBundleMessageSource;
import org.springframework.web.servlet.ViewResolver;
import org.springframework.web.servlet.config.annotation.EnableWebMvc;
import org.springframework.web.servlet.view.InternalResourceViewResolver;
import org.springframework.web.servlet.view.JstlView;

@Configuration
@EnableWebMvc
@ComponentScan(basePackages = "com.websystique.springmvc")
public class AppConfig {

    @Bean
    public ViewResolver viewResolver() {
        InternalResourceViewResolver viewResolver = new InternalResourceViewResolver();
        viewResolver.setViewClass(JstlView.class);
        viewResolver.setPrefix("/WEB-INF/views/");
        viewResolver.setSuffix(".jsp");
        return viewResolver;
    }

    @Bean
    public MessageSource messageSource() {
        ResourceBundleMessageSource messageSource = new ResourceBundleMessageSource();
        messageSource.setBasename("messages");
        return messageSource;
    }
}
注意:
- @Configuration注解标示着这个类被配置后的作用,就像上面提到的那样(表示这个类包含一个或多个使用了 @Bean 注解了的方法。将被spring容器所管理以产生beans。),
- @ComponentScan注解指出了可以在这些包路径下找到相关联的beans类。
- @EnableWebMvc注解相当于XML文件中的mvc:annotation-driven(启用web的MVC控制)。方法viewResolver配置了一个视图解析器。以定位到具体的视图页面。
4.2 /src/main/resources/messages.properties
在这篇文章中,我们使用表单进行提交,通过JSR303规范验证用户的输入。在验证失败的情况下,默认的错误信息将显示。你可以通过国际化的方式在其他消息绑定文件(以.properties结尾的文件)中定义适用于你语言环境的消息。在basename方法中。spring会程序运行的class路径中检索一个叫messages.properties的文件。让我们添加这个文件吧:
Size.employee.name=Name must be between {2} and {1} characters long
NotNull.employee.joiningDate=Joining Date can not be blank
NotNull.employee.salary=Salary can not be blank
Digits.employee.salary=Only numeric data with max 8 digits and with max 2 precision is allowed
NotEmpty.employee.ssn=SSN can not be blank
typeMismatch=Invalid format
non.unique.ssn=SSN {0} already exist. Please fill in different value.
注意:上面的消息采用了下面的规范格式
{ValidationAnnotationClass}.{modelObject}.{fieldName}
{验证注解类名}.{模块对象名}.{字段名}
此外,基于特定的注解(例如@Size)你甚至可以通过使用{0},{1},..{i}占位索引的方式来传递参数。
第5步:配置初始化类
5.1 com.websystique.springmvc.configuration.AppInitializer
package com.websystique.springmvc.configuration;

import javax.servlet.ServletContext;
import javax.servlet.ServletException;
import javax.servlet.ServletRegistration;

import org.springframework.web.WebApplicationInitializer;
import org.springframework.web.context.support.AnnotationConfigWebApplicationContext;
import org.springframework.web.servlet.DispatcherServlet;

public class AppInitializer implements WebApplicationInitializer {

    public void onStartup(ServletContext container) throws ServletException {

        AnnotationConfigWebApplicationContext ctx = new AnnotationConfigWebApplicationContext();
        ctx.register(AppConfig.class);
        ctx.setServletContext(container);

        ServletRegistration.Dynamic servlet = container.addServlet(
                "dispatcher", new DispatcherServlet(ctx));

        servlet.setLoadOnStartup(1);
        servlet.addMapping("/");
    }

}
注意:
上面的代码类似于web.xml文件的内容。由于我们使用了前端控制器(DispatherServler),分配这些映射(就像xml文件中的url-pattern那样)。通过上面的方法,我们就不用在spring-servlet.xml文件中去配置路径了。这里我们注册了这个配置类。
第6步:添加控制器以处理请求
添加这个控制器,可以对get和post请求提供服务。
6.1 com.websystique.springmvc.controller.AppController
package com.websystique.springmvc.controller;

import java.util.List;
import java.util.Locale;

import javax.validation.Valid;

import org.springframework.beans.factory.annotation.Autowired;
import org.springframework.context.MessageSource;
import org.springframework.stereotype.Controller;
import org.springframework.ui.ModelMap;
import org.springframework.validation.BindingResult;
import org.springframework.validation.FieldError;
import org.springframework.web.bind.annotation.PathVariable;
import org.springframework.web.bind.annotation.RequestMapping;
import org.springframework.web.bind.annotation.RequestMethod;

import com.websystique.springmvc.model.Employee;
import com.websystique.springmvc.service.EmployeeService;

@Controller
@RequestMapping("/")
public class AppController {

    @Autowired
    EmployeeService service;

    @Autowired
    MessageSource messageSource;

    /*
     * This method will list all existing employees.
     */
    @RequestMapping(value = { "/", "/list" }, method = RequestMethod.GET)
    public String listEmployees(ModelMap model) {

        List<Employee> employees = service.findAllEmployees();
        model.addAttribute("employees", employees);
        return "allemployees";
    }

    /*
     * This method will provide the medium to add a new employee.
     */
    @RequestMapping(value = { "/new" }, method = RequestMethod.GET)
    public String newEmployee(ModelMap model) {
        Employee employee = new Employee();
        model.addAttribute("employee", employee);
        model.addAttribute("edit", false);
        return "registration";
    }

    /*
     * This method will be called on form submission, handling POST request for
     * saving employee in database. It also validates the user input
     */
    @RequestMapping(value = { "/new" }, method = RequestMethod.POST)
    public String saveEmployee(@Valid Employee employee, BindingResult result,
            ModelMap model) {

        if (result.hasErrors()) {
            return "registration";
        }

        /*
         * Preferred way to achieve uniqueness of field [ssn] should be implementing custom @Unique annotation
         * and applying it on field [ssn] of Model class [Employee].
         *
         * Below mentioned peace of code [if block] is to demonstrate that you can fill custom errors outside the validation
         * framework as well while still using internationalized messages.
         *
         */
        if(!service.isEmployeeSsnUnique(employee.getId(), employee.getSsn())){
            FieldError ssnError =new FieldError("employee","ssn",messageSource.getMessage("non.unique.ssn", new String[]{employee.getSsn()}, Locale.getDefault()));
            result.addError(ssnError);
            return "registration";
        }

        service.saveEmployee(employee);

        model.addAttribute("success", "Employee " + employee.getName() + " registered successfully");
        return "success";
    }


    /*
     * This method will provide the medium to update an existing employee.
     */
    @RequestMapping(value = { "/edit-{ssn}-employee" }, method = RequestMethod.GET)
    public String editEmployee(@PathVariable String ssn, ModelMap model) {
        Employee employee = service.findEmployeeBySsn(ssn);
        model.addAttribute("employee", employee);
        model.addAttribute("edit", true);
        return "registration";
    }

    /*
     * This method will be called on form submission, handling POST request for
     * updating employee in database. It also validates the user input
     */
    @RequestMapping(value = { "/edit-{ssn}-employee" }, method = RequestMethod.POST)
    public String updateEmployee(@Valid Employee employee, BindingResult result,
            ModelMap model, @PathVariable String ssn) {

        if (result.hasErrors()) {
            return "registration";
        }

        if(!service.isEmployeeSsnUnique(employee.getId(), employee.getSsn())){
            FieldError ssnError =new FieldError("employee","ssn",messageSource.getMessage("non.unique.ssn", new String[]{employee.getSsn()}, Locale.getDefault()));
            result.addError(ssnError);
            return "registration";
        }

        service.updateEmployee(employee);

        model.addAttribute("success", "Employee " + employee.getName()  + " updated successfully");
        return "success";
    }


    /*
     * This method will delete an employee by it's SSN value.
     */
    @RequestMapping(value = { "/delete-{ssn}-employee" }, method = RequestMethod.GET)
    public String deleteEmployee(@PathVariable String ssn) {
        service.deleteEmployeeBySsn(ssn);
        return "redirect:/list";
    }

}
注意:
- @Controller。这个注解表明这个类是用来处理请求的控制类。通过注解@RequestMapping提供将要处理的请求URL路径。这里我们配置的是根目录'/'。它将作为默认的控制器。
- 方法listEmployees,被@RequestMethod.GET所注解。将处理来自'/'和'/list'的请求。它接管了程序初始化页面的处理,并响应所有存在的员工列表。
- 方法newEmployee 处理来着新员工注册页面的请求。显示页面由一个Employee对象模型。
- 方法saveEmployee 被@RequestMethod.POST所注解。它将处理表单提交的post请求(在进行新员工注册的时候,提交请求道url路径:/new)。注意这个方法的参数和这些参数在方法中的顺序。@Valid 注解将要求spring去验证这些关联的对象(Employee)。参数 BindingResult包含了这个验证的结果和任何在验证过程中报出的错误信息。请注意这个参数 BindingResult 必须紧跟在被验证的对象之后。否则spring无法进行验证并且有异常被抛出。在验证出错的情况下。响应的错误消息将会显示(我们在第4步配置的那些消息)。我们同时也包含了对SSN唯一性进行核对的校验。因为他在数据库中被声明为唯一的。在保存和更新一个员工之前。我们要核对这个SSN是否是唯一的。如果不是
