社区微信群开通啦,扫一扫抢先加入社区官方微信群

社区微信群
##1、 默认异常机制
默认异常处理(SpringBoot 默认提供了两种机制,一种是针对于web浏览器访问的错误页面响应,另一种则是针对于 接口测试工具等 的参数响应处理):
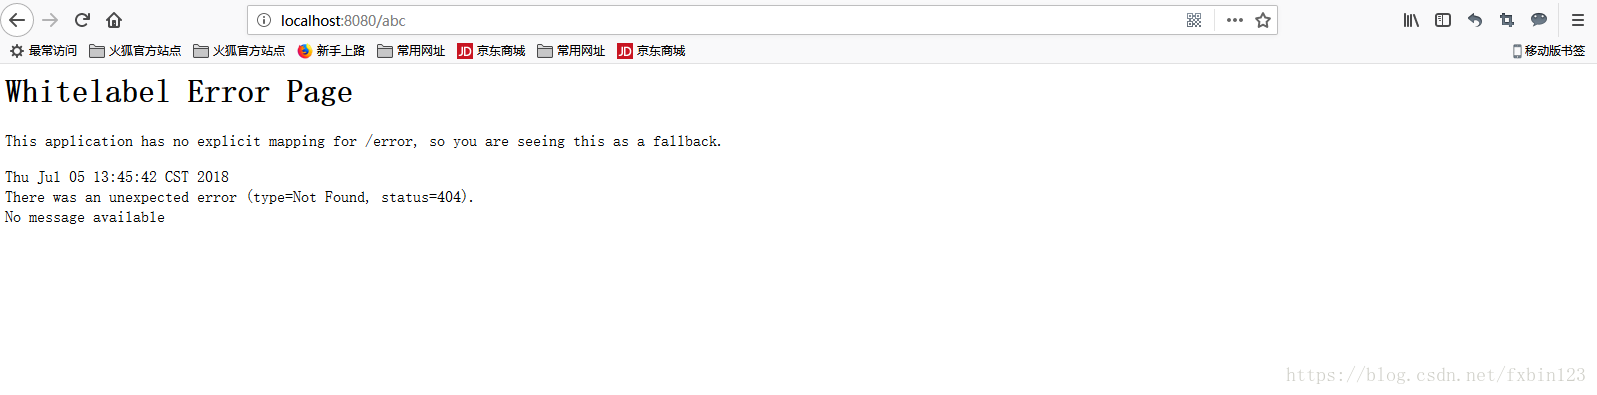
> 浏览器访问:
我们随意写一个不存在的请求 如:http://localhost:8080/abc
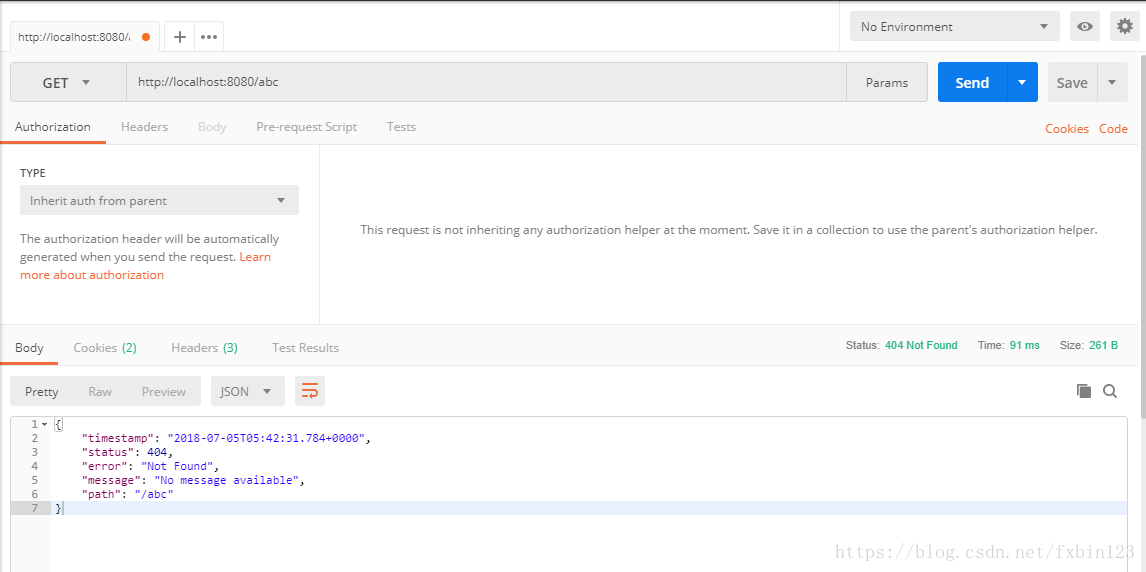
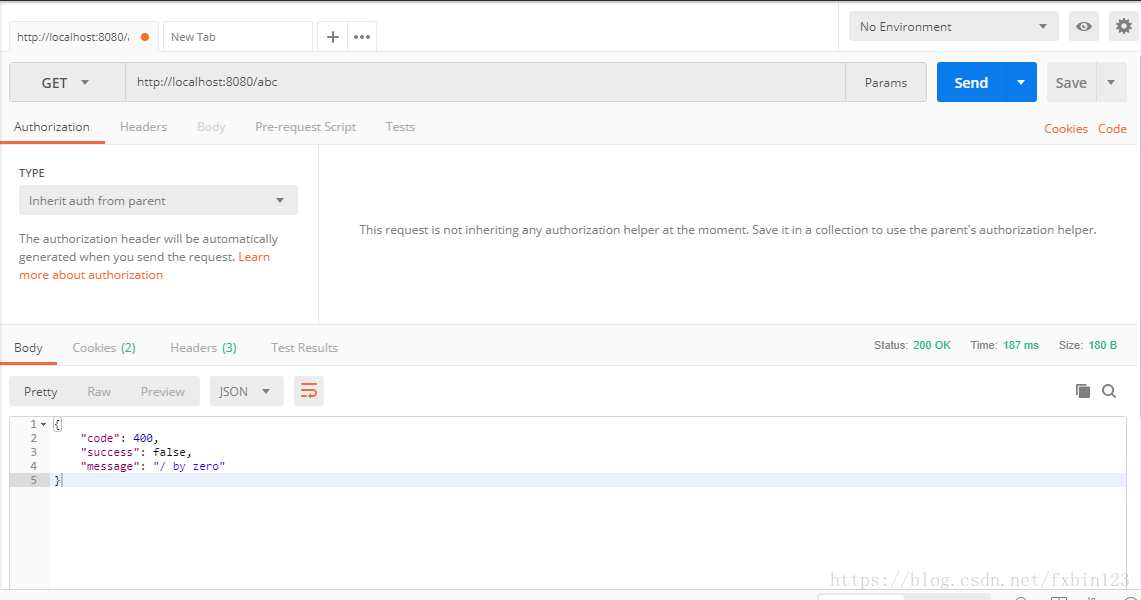
> postman 接口测试:
http://localhost:8080/abc
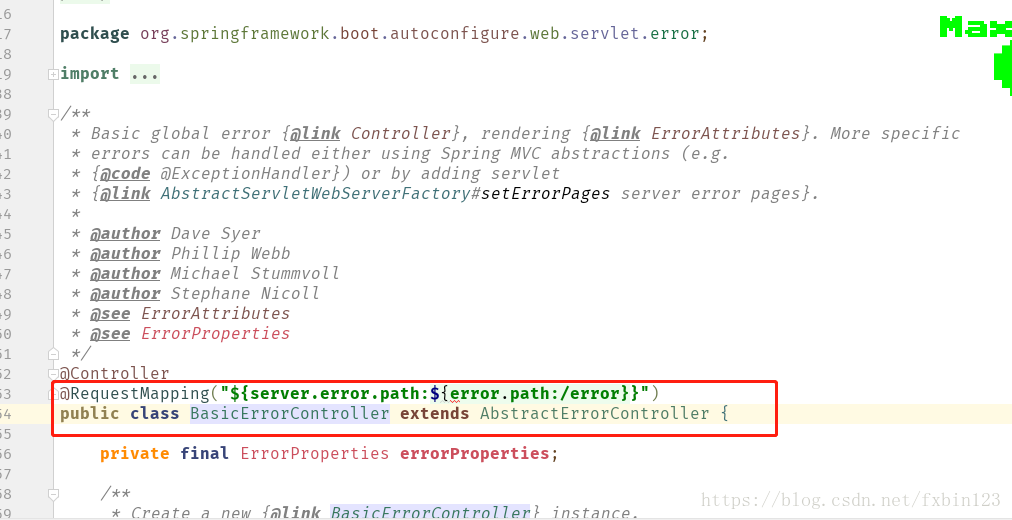
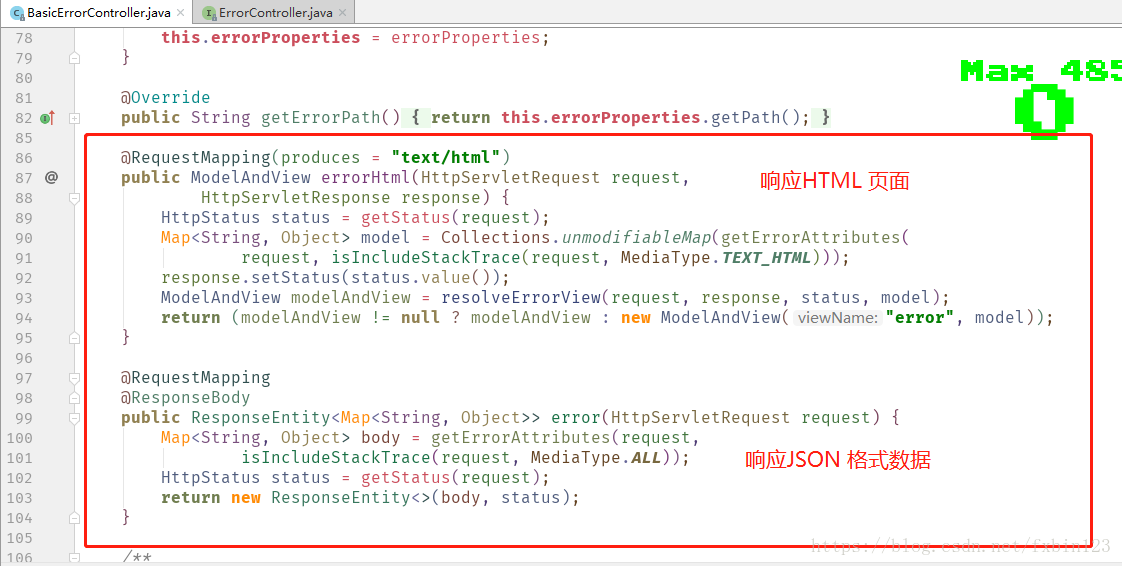
原理:SpringBoot默认提供了程序出错的结果映射路径/error。这个/error请求会在BasicErrorController中处理,其内部是通过判断请求头中的Accept的内容是否为text/html来区分请求是来自客户端浏览器(浏览器通常默认自动发送请求头内容Accept:text/html)还是客户端接口的调用,以此来决定返回页面视图还是 JSON 消息内容。
错误路径映射:
数据响应 BasicErrorController的相关代码:
##2、自定义json格式异常响应
通过 @ControllerAdvice/@RestControllerAdvice 和 @ExceptionHandler 注解全局异常自定义响应类
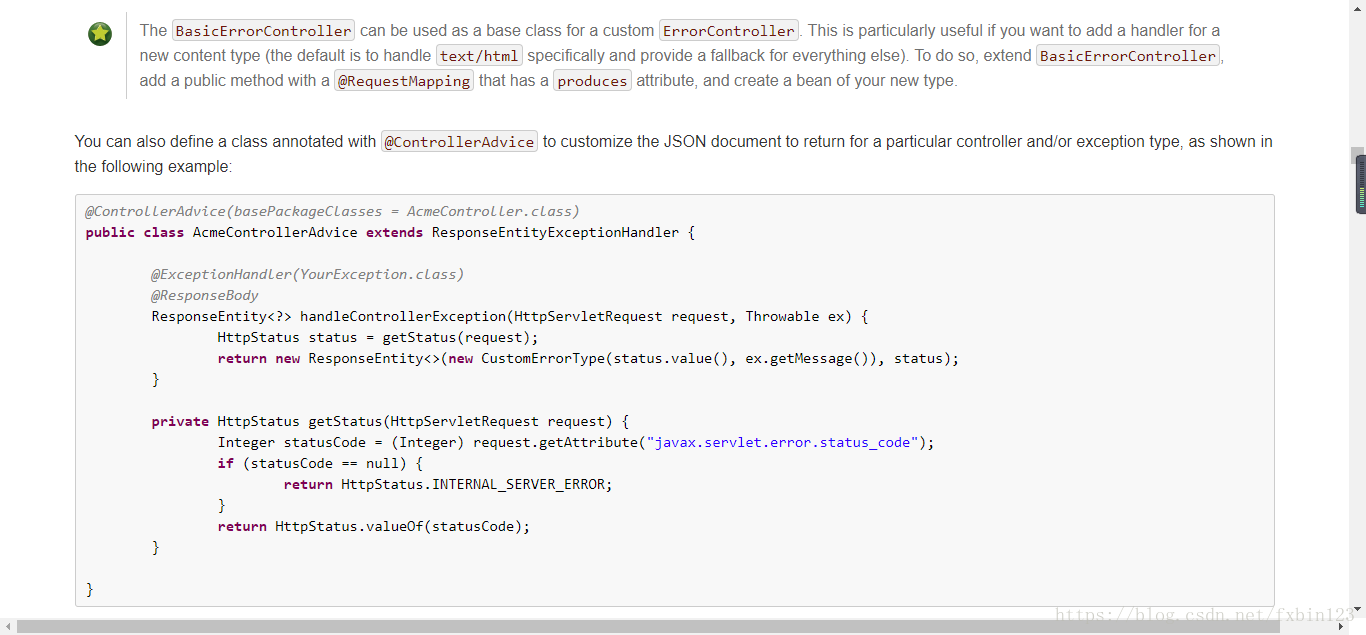
首先提供官网的 示例代码
接下来我们自定义我们自己的异常处理类
1> 首先定义响应状态码枚举类
 package com.fxbin123.dto;

/**
 * @author: fxbin
 * @datetime: 2018/7/5 18:36
 * @description:
 */
public enum ResultCode {
    SUCCESS(200),//成功
    FAIL(400),//失败
    UNAUTHORIZED(401),//未认证(签名错误)
    NOT_FOUND(404),//接口不存在
    INTERNAL_SERVER_ERROR(500);//服务器内部错误

    private final int code;

    ResultCode(int code) {
        this.code = code;
    }

    public int code() {
        return code;
    }
}
2> 定义 响应类
package com.fxbin123.dto;

import com.fasterxml.jackson.annotation.JsonInclude;
import lombok.Getter;
import lombok.Setter;
import lombok.ToString;

/**
 * @author: fxbin
 * @datetime: 2018/7/5 18:34
 * @description:
 */
public class Result {

    /**
     * 状态响应码
     */
    private int code;

    /**
     * 响应结果 成功/失败
     */
    private boolean success;

    /**
     * 响应信息
     */
    private String message;

    /**
     * 响应数据
     */
    @JsonInclude(JsonInclude.Include.NON_NULL)
    private Object data;

    public Result setCode(ResultCode resultCode) {
        this.code = resultCode.code();
        return this;
    }

    public int getCode() {
        return code;
    }

    public boolean isSuccess() {
        return success;
    }

    public Result setSuccess(boolean success) {
        this.success = success;
        return this;
    }

    public String getMessage() {
        return message;
    }

    public Result setMessage(String message) {
        this.message = message;
        return this;
    }

    public Object getData() {
        return data;
    }

    public Result setData(Object data) {
        this.data = data;
        return this;
    }
}
3> 对响应结果封装,做预处理
package com.fxbin123.dto;

/**
 * @author: fxbin
 * @datetime: 2018/7/5 18:36
 * @description:
 */
public class ResultGenerator {

    private static final String DEFAULT_SUCCESS_MESSAGE = "SUCCESS";

    public static Result genSuccessResult() {
        return new Result()
                .setCode(ResultCode.SUCCESS)
                .setSuccess(true)
                .setMessage(DEFAULT_SUCCESS_MESSAGE);
    }

    public static Result genSuccessResult(Object data) {
        return new Result()
                .setCode(ResultCode.SUCCESS)
                .setSuccess(true)
                .setMessage(DEFAULT_SUCCESS_MESSAGE)
                .setData(data);
    }

    public static Result genFailResult(String message) {
        return new Result()
                .setCode(ResultCode.FAIL)
                .setSuccess(false)
                .setMessage(message);
    }
}
4> 异常处理类
package com.fxbin123.advice;

import com.fxbin123.dto.Result;
import com.fxbin123.dto.ResultGenerator;
import org.springframework.web.bind.annotation.ExceptionHandler;
import org.springframework.web.bind.annotation.RestControllerAdvice;

import javax.servlet.http.HttpServletRequest;

/**
 * @author: fxbin
 * @datetime: 2018/7/5 18:29
 * @description:
 */
@RestControllerAdvice
public class ExceptionControllerAdvice {

    @ExceptionHandler(Exception.class)
    public Result jsonErrorHandler(HttpServletRequest req, Exception e){
        return ResultGenerator.genFailResult(e.getMessage());
    }
}
5> 接下来写一个测试类,对我们的全局异常配置进行测试
    @GetMapping(value="/abc")
    public Object testException(){
        int i = 5/0;
        return i;
    }
6> 测试结果
##3、自定义异常处理页面
1> 添加*thymeleaf*依赖
      <dependency>
          <groupId>org.springframework.boot</groupId>
          <artifactId>spring-boot-starter-thymeleaf</artifactId>
      </dependency>
2> resource目录下新建templates,并新建error.html
<!DOCTYPE HTML>
<html xmlns:th="http://www.thymeleaf.org" xmlns:layout="http://www.w3.org/1999/xhtml" layout:decorator="layout">
<head>
<title>Spring Boot 自定义异常页面</title>
<script type="text/javascript">
</script>
</head>
<body>
<div layout:fragment="content" th:remove="tag">
<div id="navbar">
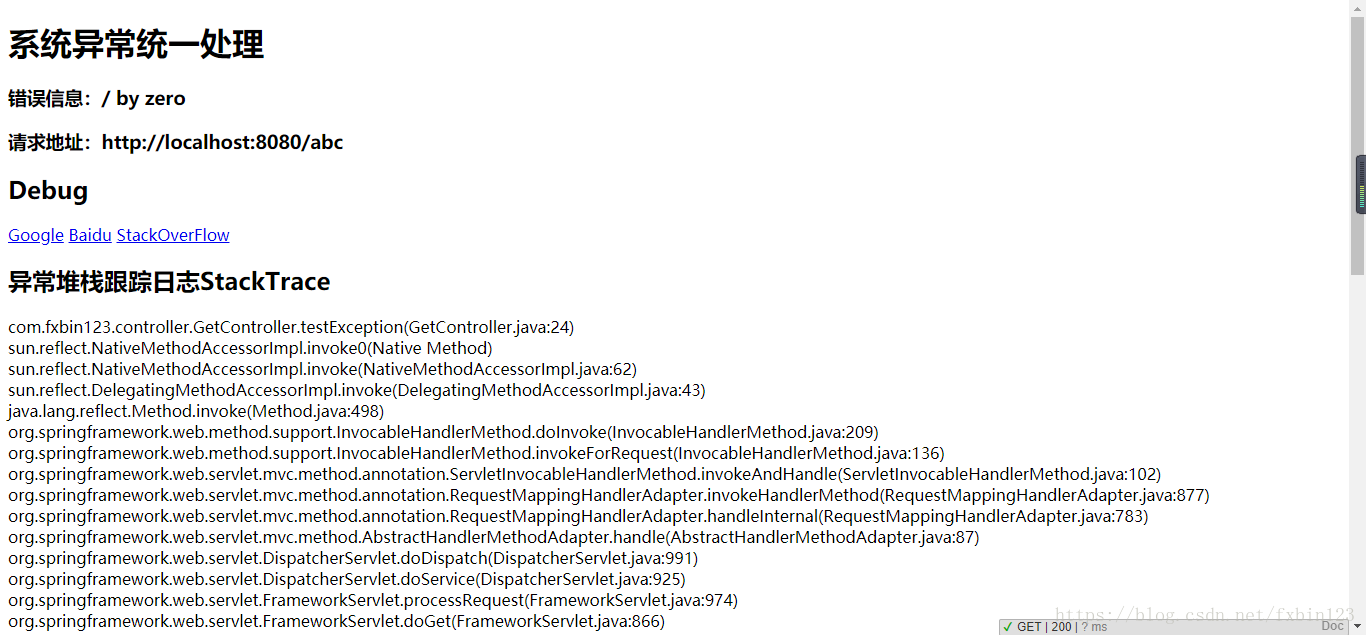
<h1>系统异常统一处理</h1>
<h3 th:text="'错误信息:'+${msg}"></h3>
<h3 th:text="'请求地址:'+${url}"></h3>
<h2>Debug</h2>
<a th:href="@{'https://www.google.com/webhp?hl=zh-CN#safe=strict&hl=zh-CN&q='+${msg}}"
class="btn btn-primary btn-lg" target="_blank" id="Google">Google</a>
<a th:href="@{'https://www.baidu.com/s?wd='+${msg}}" class="btn btn-info btn-lg" target="_blank" id="Baidu">Baidu</a>
<a th:href="@{'http://stackoverflow.com/search?q='+${msg}}"
class="btn btn-default btn-lg" target="_blank" id="StackOverFlow">StackOverFlow</a>
<h2>异常堆栈跟踪日志StackTrace</h2>
<div th:each="line:${stackTrace}">
<div th:text="${line}"></div>
</div>
</div>
</div>
<div layout:fragment="js" th:remove="tag">
</div>
</body>
</html>
3> 做错误页面异常处理 返回 ModelAndView
    @ExceptionHandler(Exception.class)
    public Object handleException(Exception e){
            ModelAndView modelAndView = new ModelAndView();
            modelAndView.addObject("msg", e.getMessage());
            modelAndView.addObject("url", req.getRequestURL());
            modelAndView.addObject("stackTrace", e.getStackTrace());
            modelAndView.setViewName("error");
            return modelAndView;
    }
4> 测试 结果如下
---end---
欢迎关注博主公众号:
如果觉得我的文章对您有用,请随意打赏。你的支持将鼓励我继续创作!