社区微信群开通啦,扫一扫抢先加入社区官方微信群

社区微信群
shiro面世已经有很长时间了,相比Spring security更加精简一些,也更容易上手,因此就想分享下这段时间的学习成果,就当是学习笔记了
1 pom文件如下
<project xmlns="http://maven.apache.org/POM/4.0.0" xmlns:xsi="http://www.w3.org/2001/XMLSchema-instance"
  xsi:schemaLocation="http://maven.apache.org/POM/4.0.0 http://maven.apache.org/xsd/maven-4.0.0.xsd">
  <modelVersion>4.0.0</modelVersion>

  <groupId>net.axcf</groupId>
  <artifactId>ShiroSample</artifactId>
  <version>0.0.1-SNAPSHOT</version>
  <packaging>jar</packaging>

  <name>ShiroSample</name>
  <url>http://maven.apache.org</url>


  <properties>
    	<project.build.sourceEncoding>UTF-8</project.build.sourceEncoding>
		<java.version>1.8</java.version>
  </properties>
  <parent>
        <groupId>org.springframework.boot</groupId>
        <artifactId>spring-boot-starter-parent</artifactId>
        <version>1.5.6.RELEASE</version>
  </parent>

  <dependencies>
    <dependency>
      <groupId>junit</groupId>
      <artifactId>junit</artifactId>
      <version>3.8.1</version>
      <scope>test</scope>
    </dependency>

    <dependency>
            <groupId>org.springframework.boot</groupId>
            <artifactId>spring-boot-starter-web</artifactId>

        </dependency>
        <dependency>
		<groupId>org.mybatis.spring.boot</groupId>
		<artifactId>mybatis-spring-boot-starter</artifactId>
		<version>1.3.1</version>
	</dependency>
        <dependency>
            <groupId>org.springframework.boot</groupId>
            <artifactId>spring-boot-autoconfigure</artifactId>

        </dependency>
       <dependency>
	   <groupId>mysql</groupId>
	   <artifactId>mysql-connector-java</artifactId>
	   <version>5.1.46</version>
	</dependency>
         <dependency>
            <groupId>org.apache.shiro</groupId>
            <artifactId>shiro-core</artifactId>
            <version>1.3.2</version>
        </dependency>
       <dependency>
           <groupId>org.apache.shiro</groupId>
           <artifactId>shiro-spring</artifactId>
           <version>1.3.2</version>
       </dependency>
        <!-- shiro ehcache -->
       <dependency>
           <groupId>org.apache.shiro</groupId>
           <artifactId>shiro-ehcache</artifactId>
           <version>1.3.2</version>
       </dependency>
       <dependency>
	  <groupId>org.springframework.boot</groupId>
	  <artifactId>spring-boot-starter-web</artifactId>
      </dependency>
    <!-- servlet依赖. -->
     <dependency>
	<groupId>javax.servlet</groupId>
	<artifactId>javax.servlet-api</artifactId>
	<scope>provided</scope>
      </dependency>

      <dependency>
	<groupId>javax.servlet</groupId>
	<artifactId>jstl</artifactId>
       </dependency>
      <!-- tomcat的支持.-->
	<dependency>
	  <groupId>org.springframework.boot</groupId>
	  <artifactId>spring-boot-starter-tomcat</artifactId>
	   <scope>provided</scope>
	</dependency>
	<dependency>
	    <groupId>org.apache.tomcat.embed</groupId>
	    <artifactId>tomcat-embed-jasper</artifactId>
	    <!--<scope>provided</scope>-->
	</dependency>
	<dependency>
	   <groupId>net.mingsoft</groupId>
           <artifactId>shiro-freemarker-tags</artifactId>
            <version>1.0.0</version>
       </dependency>

  </dependencies>

</project>
2 下面介绍shiro比较重要的Realm,先上代码
package com.debug.shiro;

import java.util.HashSet;
import java.util.Iterator;
import java.util.List;
import java.util.Set;

import javax.annotation.Resource;

import org.apache.shiro.authc.AuthenticationException;
import org.apache.shiro.authc.AuthenticationInfo;
import org.apache.shiro.authc.AuthenticationToken;
import org.apache.shiro.authc.SimpleAuthenticationInfo;
import org.apache.shiro.authc.UsernamePasswordToken;
import org.apache.shiro.authz.AuthorizationInfo;
import org.apache.shiro.authz.SimpleAuthorizationInfo;
import org.apache.shiro.crypto.hash.SimpleHash;
import org.apache.shiro.realm.AuthorizingRealm;
import org.apache.shiro.subject.PrincipalCollection;
import org.apache.shiro.util.ByteSource;

import com.debug.dto.UserAuthInfo;
import com.debug.entity.user.User;
import com.debug.service.UserService;

public class MyShiroRealm extends AuthorizingRealm{

	@Resource
	private UserService userService;

	/*
	 * 授权
	 */
	protected AuthorizationInfo doGetAuthorizationInfo(PrincipalCollection principals) {
		Object principal=principals.getPrimaryPrincipal();

		Set<String> roleSet=new HashSet<String>();
		 //添加角色和权限
                SimpleAuthorizationInfo simpleAuthorizationInfo = new SimpleAuthorizationInfo();

                 //获取用户对应的权限
                List<UserAuthInfo> auth=userService.findUserAuth(principal.toString());
                Iterator<UserAuthInfo> it=auth.iterator();
                Iterator<UserAuthInfo> permission=auth.iterator();

                while(it.hasNext()) {
        	    UserAuthInfo info=it.next();
        	    //添加角色
        	    simpleAuthorizationInfo.addRole(info.getRname());
        	    //添加权限
        	    while(permission.hasNext()) {
        		UserAuthInfo pinfo=permission.next();
        		simpleAuthorizationInfo.addStringPermission(pinfo.getMname());
        	     }
                }
		return simpleAuthorizationInfo;
	}


	/*
	 * 认证
	 */
	protected AuthenticationInfo doGetAuthenticationInfo(AuthenticationToken token) throws AuthenticationException {
		UsernamePasswordToken utoken=(UsernamePasswordToken)token;
		String userName=utoken.getUsername();
		User u=userService.findByUserName(userName);

		ByteSource salt=ByteSource.Util.bytes(userName);
		if(u==null) {
			return null;
		}else {
			 //SimpleAuthenticationInfo simpleAuthenticationInfo = new SimpleAuthenticationInfo(userName, u.getPassword().toString(), getName());
			SimpleAuthenticationInfo simpleAuthenticationInfo=new SimpleAuthenticationInfo(userName, u.getPassword(), salt, this.getName());
			return simpleAuthenticationInfo;
		}

	}

	public Object getHashedCredential(String pswd) {
		String algorithmName="MD5";
		Object password=pswd;
		int hashIterations=1024;
		ByteSource salt=ByteSource.Util.bytes("guest");
		Object res=new SimpleHash(algorithmName, password, salt, hashIterations);
		return res;
	}

}上面的2个方法是核心部分,这里把用户、角色、权限放到了mysql中,主要涉及到五张表:用户表,角色表(用户所拥有的角色),权限表(角色所涉及到的权限),用户-角色表(用户和角色是多对多的),角色-权限表(角色和权限是多对多的),表设计可以参考这里:https://www.cnblogs.com/hlhdidi/p/6376457.html
这里使用的是mybatis所以把主要的sql贴出来给大家:
<?xml version="1.0" encoding="UTF-8" ?>
<!DOCTYPE mapper PUBLIC "-//mybatis.org//DTD Mapper 3.0//EN" "http://mybatis.org/dtd/mybatis-3-mapper.dtd" >
<mapper namespace="com.debug.dao.UserDao" >
        <resultMap id="BaseResultMap" type="com.debug.entity.user.User" >
                    <id column="uid" property="uid"  />
		    <result column="username" property="username" />
		    <result column="password" property="password" />
        </resultMap>

         <resultMap id="authResultMap" type="com.debug.dto.UserAuthInfo" >
                    <id column="uid" property="uid"  />
		    <result column="username" property="username" />
		    <result column="password" property="password" />
		    <result column="mid" property="mid" />
		    <result column="mname" property="mname" />
        </resultMap>

      <select id="findByUserName" parameterType="string" resultType="com.debug.entity.user.User">

        select * from user where username=#{userName}
      </select>

      <select id="findUserAuth" parameterType="string" resultMap="authResultMap">
        select A.*,B.rid,B.rname,C.mid,C.mname from user A,role B,module C,module_role D,user_role E
        where A.uid=E.uid and B.rid=E.rid and B.rid=D.rid and C.mid=D.mid and D.rid=B.rid
        and A.username=#{username}
      </select>
</mapper>
这次重点放在shiro上,其他技术不做详细讨论
3 凭证比对器(按需编写,可加入盐值加密)
package com.debug.shiro;

import org.apache.shiro.authc.AuthenticationInfo;
import org.apache.shiro.authc.AuthenticationToken;
import org.apache.shiro.authc.UsernamePasswordToken;
import org.apache.shiro.authc.credential.SimpleCredentialsMatcher;
import org.apache.shiro.crypto.hash.SimpleHash;
import org.apache.shiro.util.ByteSource;

public class MyCredentialsMatcher extends SimpleCredentialsMatcher{
	public boolean doCredentialsMatch(AuthenticationToken token, AuthenticationInfo info) {

        UsernamePasswordToken utoken=(UsernamePasswordToken) token;
        //获得用户输入的用户名、密码:(采用加盐(salt)的方式去检验)
        String userName = new String(utoken.getUsername());
        String password = new String(utoken.getPassword());

        //获得数据库中的密码
        String dbPassword=(String) info.getCredentials();

        ByteSource salt=ByteSource.Util.bytes(userName);
	Object res=new SimpleHash("MD5", password, salt, 1024);

	if(res.toString().equals(dbPassword)) {
	    return true;
	}else {
	   return false;
	}

        //进行密码的比对
        //return this.equals(inPassword, dbPassword);
    }
}
盐值根据需要选择可以是id,userName或者其他,加密方式可以是MD5或者SHA1,只要shiro支持即可,加密次数加上比较好
4 把shiro的所有配置 配置给spring boot
package com.debug.config;

import java.util.*;

import org.apache.shiro.authc.credential.CredentialsMatcher;
import org.apache.shiro.spring.LifecycleBeanPostProcessor;
import org.apache.shiro.spring.security.interceptor.AuthorizationAttributeSourceAdvisor;
import org.apache.shiro.spring.web.ShiroFilterFactoryBean;
import org.apache.shiro.web.mgt.DefaultWebSecurityManager;
import org.springframework.aop.framework.autoproxy.DefaultAdvisorAutoProxyCreator;
import org.springframework.beans.factory.annotation.Qualifier;
import org.springframework.context.annotation.Bean;
import org.springframework.context.annotation.Configuration;
import org.apache.shiro.mgt.SecurityManager;

import com.debug.shiro.MyCredentialsMatcher;
import com.debug.shiro.MyShiroRealm;

@Configuration
public class ShiroConfiguration {
	   @Bean(name="shiroFilter")
	    public ShiroFilterFactoryBean shiroFilter(@Qualifier("securityManager") SecurityManager manager) {
	        ShiroFilterFactoryBean bean=new ShiroFilterFactoryBean();
	        bean.setSecurityManager(manager);
	        //配置登录的url和登录成功的url
	        bean.setLoginUrl("/auth/toLogin");
	        bean.setSuccessUrl("/auth/index");
	        //配置访问权限
	        LinkedHashMap<String, String> filterChainDefinitionMap=new LinkedHashMap<String, String>();
	        filterChainDefinitionMap.put("/auth/toLogin", "anon"); //表示可以匿名访问
	        filterChainDefinitionMap.put("/auth/loginCheck", "anon"); //表示可以匿名访问
	        filterChainDefinitionMap.put("/auth/logout","logout");
	        filterChainDefinitionMap.put("/**", "authc");//表示需要认证才可以访问

	        bean.setFilterChainDefinitionMap(filterChainDefinitionMap);
	        return bean;
	    }
	    //配置核心安全事务管理器
	    @Bean(name="securityManager")
	    public SecurityManager securityManager(@Qualifier("authRealm") MyShiroRealm authRealm) {
	        System.err.println("--------------shiro已经加载----------------");
	        DefaultWebSecurityManager manager=new DefaultWebSecurityManager();
	        manager.setRealm(authRealm);
	        return manager;
	    }
	    //配置自定义的权限登录器
	    @Bean(name="authRealm")
	    public MyShiroRealm authRealm(@Qualifier("credentialsMatcher") CredentialsMatcher matcher) {
	    	MyShiroRealm authRealm=new MyShiroRealm();
	        authRealm.setCredentialsMatcher(matcher);
	        return authRealm;
	    }
	    //配置自定义的密码比较器
	    @Bean(name="credentialsMatcher")
	    public CredentialsMatcher credentialsMatcher() {
	        return new MyCredentialsMatcher();
	    }
	    @Bean
	    public LifecycleBeanPostProcessor lifecycleBeanPostProcessor(){
	        return new LifecycleBeanPostProcessor();
	    }
	    @Bean
	    public DefaultAdvisorAutoProxyCreator defaultAdvisorAutoProxyCreator(){
	        DefaultAdvisorAutoProxyCreator creator=new DefaultAdvisorAutoProxyCreator();
	        creator.setProxyTargetClass(true);
	        return creator;
	    }
	    @Bean
	    public AuthorizationAttributeSourceAdvisor authorizationAttributeSourceAdvisor(@Qualifier("securityManager") SecurityManager manager) {
	        AuthorizationAttributeSourceAdvisor advisor=new AuthorizationAttributeSourceAdvisor();
	        advisor.setSecurityManager(manager);
	        return advisor;
	    }
}
到这里主要的代码就写好了,下面就是页面,controller了
5 编写controller和jsp
package com.debug.controller;

import org.apache.shiro.SecurityUtils;
import org.apache.shiro.authc.AuthenticationException;
import org.apache.shiro.authc.UsernamePasswordToken;
import org.apache.shiro.subject.Subject;
import org.springframework.stereotype.Controller;
import org.springframework.web.bind.annotation.RequestMapping;
import org.springframework.web.bind.annotation.RequestParam;


@Controller
@RequestMapping("/auth")
public class AuthController {

   @RequestMapping("/toLogin")
   public String  toLogin() {

	   return "login";
   }
   @RequestMapping("/loginCheck")
   public String  loginCheck(@RequestParam("userName")String userName,@RequestParam("password")String password) {
	   int flag=0;
	   //获取subject
       Subject currentUser = SecurityUtils.getSubject();
       UsernamePasswordToken token = new UsernamePasswordToken(userName, password);
       token.setRememberMe(true);
       try {
          currentUser.login(token);
       }catch (AuthenticationException ae) {
    	   flag++;
    	  System.out.println("登录失败:"+ae.getMessage());
       }
       if(flag>0) {
    	   return "unauthorized";
       }else {
    	   return "index";
       }

   }
   @RequestMapping("/index")
   public String  index() {

	   return "index";
   }

   @RequestMapping("/unauthorized")
   public String  unauthorized() {

	   return "unauthorized";
   }

   @RequestMapping("/user")
   public String  user() {

	   return "user";
   }

   @RequestMapping("/admin")
   public String  admin() {

	   return "admin";
   }
}
登录页面的jsp代码如下:
<%@ page language="java" contentType="text/html; charset=UTF-8"
pageEncoding="UTF-8"%>
<!DOCTYPE html PUBLIC "-//W3C//DTD HTML 4.01 Transitional//EN" "http://www.w3.org/TR/html4/loose.dtd">
<html>
<head>
<meta http-equiv="Content-Type" content="text/html; charset=UTF-8">
<title>登录页</title>
</head>
<body>
<p>登录页</p>
<form action="../auth/loginCheck" method="post">
用户名:<input type="text" name="userName" /><br></br>
密码:<input type="password" name="password" /><br></br>
<input type="submit" value="提交"/>
</form>
</body>
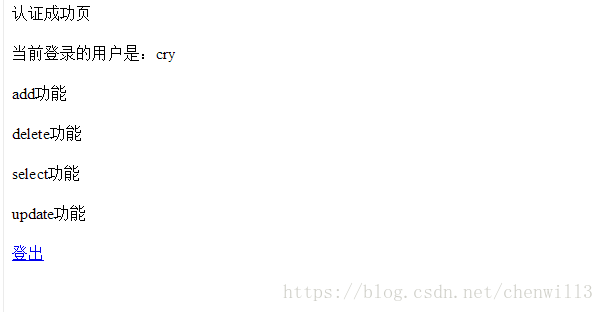
</html>登录/授权成功后的页面index.jsp
<%@ page language="java" contentType="text/html; charset=UTF-8"
    pageEncoding="UTF-8"%>
<%@ taglib prefix="shiro" uri="http://shiro.apache.org/tags"%>
<!DOCTYPE html PUBLIC "-//W3C//DTD HTML 4.01 Transitional//EN" "http://www.w3.org/TR/html4/loose.dtd">
<html>
<head>
<meta http-equiv="Content-Type" content="text/html; charset=UTF-8">
<title>认证成功页</title>
</head>
<body>
  认证成功页<br><br>
  当前登录的用户是:<shiro:principal></shiro:principal><br><br>
  <shiro:hasPermission name="add">
    add功能<br><br>
  </shiro:hasPermission>
   <shiro:hasPermission name="delete">
   delete功能<br><br>
  </shiro:hasPermission>
   <shiro:hasPermission name="query">
   select功能<br><br>
  </shiro:hasPermission>
   <shiro:hasPermission name="update">
     update功能<br><br>
  </shiro:hasPermission>
  <a href="../auth/logout">登出</a>
</body>
</html>
其他页面随大家发挥,就不贴出来了,截图随后补上
注:
1 有关shiro里的session和web里的HttpSession大部分会有误解,它们并不冲突Controller里还是使用HttpSession,shiro的session则用在DAO或service层较好,session里的内容都是一样的,只是要注意适用范围
2 spring boot如果使用jsp作为视图解析器,要注意文件的存在位置,需要在src/main/下面建名为webapp的文件夹,里面放一层WEB-INF,下面才放jsp文件(夹)
##jsp##
spring.mvc.view.prefix=/WEB-INF/jsp/
spring.mvc.view.suffix=.jsp
这个配置不能错,否则容易出现404,如果是freemarker则直接在src/main下面建ftl的文件夹即可
3 为了在ftl中很好的使用shiro标签,还需要如下的配置
package com.debug.config;

import javax.annotation.PostConstruct;

import org.springframework.beans.factory.annotation.Autowired;
import org.springframework.stereotype.Component;
import org.springframework.web.servlet.view.freemarker.FreeMarkerConfigurer;

import com.jagregory.shiro.freemarker.ShiroTags;

import freemarker.template.TemplateModelException;

@Component
public class ShiroTagsFreeMarkerCfg {
	@Autowired
	private FreeMarkerConfigurer freeMarkerConfigurer;
	@PostConstruct
	public void setSharedVariable() throws TemplateModelException {
		freeMarkerConfigurer.getConfiguration().setSharedVariable("shiro", new ShiroTags());
		freeMarkerConfigurer.getConfiguration().setNumberFormat("#");
	}
}
以上就是分享内容了,下次打算把shiro的学习demo分享一下,持续学习中..........
如果觉得我的文章对您有用,请随意打赏。你的支持将鼓励我继续创作!