社区微信群开通啦,扫一扫抢先加入社区官方微信群

社区微信群
1、在阿里云上申请证书,在此不赘述
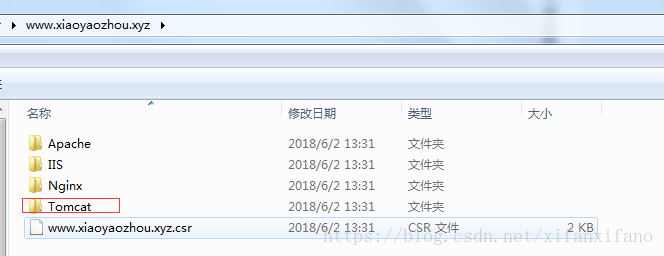
生成证书的zip压缩包解压后文件目录如下:
我们使用Tomcat里面的jks文件
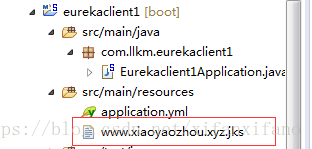
2、application.yml配置https的相关信息
server:
  port: 8097
  ssl:
    key-store: classpath:www.xiaoyaozhou.xyz.jks
    key-store-password: 75zcpi2j1q76
3、将jks文件放在application.yml的同级目录下
4、在Application启动类上添加http自动转向https的bean
import org.apache.catalina.Context;
import org.apache.catalina.connector.Connector;
import org.apache.tomcat.util.descriptor.web.SecurityCollection;
import org.apache.tomcat.util.descriptor.web.SecurityConstraint;
import org.springframework.beans.factory.annotation.Value;
import org.springframework.boot.SpringApplication;
import org.springframework.boot.autoconfigure.SpringBootApplication;
import org.springframework.boot.web.embedded.tomcat.TomcatServletWebServerFactory;
import org.springframework.boot.web.servlet.server.ServletWebServerFactory;
import org.springframework.cloud.netflix.eureka.EnableEurekaClient;
import org.springframework.context.annotation.Bean;
import org.springframework.web.bind.annotation.RequestMapping;
import org.springframework.web.bind.annotation.RequestParam;
import org.springframework.web.bind.annotation.RestController;

@SpringBootApplication
@EnableEurekaClient
@RestController
public class Eurekaclient1Application {

	@Value("${server.port}")
	Integer port;

	@Bean
	public ServletWebServerFactory servletContainer() {
		TomcatServletWebServerFactory  tomcat = new TomcatServletWebServerFactory () {
			@Override
			protected void postProcessContext(Context context) {
				SecurityConstraint constraint = new SecurityConstraint();
				constraint.setUserConstraint("CONFIDENTIAL");
				SecurityCollection collection = new SecurityCollection();
				collection.addPattern("/*");
				constraint.addCollection(collection);
				context.addConstraint(constraint);
			}
		};
		tomcat.addAdditionalTomcatConnectors(httpConnector());
		return tomcat;
	}

	@Bean
	public Connector httpConnector() {
		Connector connector = new Connector("org.apache.coyote.http11.Http11NioProtocol");
		connector.setScheme("http");
		// Connector监听的http的端口号
		connector.setPort(8080);
		connector.setSecure(false);
		// 监听到http的端口号后转向到的https的端口号
		connector.setRedirectPort(port);
		return connector;
	}


	public static void main(String[] args) {
		SpringApplication.run(Eurekaclient1Application.class, args);
	}

	@RequestMapping("/hi")
	public String home(@RequestParam String name) {
		return "hi " + name + ",i am from port:" + port;
	}
}注意:这个是spring boot 2.0.x版本以上的代码。如果是这个版本以下的,需要修改如下:
@Bean
	public EmbeddedServletContainerFactory servletContainer() {
		TomcatEmbeddedServletContainerFactory tomcat = new TomcatEmbeddedServletContainerFactory() {
			@Override
			protected void postProcessContext(Context context) {
				SecurityConstraint constraint = new SecurityConstraint();
				constraint.setUserConstraint("CONFIDENTIAL");
				SecurityCollection collection = new SecurityCollection();
				collection.addPattern("/*");
				constraint.addCollection(collection);
				context.addConstraint(constraint);
			}
		};
		tomcat.addAdditionalTomcatConnectors(httpConnector());
		return tomcat;
	}
5.启动spring boot项目,显示两个端口都启动了
6.docker中创建容器并运行
docker run -d -p 8097:8097 -p 8080:8080 --name test testImage
-p 要有将两个端口号都映射(之前不了解docker,走了些弯路)
test 是容器名
testImage是镜像名
如果觉得我的文章对您有用,请随意打赏。你的支持将鼓励我继续创作!