社区微信群开通啦,扫一扫抢先加入社区官方微信群

社区微信群
参考地址:https://blog.csdn.net/sgrrmswtvt/article/details/77866187
1、首先需要安装Git,可以使用yum源在线安装:
yum -y install git
2、创建一个git用户,用来运行git服务
adduser git
添加git用户密码
[root@localhost ~]# passwd git
Changing password for user git.
New password: ******
BAD PASSWORD: The password is shorter than 8 characters
Retype new password: ******
passwd: all authentication tokens updated successfully.
3、初始化git仓库:这里我们选择/var/git_www/demo1/demo1.git来作为我们的git仓库
[root@localhost ~]# mkdir -p /var/git_www/demo1
[root@localhost ~]# cd /var/git_www/demo1
[root@localhost demo1]# pwd
/var/git_www/demo1
[root@localhost demo1]# git init --bare demo1.git
执行以上命令,会创建一个裸仓库,裸仓库没有工作区,因为服务器上的Git仓库纯粹是为了共享,所以不让用户直接登录到服务器上去改工作区,并且服务器上的Git仓库通常都以.git结尾。然后,把owner改为git:
[root@localhost demo1]# chown -R git demo1.git/
[root@localhost demo1]# chown -R git demo1.git/
4、在这里,Git服务器就已经搭得差不多了。下面我们在客户端clone一下远程仓库[在windows电脑测试,或者另外的linux服务器][客户端操作]
Linux demo[这是另外一台linux机器]:
[root@localhost git_www]# git clone git@192.168.11.43:/var/git_www/demo1/demo1.git
Cloning into 'demo1'...
git@192.168.11.43's password:
warning: You appear to have cloned an empty repository.
[此处还需要输入 git 账号的密码]
5、创建SSH Key[客户端操作]
首先在用户主目录下【/home/git】,看看有没有.ssh目录,如果有,再看看这个目录下有没有id_rsa和id_rsa.pub这两个文件,如果已经有了,可直接跳到下一步。如果没有,打开Shell(Windows下打开Git Bash),创建SSH Key:[客户端操作]
[root@localhost git]# ls -a
.  ..  .bash_logout  .bash_profile  .bashrc  .ssh
[root@localhost git]# ssh-keygen -t rsa -C "2398@qq.com"
你需要把邮件地址换成你自己的邮件地址,然后一路回车,使用默认值即可,由于这个Key也不是用于军事目的,所以也无需设置密码。
在用户主目录里找到.ssh目录,里面有id_rsa和id_rsa.pub两个文件,这两个就是SSH Key的秘钥对,id_rsa是私钥,不能泄露出去,id_rsa.pub是公钥【添加到git服务器的.ssh/authorized_keys】,可以放心地告诉任何人。
[root@localhost ~]# ls /root/.ssh/
authorized_keys  id_rsa  id_rsa.pub  known_hosts
6、Git服务器打开RSA认证
然后就可以去Git服务器上添加你的公钥用来验证你的信息了。在Git服务器上首先需要将**/etc/ssh/sshd_config**中将RSA认证打开,即:
[root@localhost .ssh]# vim /etc/ssh/ssh_config
添加内容:
RSAAuthentication yes
PubkeyAuthentication yes
# The default is to check both .ssh/authorized_keys and .ssh/authorized_keys2
# but this is overridden so installations will only check .ssh/authorized_keys
AuthorizedKeysFile      .ssh/authorized_keys
截图说明: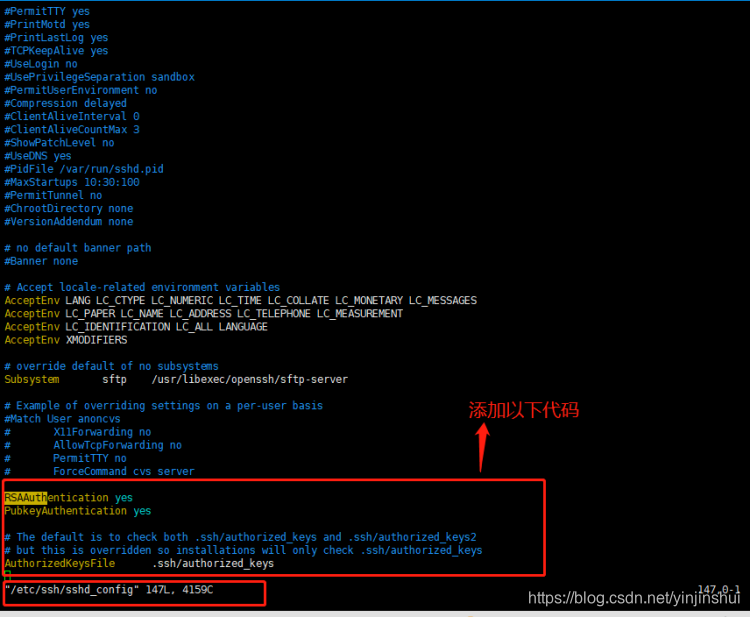
这里我们可以看到公钥存放在**.ssh/authorized_keys文件中。所以我们在/home/git下创建.ssh目录,然后创建authorized_keys文件,并将刚生成的公钥导入进去。
然后再次clone的时候,或者是之后push**的时候,就不需要再输入密码了:
【git 服务端操作】
[root@localhost .ssh]# ls
authorized_keys
[root@localhost .ssh]# vim authorized_keys
将客户端的公钥添加到此文件中: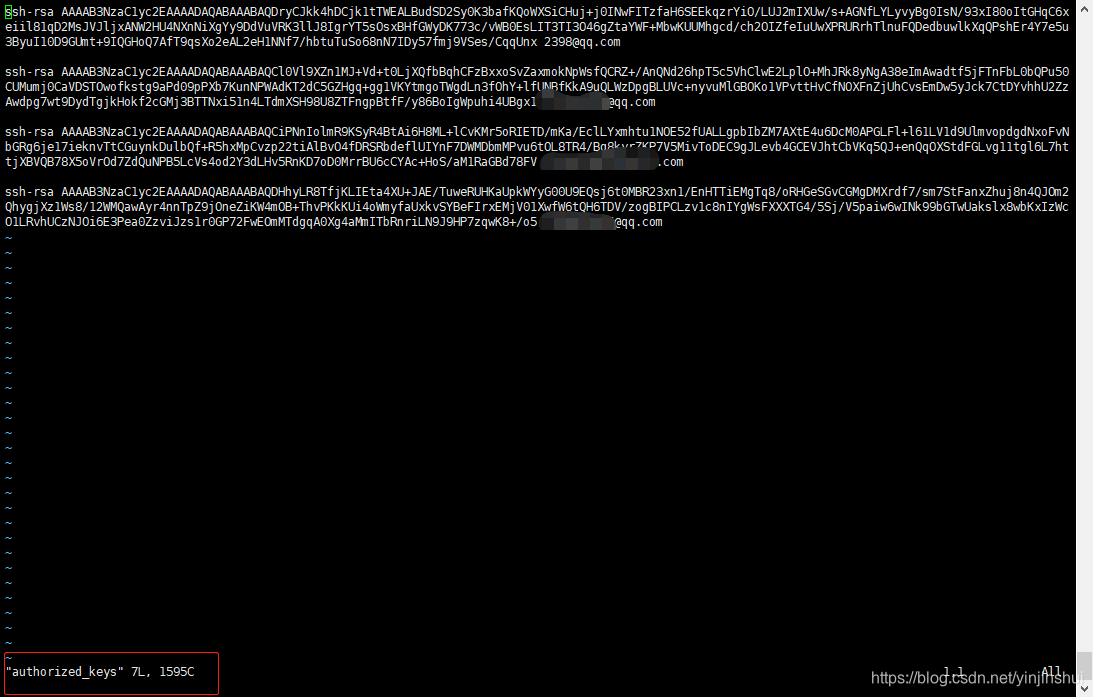
7.在git客户端操作克隆
[root@localhost git_www]# git clone git@192.168.11.43:/var/git_www/demo1/demo1.git
Cloning into 'demo1'...
warning: You appear to have cloned an empty repository.
此时克隆就不需要密码
8.禁用git用户的shell登陆
出于安全考虑,第二步创建的git用户不允许登录shell,这可以通过编辑**/etc/passwd**文件完成。找到类似下面的一行:
[root@localhost git]# vim /etc/passwd
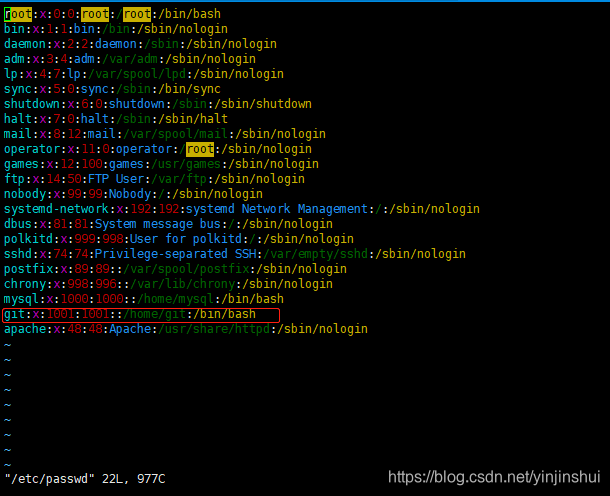
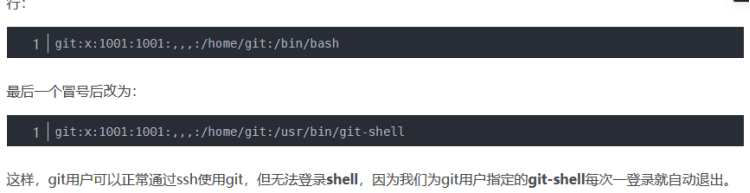
git:x:1001:1001::/home/git:/bin/bash
修改成
git:x:1001:1001::/home/git:/usr/bin/git-shell
8、window,linux拉取git项目(初始化代码,把代码推送到远程分支)
git clone git@192.168.11.43:/var/git_www/demo1/demo1.git
【
git服务端操作:
注意:demo1.git 给与权限
或chgrp -R git demo1.git
Chown -R git demo1.git
】

ssh-keyyen -t rsa -C "2398@qq.com"
(把生成的[客户端] vim /root/.ssh/id_rsa.pub )
公钥粘贴到[服务端]vim /home/git/.ssh/authorized_keys

创建分支:
git checkout -b master

添加文件提交:
vim a.txt
git add .
git commit -m "first"
推送分支到远程分支:
git push origin master
如果觉得我的文章对您有用,请随意打赏。你的支持将鼓励我继续创作!
