社区微信群开通啦,扫一扫抢先加入社区官方微信群

社区微信群
一、基本信息:
1、下载地址:https://dev.mysql.com/downloads/mysql/

下载链接:
https://cdn.mysql.com//Downloads/MySQL-5.7/mysql-5.7.28-1.el7.x86_64.rpm-bundle.tar
2、操作系统 Centos7.4 x64 Minimal 1708
3、工具:xshell5
4、VMware 版本:VMware Workstation Pro15
5、虚拟机安装:https://blog.csdn.net/llwy1428/article/details/89328381
6、配置防火墙
关闭防火墙    : systemctl stop firewalld
查看状态      : systemctl status firewalld
开机禁用      : systemctl disable firewalld
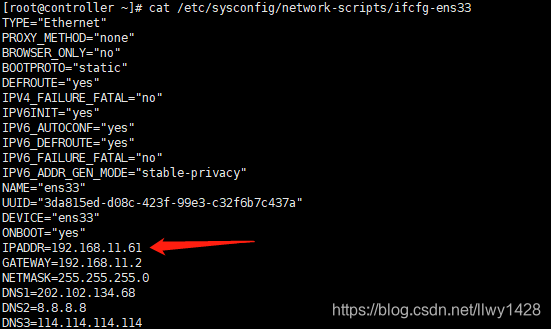
7、配置静态IP
[root@computer ~]# vim /etc/sysconfig/network-scripts/ifcfg-ens33
二、安装部署
1、虚拟机安装基本工具
[root@controller ~]# yum remove -y mariadb-libs
[root@controller ~]# yum install wget vim rpm tree net-tools perl-Data-Dumper -y
2、下载 mysql 安装包
[root@controller ~]# mkdir /opt/mysql
[root@controller ~]# cd /opt/mysql
[root@controller mysql]# wget https://cdn.mysql.com//Downloads/MySQL-5.7/mysql-5.7.28-1.el7.x86_64.rpm-bundle.tar

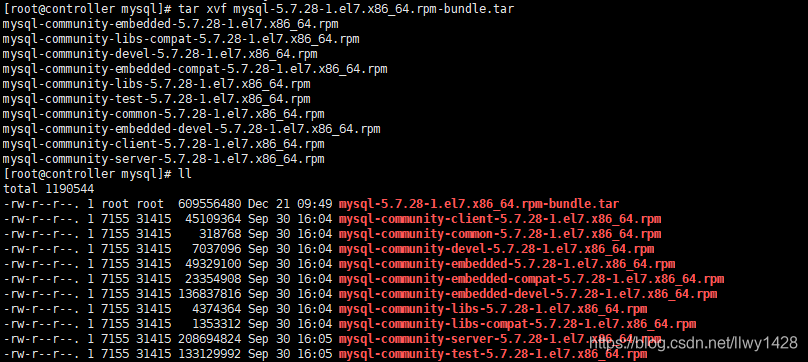
3、解压
[root@controller mysql]# tar xvf mysql-5.7.28-1.el7.x86_64.rpm-bundle.tar
查看目录
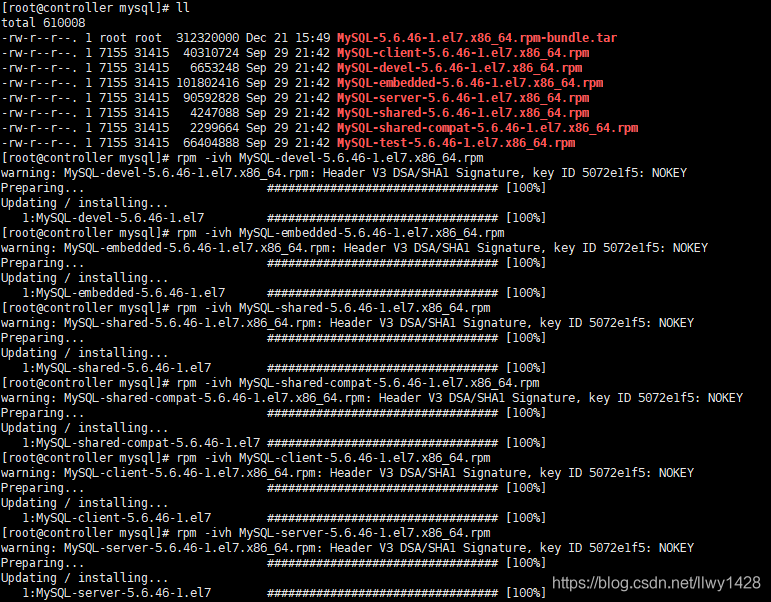
4、安装(注意安装顺序)
[root@controller mysql]# rpm -ivh mysql-community-common-5.7.28-1.el7.x86_64.rpm
[root@controller mysql]# rpm -ivh mysql-community-libs-5.7.28-1.el7.x86_64.rpm
[root@controller mysql]# rpm -ivh mysql-community-libs-compat-5.7.28-1.el7.x86_64.rpm
[root@controller mysql]# rpm -ivh mysql-community-devel-5.7.28-1.el7.x86_64.rpm
[root@controller mysql]# rpm -ivh mysql-community-embedded-5.7.28-1.el7.x86_64.rpm
[root@controller mysql]# rpm -ivh mysql-community-embedded-compat-5.7.28-1.el7.x86_64.rpm
[root@controller mysql]# rpm -ivh mysql-community-client-5.7.28-1.el7.x86_64.rpm
[root@controller mysql]# rpm -ivh mysql-community-server-5.7.28-1.el7.x86_64.rpm
注意:Mysql5.6 和 Mysql5.7 有区别
关于 Mysql 5.6 数据库的初始化请参考
https://blog.csdn.net/llwy1428/article/details/85255621
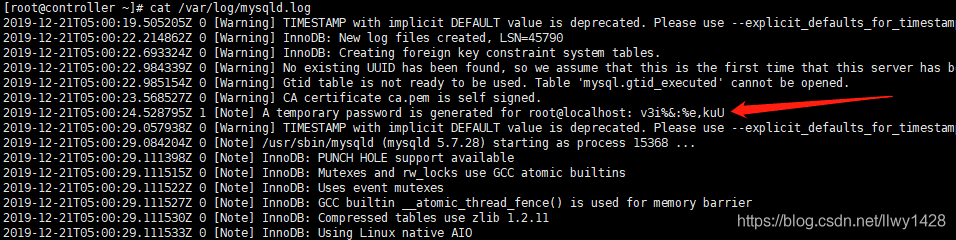
5、查看 Mysql 数据库的 root 用户的初始密码
启动 Mysql 数据库服务
[root@controller ~]# service mysqld start
[root@controller ~]# cat /var/log/mysqld.log
控制台登录 Mysql 数据库
[root@controller ~]# mysql -uroot -p
Enter password: (录入初始密码)
6、修改 Mysql 数据库 root 用户的密码
修改两个全局参数:
(1)修改validate_password_policy参数的值
mysql> set global validate_password_policy=0;
Query OK, 0 rows affected (0.00 sec)
(2)修改密码的长度
mysql> set global validate_password_length=1;
Query OK, 0 rows affected (0.00 sec)
(3)修改 Mysql 数据库的 root 用户的密码 (此处我修改成了 “root” )
mysql> ALTER USER 'root'@'localhost' IDENTIFIED BY 'root';
Query OK, 0 rows affected (0.00 sec)
(4)授权其他机器访问
mysql> GRANT ALL PRIVILEGES ON *.* TO 'root'@'%' IDENTIFIED BY 'root' WITH GRANT OPTION;
Query OK, 0 rows affected, 1 warning (0.00 sec)
mysql> FLUSH  PRIVILEGES;
Query OK, 0 rows affected (0.00 sec)
(5)退出
mysql> exit;
Bye
7、测试:
在其它机器(Windows)上使用 Navicat 连接数据库:
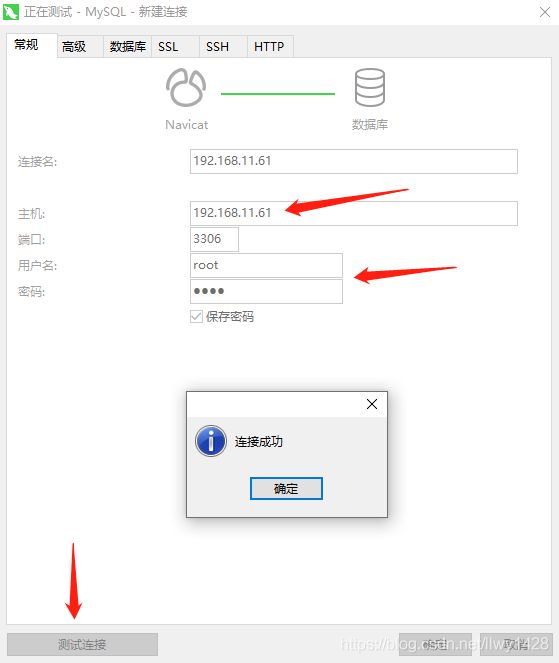
至此 Centos7 手动安装 Mysql 数据库 (使用 Mysql 的 rpm 文件)操作完毕!
如果觉得我的文章对您有用,请随意打赏。你的支持将鼓励我继续创作!
