社区微信群开通啦,扫一扫抢先加入社区官方微信群

社区微信群
提示:本人使用的系统:Centos7。在此之前,请确保安装了JDK,由于安装过于简单,这里不介绍了。
【Elasticsearch7.2百度云,本人使用的版本】
【官网下载】
1.解压
tar -zxvf /usr/local/elasticsearch.tar.gz
2.修改配置文件(默认全部注释,将下面复制粘贴在末尾即可)
vi /usr/local/elasticsearch-7.2.0/config/elasticsearch.yml
cluster.name: es_cluster
# 确保在不同环境中集群的名称不重复:
node.name: node-1
# 绑定的网卡IP:
network.host: 192.168.114.120
# http协议端口:
http.port: 9200
# 是否为主节点
node.master: true
# 初始主节点
cluster.initial_master_nodes: ["node-1"]
# 开始发现新节点的IP地址
discovery.zen.ping.unicast.hosts: ["192.168.114.120"]
# 支持跨域
http.cors.enabled: true
http.cors.allow-origin: "*"
3.修改limits.conf
vi /etc/security/limits.conf 追加如下内容
 * soft nofile 65536
 * hard nofile 131072
 * soft nproc 2048
 * hard nproc 4096
注意:如果有想测试的话,在修改limits.conf文件之后,对于非root角色需要重新切换角色才能生效。
否则将出错
ERROR: [3] bootstrap checks failed
[1]: max file descriptors [4096] for elasticsearch process is too low, increase to at least [65535]
[2]: max number of threads [3795] for user [elasticsearch] is too low, increase to at least [4096]
[3]: max virtual memory areas vm.max_map_count [65530] is too low, increase to at least [262144]
4.修改sysctl.conf
方式一.永久生效
vi /etc/sysctl.conf 追加如下内容
vm.max_map_count=262144
输入命令 sysctl -p 使修改生效
方式二.临时生效
sysctl -w vm.max_map_count=262144
否则将出错
ERROR: [1] bootstrap checks failed
[1]: max virtual memory areas vm.max_map_count [65530] is too low, increase to at least [262144]
5.由于elasticsearch不能以root用户运行,所以这里创建一个用户elasticsearch(随意)
adduser elasticsearch
passwd elasticsearch
chown -R elasticsearch:elasticsearch /usr/local/elasticsearch-7.2.0/
su elasticsearch
如果以root用户运行将抛出以下异常
org.elasticsearch.bootstrap.StartupException: java.lang.RuntimeException: can not run elasticsearch as root
6.启动(systemctl stop firewalld临时关闭防火墙)
cd /usr/local/elasticsearch-7.2.0/bin/
./elasticsearch (也可使用./elasticsearch -d在后台运行)
输入 http://192.168.114.120:9200/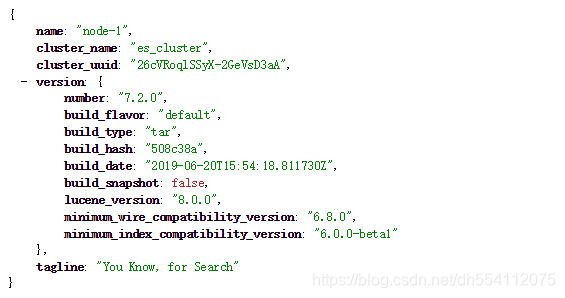
1.解压
tar -xvf node-v10.16.3-linux-x64.tar.xz
2.改名
mv /usr/local/node-v10.16.3-linux-x64 /usr/local/nodejs
3.创建软连接
ln -s /usr/local/nodejs/bin/node /usr/bin/
ln -s /usr/local/nodejs/bin/npm /usr/bin/
4.测试
node -v
npm  -v
1.安装bzip2
yum install -y bzip2
2.解压
tar -xvf phantomjs-2.1.1-linux-x86_64 .tar.bz2
3.改名
mv phantomjs-2.1.1-linux-x86_64 phantomjs
4.建立软连接
ln -s /usr/local/phantomjs/bin/phantomjs /usr/bin/
5.安装fontconfig
yum install -y fontconfig
6.测试
phantomjs --version
1.安装unzip
yum install -y unzip
2.解压
unzip elasticsearch-head-master.zip
3.进入目录
cd elasticsearch-head-master
4.执行命令
npm install cnpm -g --registry=https://registry.npm.taobao.org
5.修改Gruntfile.js
vi Gruntfile.js(添加hostname: ‘*’,)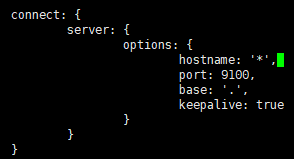
6.跳转elasticsearch-head-master/_site目录
cd _site
7.修改app.js
vi app.js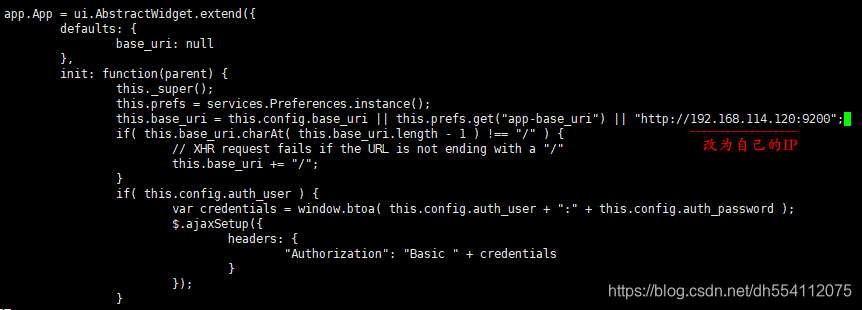
8.安装grunt
npm install -g grunt-cli --registry=http://registry.cnpmjs.org
npm install grunt -save-dev --registry=http://registry.cnpmjs.org
npm install grunt-contrib-clean --registry=https://registry.npm.taobao.org
npm install grunt-contrib-concat --registry=https://registry.npm.taobao.org
npm install grunt-contrib-watch --registry=https://registry.npm.taobao.org
npm install grunt-contrib-connect --registry=https://registry.npm.taobao.org
npm install grunt-contrib-copy --registry=https://registry.npm.taobao.org
npm install grunt-contrib-jasmine --registry=https://registry.npm.taobao.org
9.启动
npm run start
10.测试
输入 http://192.168.114.120:9100/
如果觉得我的文章对您有用,请随意打赏。你的支持将鼓励我继续创作!
