社区微信群开通啦,扫一扫抢先加入社区官方微信群

社区微信群
最近公司官网上线,把官网基本部署好后准备把http请求变成https(根据很多文章说https更安全并且更适合SEO)
因为我们是前后端分离开发,所以这里踩了坑,记录一下.
进行该操作需要有域名,并且域名已备案成功,在本章不做详细描述,可以自行百度.
我们是在阿里云购买的域名,所以本章以阿里云为例:
登录阿里云控制台搜索SSL证书
在阿里云控制台:安全(云盾)->证书服务->购买证书里(地址:https://common-buy.aliyun.com/?spm=5176.2020520163.cas.1.zTLyhO&commodityCode=cas#/buy) 选择免费的证书类型完成购买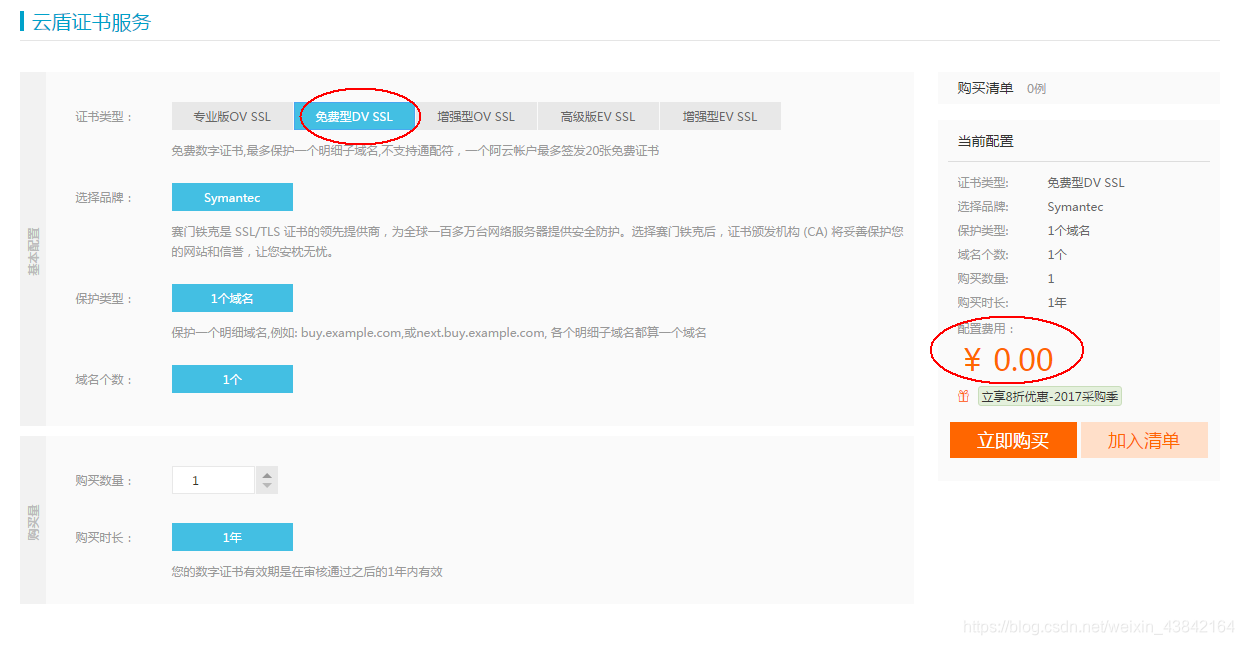
免费购买完成后,在订单里输入信息,输入需要使用Https服务的详细子域名,填写个人信息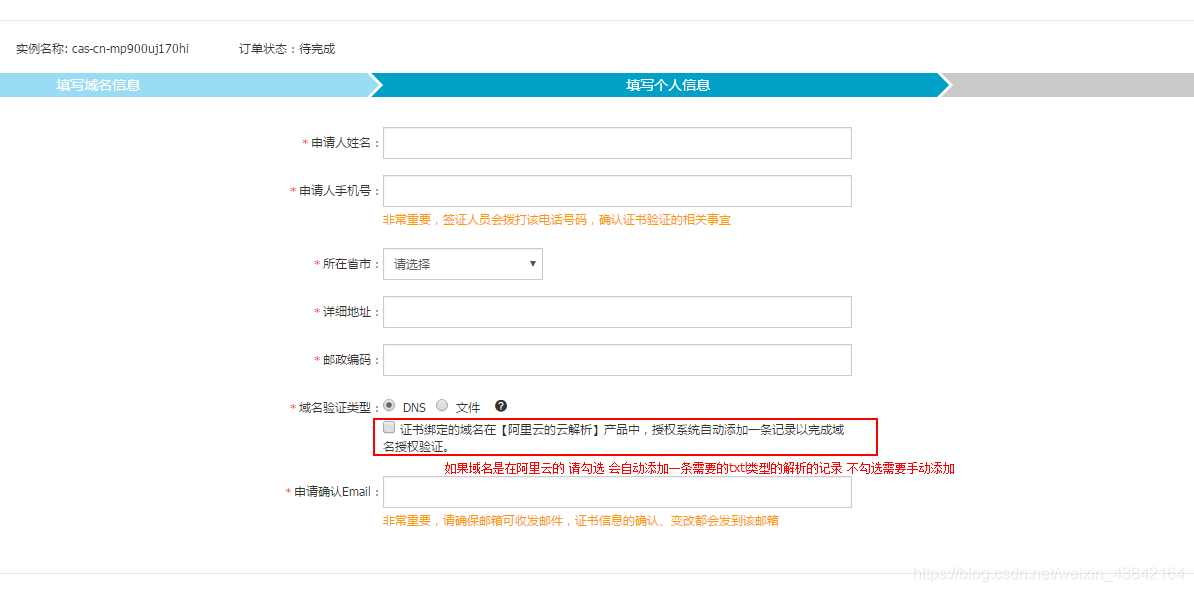
完成信息后,接下来就是等待审批结果了,审批通过后,下载
进入ssl证书界面点击下载按钮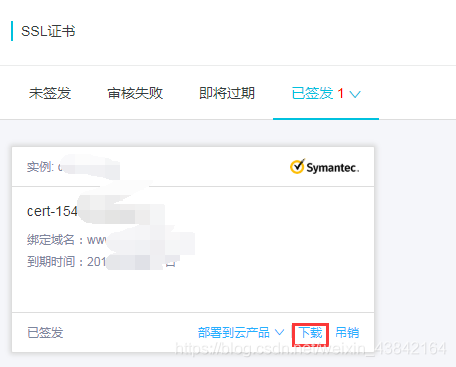
在右边弹窗中可以看到tomcat和nginx证书下载,我们先进行nginx的配置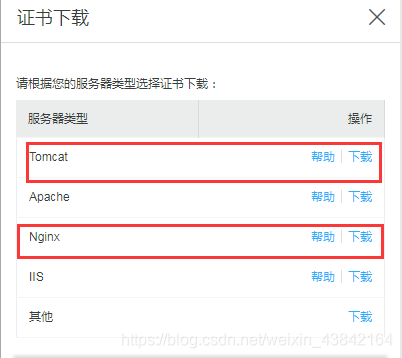
先单击Nginx旁的下载按钮,下载完成后的压缩包中有一个.key的文件和一个.pem的文件,点击Nginx旁的帮助帮助里的资料很详细,这里不做赘述,这里有一个坑:
server {
 listen 443;
 server_name localhost;
 ssl on;
 root html;
 index index.html index.htm;
 ssl_certificate   cert/a.pem;      #放在conf目录下后为a.pem;
 ssl_certificate_key  cert/a.key; 	#放在conf目录下后为a.key;
 ssl_session_timeout 5m;
 ssl_ciphers ECDHE-RSA-AES128-GCM-SHA256:ECDHE:ECDH:AES:HIGH:!NULL:!aNULL:!MD5:!ADH:!RC4;
 ssl_protocols TLSv1 TLSv1.1 TLSv1.2;
 ssl_prefer_server_ciphers on;
 location / {
     root html;
     index index.html index.htm;
 }
}
在该教程中看到,让我们在服务器的nginx的根目录下创建cert文件夹并把.pem和.key文件放进去,我当时这样做会有点问题:重启nginx的时候会报错找不到.key和.pem文件
然后我把这两个文件都放在了nginx的conf目录下,并把路径更改为相对路径,在上面的注释中有
然后还需要配置一个地方,在
加上rewrite ^(.*)$ https://$host$1 permanent;
这样所有请求都会被转发到https,然后nginx就配置完成了.
这时候有的朋友可能认为就已经OK了(包括我),但是重新部署后发现接口调不通了,前端拿不到数据了,最后查询了很多资料发现是因为后端接口必须支持https请求(至少现在我还这样认为),所以下面下面来看Springboot的配置
在刚才证书下载的地方下载tomcat证书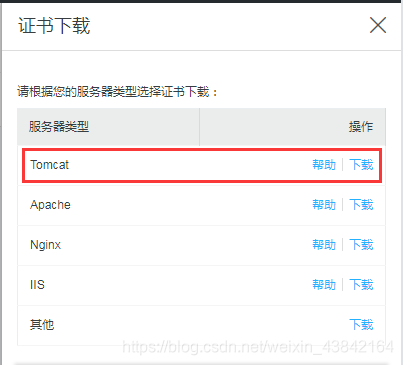
下载完成后会有两个文件,一个.txt和一个.pfx,txt文件中是我们的密码(后面需要用),.pfx文件是证书文件
server:
  port: 30000
  ssl:
    key-store: classpath:sxx.pfx #拷贝到根目录的证书文件
    key-store-password: tK75MMVp #密码(下载tomcat证书压缩包里的txt文件)
    key-store-type: PKCS12       #固定写法
还没结束…
我们把Springboot项目打成jar包发布到Linux服务器的时候,需要把证书也上传到与jar同级的目录
类似这样
终于大功告成啦,去试试把…这是我一下午的结果…
还有没用前后端分离的,直接用springboot来做转发的配置也很简单
只需要在之前的基础再注入两个bean即可
@Configuration
public class HttpsConfig {

    /**
     * spring boot 1.0
     */
   /* @Bean
    public EmbeddedServletContainerFactory servletContainer() {
        TomcatEmbeddedServletContainerFactory tomcat = new TomcatEmbeddedServletContainerFactory() {
            @Override
            protected void postProcessContext(Context  context) {
                SecurityConstraint constraint = new SecurityConstraint();
                constraint.setUserConstraint("CONFIDENTIAL");
                SecurityCollection collection = new SecurityCollection();
                collection.addPattern("/*");
                constraint.addCollection(collection);
                context.addConstraint(constraint);
            }
        };
        tomcat.addAdditionalTomcatConnectors(httpConnector());
        return tomcat;
    }*/

    /**
     * spring boot 2.0
     * @return
     */
    @Bean
    public TomcatServletWebServerFactory servletContainer() {
        TomcatServletWebServerFactory tomcat = new TomcatServletWebServerFactory() {
            @Override
            protected void postProcessContext(Context context) {
                SecurityConstraint constraint = new SecurityConstraint();
                constraint.setUserConstraint("CONFIDENTIAL");
                SecurityCollection collection = new SecurityCollection();
                collection.addPattern("/*");
                constraint.addCollection(collection);
                context.addConstraint(constraint);
            }
        };
        tomcat.addAdditionalTomcatConnectors(httpConnector());
        return tomcat;
    }

    @Bean
    public Connector httpConnector() {
        Connector connector = new Connector("org.apache.coyote.http11.Http11NioProtocol");
        connector.setScheme("http");
        //Connector监听的http的端口号
        connector.setPort(80);
        connector.setSecure(false);
        //监听到http的端口号后转向到的https的端口号
        connector.setRedirectPort(443);
        return connector;
    }

}
这样如果用http请求也会被转发到https
如果觉得我的文章对您有用,请随意打赏。你的支持将鼓励我继续创作!
