
本文转载自http://www.tuicool.com/articles/AnIVJn. 因Python语言,个人也没学过,不是太熟悉,这篇文章的代码格式排版不准确爆了很多错,让我走了好多坑,不过还是要感谢原文作者。
在CentOS7系统上安装了docker-compose之后,我们以一个小例子来熟悉一下这个工具的使用.
Docker-Compose使用
[root@localhost ~]# cd dockerfile_dir/
[root@localhost dockerfile_dir]# ll
total 16
-rw-r--r--. 1 root root 313 Oct 31 09:52 app.py
-rw-r--r--. 1 root root 222 Oct 31 09:21 docker-compose.yaml
-rw-r--r--. 1 root root  79 Oct 31 09:42 Dockerfile
-rw-r--r--. 1 root root 12 Oct 31 08:19 requirements.txt[root@localhost ~]# cd dockerfile_dir/FROM python:2.7
ADD . /code
WORKDIR /code
RUN pip install -r requirements.txtflask
redisfrom flask import Flask
from redis import Redis
import os
app = Flask(__name__)
redis = Redis(host='redis', port=6379)
@app.route('/')
def hello():
redis.incr('hits')
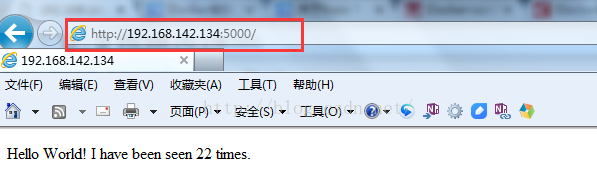
return 'Hello World! I have been seen %s times.' % redis.get('hits')
if __name__ == "__main__":
app.run(host="0.0.0.0", debug=True)web:
build: .
command:
python app.py
ports:
- "5000:5000"
volumes:
- .:/code
links:
- redis
redis:
image: redis[root@localhost dockerfile_dir]# docker-compose up
Building web
Step 1 : FROM python:2.7
---> 77cf0ea98df6
Step 2 : ADD . /code
---> 75cd864e0ccb
Removing intermediate container ac7333aef426
Step 3 : WORKDIR /code
---> Running in 5b5313e1b03c
---> e972204373ea
Removing intermediate container 5b5313e1b03c
Step 4 : RUN pip install -r requirements.txt
---> Running in 8b5e6cb8288a
Collecting flask (from -r requirements.txt (line 1))
Downloading Flask-0.11.1-py2.py3-none-any.whl (80kB)
Collecting redis (from -r requirements.txt (line 2))
Downloading redis-2.10.5-py2.py3-none-any.whl (60kB)
Collecting itsdangerous>=0.21 (from flask->-r requirements.txt (line 1))
Downloading itsdangerous-0.24.tar.gz (46kB)
Collecting Jinja2>=2.4 (from flask->-r requirements.txt (line 1))
Downloading Jinja2-2.8-py2.py3-none-any.whl (263kB)
Collecting Werkzeug>=0.7 (from flask->-r requirements.txt (line 1))
Downloading Werkzeug-0.11.11-py2.py3-none-any.whl (306kB)
Collecting click>=2.0 (from flask->-r requirements.txt (line 1))
Downloading click-6.6.tar.gz (283kB)
Collecting MarkupSafe (from Jinja2>=2.4->flask->-r requirements.txt (line 1))
Downloading MarkupSafe-0.23.tar.gz
Building wheels for collected packages: itsdangerous, click, MarkupSafe
Running setup.py bdist_wheel for itsdangerous: started
Running setup.py bdist_wheel for itsdangerous: finished with status 'done'
Stored in directory: /root/.cache/pip/wheels/fc/a8/66/24d655233c757e178d45dea2de22a04c6d92766abfb741129a
Running setup.py bdist_wheel for click: started
Running setup.py bdist_wheel for click: finished with status 'done'
Stored in directory: /root/.cache/pip/wheels/b0/6d/8c/cf5ca1146e48bc7914748bfb1dbf3a40a440b8b4f4f0d952dd
Running setup.py bdist_wheel for MarkupSafe: started
Running setup.py bdist_wheel for MarkupSafe: finished with status 'done'
Stored in directory: /root/.cache/pip/wheels/a3/fa/dc/0198eed9ad95489b8a4f45d14dd5d2aee3f8984e46862c5748
Successfully built itsdangerous click MarkupSafe
Installing collected packages: itsdangerous, MarkupSafe, Jinja2, Werkzeug, click, flask, redis
Successfully installed Jinja2-2.8 MarkupSafe-0.23 Werkzeug-0.11.11 click-6.6 flask-0.11.1 itsdangerous-0.24 redis-2.10.5
---> cbdb581853a2
Starting dockerfiledir_redis_1
Starting dockerfiledir_web_1
Attaching to dockerfiledir_redis_1, dockerfiledir_web_1
redis_1 | 1:C 31 Oct 13:52:41.359 # Warning: no config file specified, using the default config. In order to specify a config file use redis-server /path/to/redis.conf
redis_1 | _._
redis_1 | _.-``__ ''-._
redis_1 | _.-`` `. `_. ''-._ Redis 3.2.4 (00000000/0) 64 bit
redis_1 | .-`` .-```. ```/ _.,_ ''-._
redis_1 | ( ' , .-` | `, ) Running in standalone mode
redis_1 | |`-._`-...-` __...-.``-._|'` _.-'| Port: 6379
redis_1 | | `-._ `._ / _.-' | PID: 1
redis_1 | `-._ `-._ `-./ _.-' _.-'
redis_1 | |`-._`-._ `-.__.-' _.-'_.-'|
redis_1 | | `-._`-._ _.-'_.-' | http://redis.io
redis_1 | `-._ `-._`-.__.-'_.-' _.-'
redis_1 | |`-._`-._ `-.__.-' _.-'_.-'|
redis_1 | | `-._`-._ _.-'_.-' |
redis_1 | `-._ `-._`-.__.-'_.-' _.-'
redis_1 | `-._ `-.__.-' _.-'
redis_1 | `-._ _.-'
redis_1 | `-.__.-'
redis_1 |
redis_1 | 1:M 31 Oct 13:52:41.363 # WARNING: The TCP backlog setting of 511 cannot be enforced because /proc/sys/net/core/somaxconn is set to the lower value of 128.
redis_1 | 1:M 31 Oct 13:52:41.363 # Server started, Redis version 3.2.4
redis_1 | 1:M 31 Oct 13:52:41.363 # WARNING overcommit_memory is set to 0! Background save may fail under low memory condition. To fix this issue add 'vm.overcommit_memory = 1' to /etc/sysctl.conf and then reboot or run the command 'sysctl vm.overcommit_memory=1' for this to take effect.
redis_1 | 1:M 31 Oct 13:52:41.364 # WARNING you have Transparent Huge Pages (THP) support enabled in your kernel. This will create latency and memory usage issues with Redis. To fix this issue run the command 'echo never > /sys/kernel/mm/transparent_hugepage/enabled' as root, and add it to your /etc/rc.local in order to retain the setting after a reboot. Redis must be restarted after THP is disabled.
redis_1 | 1:M 31 Oct 13:52:41.364 * DB loaded from disk: 0.000 seconds
redis_1 | 1:M 31 Oct 13:52:41.364 * The server is now ready to accept connections on port 6379
web_1 | * Running on http://0.0.0.0:5000/ (Press CTRL+C to quit)
web_1 | * Restarting with stat
web_1 | * Debugger is active!
web_1 | * Debugger pin code: 160-426-538至此,两个应用就跑起来了,演示完毕.
3. Yaml文件参考
在上面的yaml文件中,我们可以看到compose文件的基本结构。首先是定义一个服务名,下面是yaml服务中的一些选项条目:
image :镜像的ID
build :直接从pwd的Dockerfile来build,而非通过image选项来pull
links :连接到那些容器。每个占一行,格式为SERVICE[:ALIAS],例如 – db[:database]
external_links :连接到该compose.yaml文件之外的容器中,比如是提供共享或者通用服务的容器服务。格式同links
command :替换默认的command命令
ports : 导出端口。格式可以是:
ports:-"3000"-"8000:8000"-"127.0.0.1:8001:8001"expose :导出端口,但不映射到宿主机的端口上。它仅对links的容器开放。格式直接指定端口号即可。
volumes :加载路径作为卷,可以指定只读模式:
volumes:-/var/lib/mysql
 - cache/:/tmp/cache
 -~/configs:/etc/configs/:ro
volumes_from :加载其他容器或者服务的所有卷
environment:- RACK_ENV=development
  - SESSION_SECRET
env_file :从一个文件中导入环境变量,文件的格式为RACK_ENV=development
extends :扩展另一个服务,可以覆盖其中的一些选项。一个sample如下:
common.yml
webapp:
  build:./webapp
  environment:- DEBUG=false- SEND_EMAILS=false
development.yml
web:extends:
    file: common.yml
    service: webapp
  ports:-"8000:8000"
  links:- db
  environment:- DEBUG=true
db:
  image: postgres
net :容器的网络模式,可以为”bridge”, “none”, “container:[name or id]”, “host”中的一个。
dns :可以设置一个或多个自定义的DNS地址。
dns_search :可以设置一个或多个DNS的扫描域。
其他的 working_dir, entrypoint, user, hostname, domainname, mem_limit, privileged, restart, stdin_open, tty, cpu_shares ,和 docker run 命令是一样的,这些命令都是单行的命令。例如:
cpu_shares:73
working_dir:/code
entrypoint: /code/entrypoint.sh
user: postgresql
hostname: foo
domainname: foo.com
mem_limit:1000000000
privileged:true
restart: always
stdin_open:true
tty:true
4. docker-compose常用命令
在第二节中的 docker-compose up ,这两个容器都是在前台运行的。我们可以指定-d命令以daemon的方式启动容器。除此之外,docker-compose还支持下面参数:
--verbose :输出详细信息
-f 制定一个非docker-compose.yml命名的yaml文件
-p 设置一个项目名称(默认是directory名)
docker-compose的动作包括:
build :构建服务
kill -s SIGINT :给服务发送特定的信号。
logs :输出日志
port :输出绑定的端口
ps :输出运行的容器
pull :pull服务的image
rm :删除停止的容器
run : 运行某个服务,例如docker-compose run web python manage.py shell
start :运行某个服务中存在的容器。
stop :停止某个服务中存在的容器。
up :create + run + attach容器到服务。
scale :设置服务运行的容器数量。例如:docker-compose scale web=2 worker=3
参考:
Compose Document