社区微信群开通啦,扫一扫抢先加入社区官方微信群

社区微信群
这是基于C/S的即时通讯,说不多说,上代码!
1.添加依赖
<?xml version="1.0" encoding="UTF-8"?>
<project xmlns="http://maven.apache.org/POM/4.0.0" xmlns:xsi="http://www.w3.org/2001/XMLSchema-instance"
xsi:schemaLocation="http://maven.apache.org/POM/4.0.0 http://maven.apache.org/xsd/maven-4.0.0.xsd">
<modelVersion>4.0.0</modelVersion>
<groupId>com.example</groupId>
<artifactId>springboot_thymeleaf</artifactId>
<version>0.0.1-SNAPSHOT</version>
<packaging>jar</packaging>
<name>springboot_thymeleaf</name>
<description>Demo project for Spring Boot</description>
<parent>
<groupId>org.springframework.boot</groupId>
<artifactId>spring-boot-starter-parent</artifactId>
<version>2.0.4.RELEASE</version>
<relativePath/> <!-- lookup parent from repository -->
</parent>
<properties>
<project.build.sourceEncoding>UTF-8</project.build.sourceEncoding>
<project.reporting.outputEncoding>UTF-8</project.reporting.outputEncoding>
<java.version>1.8</java.version>
<pagehelper.version>5.0.2</pagehelper.version>
<druid.version>1.1.6</druid.version>
</properties>
<dependencies>
<dependency>
<groupId>org.springframework.boot</groupId>
<artifactId>spring-boot-starter</artifactId>
</dependency>
<dependency>
<groupId>org.springframework.boot</groupId>
<artifactId>spring-boot-starter-test</artifactId>
<scope>test</scope>
</dependency>
<dependency>
<groupId>org.springframework.boot</groupId>
<artifactId>spring-boot-starter-web</artifactId>
</dependency>
<!--热启动 -->
<dependency>
<groupId>org.springframework.boot</groupId>
<artifactId>spring-boot-devtools</artifactId>
<optional>true</optional>
</dependency>
<!-- jdbc 逆向工程 -->
<dependency>
<groupId>org.springframework.boot</groupId>
<artifactId>spring-boot-starter-jdbc</artifactId>
</dependency>
<dependency>
<groupId>mysql</groupId>
<artifactId>mysql-connector-java</artifactId>
<scope>runtime</scope>
</dependency>
<dependency>
<groupId>org.mybatis.generator</groupId>
<artifactId>mybatis-generator-core</artifactId>
<version>1.3.3</version>
</dependency>
<!-- SpringBoot - MyBatis -->
<!-- https://mvnrepository.com/artifact/org.mybatis.spring.boot/mybatis-spring-boot-starter -->
<dependency>
<groupId>org.mybatis.spring.boot</groupId>
<artifactId>mybatis-spring-boot-starter</artifactId>
<version>1.3.2</version>
</dependency>
<dependency>
<!-- jsoup html解析器 -->
<groupId>org.jsoup</groupId>
<artifactId>jsoup</artifactId>
<version>1.11.3</version>
</dependency>
<!-- thymeleaf依赖 -->
<dependency>
<groupId>org.springframework.boot</groupId>
<artifactId>spring-boot-starter-thymeleaf</artifactId>
</dependency>
<!-- 兼容于thymeleaf的shiro -->
<dependency>
<groupId>com.github.theborakompanioni</groupId>
<artifactId>thymeleaf-extras-shiro</artifactId>
<version>2.0.0</version>
</dependency>
<!-- project lombok -->
<dependency>
<groupId>org.projectlombok</groupId>
<artifactId>lombok</artifactId>
</dependency>
<dependency>
<groupId>tk.mybatis</groupId>
<artifactId>mapper-spring-boot-starter</artifactId>
<version>2.0.0</version>
</dependency>
<!-- pagehelper -->
<dependency>
<groupId>com.github.pagehelper</groupId>
<artifactId>pagehelper</artifactId>
<version>${pagehelper.version}</version>
</dependency>
<!-- 导入Mysql数据库链接jar包 -->
<!-- <dependency>
<groupId>mysql</groupId>
<artifactId>mysql-connector-java</artifactId>
</dependency> -->
<dependency>
<groupId>com.alibaba</groupId>
<artifactId>druid</artifactId>
<version>${druid.version}</version>
</dependency>
<!-- jsion和java互转 -->
<dependency>
<groupId>com.alibaba</groupId>
<artifactId>fastjson</artifactId>
<version>1.2.3</version>
</dependency>
<dependency>
<groupId>net.sf.json-lib</groupId>
<artifactId>json-lib</artifactId>
<version>2.4</version>
<classifier>jdk15</classifier>
</dependency>
<dependency>
<groupId>commons-beanutils</groupId>
<artifactId>commons-beanutils</artifactId>
<version>1.7.0</version>
</dependency>
<dependency>
<groupId>commons-collections</groupId>
<artifactId>commons-collections</artifactId>
<version>3.1</version>
</dependency>
<dependency>
<groupId>commons-lang</groupId>
<artifactId>commons-lang</artifactId>
<version>2.5</version>
</dependency>
<dependency>
<groupId>net.sf.ezmorph</groupId>
<artifactId>ezmorph</artifactId>
<version>1.0.3</version>
</dependency>
<!-- 这两个支持websoket的依赖加了会报错 太奇怪了 -->
<!-- <dependency>
<groupId>javax</groupId>
<artifactId>javaee-api</artifactId>
<version>7.0</version>
<scope>provided</scope>
</dependency>
https://mvnrepository.com/artifact/aopalliance/aopalliance
<dependency>
<groupId>aopalliance</groupId>
<artifactId>aopalliance</artifactId>
<version>1.0</version>
</dependency> -->
</dependencies>
<build>
<plugins>
<plugin>
<groupId>org.springframework.boot</groupId>
<artifactId>spring-boot-maven-plugin</artifactId>
<configuration>
<!--热启动 -->
<fork>true</fork>
</configuration>
</plugin>
<!-- 逆向工程 -->
<plugin>
<groupId>org.mybatis.generator</groupId>
<artifactId>mybatis-generator-maven-plugin</artifactId>
<version>1.3.7</version>
<configuration>
<!--允许移动生成的文件 -->
<verbose>true</verbose>
<!-- 是否覆盖 -->
<overwrite>true</overwrite>
</configuration>
<dependencies>
<dependency>
<groupId>mysql</groupId>
<artifactId>mysql-connector-java</artifactId>
<version>5.1.30</version>
</dependency>
</dependencies>
</plugin>
</plugins>
</build>
</project>
2.定义websoket服务器
package com.example.listener;

import java.io.IOException;
import java.util.concurrent.CopyOnWriteArraySet;

import javax.websocket.OnClose;
import javax.websocket.OnError;
import javax.websocket.OnMessage;
import javax.websocket.OnOpen;
import javax.websocket.Session;
import javax.websocket.server.ServerEndpoint;

/**
 * @ServerEndpoint 注解是一个类层次的注解,它的功能主要是将目前的类定义成一个websocket服务器端,
 * 注解的值将被用于监听用户连接的终端访问URL地址,客户端可以通过这个URL来连接到WebSocket服务器端
 */
@ServerEndpoint("/websocket")
public class WebSocketListener {

	//静态变量,用来记录当前在线连接数。应该把它设计成线程安全的。
    private static int onlineCount = 0;

    //concurrent包的线程安全Set,用来存放每个客户端对应的MyWebSocket对象。若要实现服务端与单一客户端通信的话,可以使用Map来存放,其中Key可以为用户标识
    private static CopyOnWriteArraySet<WebSocketListener> webSocketSet = new CopyOnWriteArraySet<WebSocketListener>();

  //与某个客户端的连接会话,需要通过它来给客户端发送数据
    private Session session;


    /**
     * 连接建立成功调用的方法
     * @param session  可选的参数。session为与某个客户端的连接会话,需要通过它来给客户端发送数据
     */
    @OnOpen
    public void onOpen(Session session){
        this.session = session;
        webSocketSet.add(this);     //加入set中
        addOnlineCount();           //在线数加1
        System.out.println("有新连接加入!当前在线人数为" + getOnlineCount());
    }

    /**
     * 连接关闭调用的方法
     */
    @OnClose
    public void onClose(){
        webSocketSet.remove(this);  //从set中删除
        subOnlineCount();           //在线数减1
        System.out.println("有一连接关闭!当前在线人数为" + getOnlineCount());
    }

    /**
     * 收到客户端消息后调用的方法
     * @param message 客户端发送过来的消息
     * @param session 可选的参数
     */
    @OnMessage
    public void onMessage(String message, Session session) {
        System.out.println("来自客户端的消息:" + message);
        //群发消息
        for(WebSocketListener item: webSocketSet){
            try {
                item.sendMessage(message);
            } catch (IOException e) {
                e.printStackTrace();
                continue;
            }
        }
    }

    /**
     * 发生错误时调用
     * @param session
     * @param error
     */
    @OnError
    public void onError(Session session, Throwable error){
        System.out.println("发生错误");
        error.printStackTrace();
    }

    /**
     * 这个方法与上面几个方法不一样。没有用注解,是根据自己需要添加的方法。
     * @param message
     * @throws IOException
     */
    public void sendMessage(String message) throws IOException{
        this.session.getBasicRemote().sendText(message);
        //this.session.getAsyncRemote().sendText(message);
    }

    public static synchronized int getOnlineCount() {
        return onlineCount;
    }

    public static synchronized void addOnlineCount() {
        WebSocketListener.onlineCount++;
    }

    public static synchronized void subOnlineCount() {
    	WebSocketListener.onlineCount--;
    }
}
3.js代码
<!DOCTYPE html>
<html>
<head>
  <meta charset="utf-8">
  <title>即时聊天系统</title>
  <meta name="renderer" content="webkit">
  <meta http-equiv="X-UA-Compatible" content="IE=edge,chrome=1">
  <meta name="viewport" content="width=device-width, initial-scale=1, maximum-scale=1">
   <link rel="stylesheet" href="/static/layui/css/layui.css" media="all" th:href="@{static/layui/css/layui.css}">
  <!--  <link rel="stylesheet" href="/static/layui/css/modules/layim/layim.css" media="all" th:href="@{static/layui/css/modules/layim/layim.css}"> -->
  <!-- 注意:如果你直接复制所有代码到本地,上述css路径需要改成你本地的 -->
</head>
<body>
  <div th:replace="includes/witsafe/nav :: #navBar" />

  <div th:replace="includes/witsafe/menu :: #sideMenu" />
 <div class="layui-body">
<blockquote class="layui-elem-quote"></blockquote>
 <br/> <br/>
<a class="layui-btn layui-btn-normal" href="http://layim.layui.com/" target="_blank">前去LayIM官网</a>


    Welcome<br/><input id="text" type="text"/>
    <button onclick="send()">发送消息</button>
    <hr/>
    <button onclick="closeWebSocket()">关闭WebSocket连接</button>
    <hr/>
    <div id="message"></div>
</div>
<!--   <script th:src="@{static/js/jquery-2.0.3.min.js}"></script> -->
  <script th:src="@{static/layui/layui.js}"></script>
  <script th:src="@{static/cjy.main.js}"></script>
<!-- 注意:如果你直接复制所有代码到本地,上述js路径需要改成你本地的 -->
<script>

//建立WebSocket通讯
var websocket = null;
//判断当前浏览器是否支持WebSocket
if ('WebSocket' in window) {
   websocket = new WebSocket("ws://localhost:8000/websocket");
}
else {
   alert('当前浏览器 Not support websocket')
}

//连接发生错误的回调方法
websocket.onerror = function () {
   setMessageInnerHTML("WebSocket连接发生错误");
};

//连接成功建立的回调方法
websocket.onopen = function () {
   setMessageInnerHTML("WebSocket连接成功");
}

//接收到消息的回调方法
websocket.onmessage = function (event) {
   setMessageInnerHTML(event.data);
}

//连接关闭的回调方法
websocket.onclose = function () {
   setMessageInnerHTML("WebSocket连接关闭");
}

//监听窗口关闭事件,当窗口关闭时,主动去关闭websocket连接,防止连接还没断开就关闭窗口,server端会抛异常。
window.onbeforeunload = function () {
   closeWebSocket();
}

//将消息显示在网页上
function setMessageInnerHTML(innerHTML) {
   document.getElementById('message').innerHTML += innerHTML + '<br/>';
}

//关闭WebSocket连接
function closeWebSocket() {
   websocket.close();
}

//发送消息
function send() {
   var message = document.getElementById('text').value;
   websocket.send(message);
}


</script>

</body>
</html>
4.效果
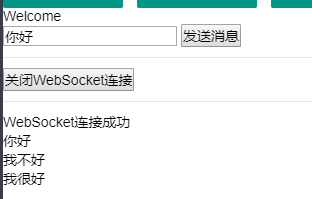
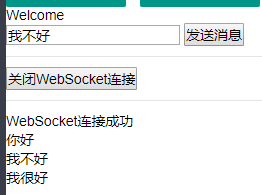
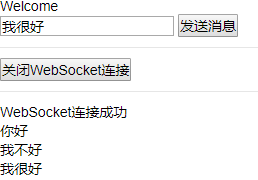

分别为客户端1,客户端2和客户端3的聊天效果 类似群聊
如果觉得我的文章对您有用,请随意打赏。你的支持将鼓励我继续创作!
