社区微信群开通啦,扫一扫抢先加入社区官方微信群

社区微信群
今天主要是对于网络请求框架Retrofit2.0做一次总结,并通过具体实例展示一下Retrofit2.0的使用方法。
Retrofit2.0是一款基于OkHttp的非常适用于RESTful URL格式的HTTP网络请求框架。OkHttp是Square公司贡献的一款轻量级网络请求框架,我在这里就不做具体介绍了,后续我会对这些主流的网络框架的优缺做个总结,RESTful是一种软件架构风格,设计风格,而不是标准,只是提供了一组设计原则和约束条件,RESTful主要用于客户端和服务器交互类的软件,基于这个风格设计的软件,可以更简洁、更有层次、更易于实现缓存等机制(摘自百科,具体的原则和条件查看)。
Retrofit2.0通过注解配置网络参数,可以按照我们的规则去构造实际的HTTP请求,能够灵活设置URL、头部、请求体、返回值等,其还支持同步、异步请求数据,能灵活搭配converter-gson等多种解析框架和RxJava2的响应式编程模式,在设计上高度解耦,在使用上灵活方便,而在性能上,更因为是集成自OkHttp具有性能好,处理速度快等优点。
我觉得可以把Retrofit2.0的使用分为以下几个步骤:
下面我们就来拿获取天气信息的小例子来看看效果,天气网址API网址,这个例子的主要作用就是完整的简单的使用一下Retrofit2.0,让我们的大脑对于Retrofit2.0的使用过程有一个整体的认识,而具体的注解标识参数讲解会在稍后介绍。
这是我们所添加的依赖,因为retrofit底层对于网络的默认访问也是基于okhttp的,所以我们也得添加okhttp
compile 'com.squareup.retrofit2:retrofit:2.3.0'
compile 'com.squareup.okhttp3:okhttp:3.8.0'
这是我们所添加的权限,因为网络权限只是普通权限,android6.0之后也不需要动态获取,直接在清单文件配置即可
<uses-permission android:name="android.permission.INTERNET" />这是我们所创建的IService接口,通过@GET注解标识为get请求,@GET中所填写的”data/sk/{location}”和后面将介绍的baseUrl(http://www.weather.com.cn/)组成完整的天气网址,其中{location}相当于占位符,我们可以通过weatherInfo方法中的@Path进行替换,在本例中传入的实参locationCode即“101010100.html”
public interface IService {
//天气网址:http://www.weather.com.cn/data/sk/101010100.html
@GET("data/sk/{location}")
Call<WeatherBean> weatherInfo(@Path("location") String locationCode);
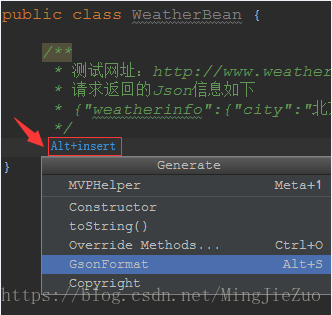
}这是我们所需要的WeatherBean类,用来接收服务器给我们返回的数据,由于本例中服务器返回的json数据,所以我们可以将WeatherBean直接通过AS自带插件GsonFormat来自动生成字段和方法,非常方便
这是具体的WeatherBean代码 ,请求成功后的Json信息模板也写在了注释里,我们可以通过返回的Json信息来自动生成字段方法。
public class WeatherBean {
    /**
     * 测试网址:http://www.weather.com.cn/data/sk/101010100.html
     * 请求返回的Json信息如下
     * {"weatherinfo":{"city":"北京","cityid":"101010100","temp":"27.9","WD":"南风","WS":"小于3级","SD":"28%","AP":"1002hPa","njd":"暂无实况","WSE":"<3","time":"17:55","sm":"2.1","isRadar":"1","Radar":"JC_RADAR_AZ9010_JB"}}
     */

    private WeatherinfoBean weatherinfo;

    public WeatherinfoBean getWeatherinfo() {
        return weatherinfo;
    }

    public void setWeatherinfo(WeatherinfoBean weatherinfo) {
        this.weatherinfo = weatherinfo;
    }

    public static class WeatherinfoBean {
        /**
         * city : 北京
         * cityid : 101010100
         * temp : 27.9
         * WD : 南风
         * WS : 小于3级
         * SD : 28%
         * AP : 1002hPa
         * njd : 暂无实况
         * WSE : <3
         * time : 17:55
         * sm : 2.1
         * isRadar : 1
         * Radar : JC_RADAR_AZ9010_JB
         */

        private String city;
        private String cityid;
        private String temp;
        private String WD;
        private String WS;
        private String SD;
        private String AP;
        private String njd;
        private String WSE;
        private String time;
        private String sm;
        private String isRadar;
        private String Radar;

        public String getCity() {
            return city;
        }

        public void setCity(String city) {
            this.city = city;
        }

        public String getCityid() {
            return cityid;
        }

        public void setCityid(String cityid) {
            this.cityid = cityid;
        }

        public String getTemp() {
            return temp;
        }

        public void setTemp(String temp) {
            this.temp = temp;
        }

        public String getWD() {
            return WD;
        }

        public void setWD(String WD) {
            this.WD = WD;
        }

        public String getWS() {
            return WS;
        }

        public void setWS(String WS) {
            this.WS = WS;
        }

        public String getSD() {
            return SD;
        }

        public void setSD(String SD) {
            this.SD = SD;
        }

        public String getAP() {
            return AP;
        }

        public void setAP(String AP) {
            this.AP = AP;
        }

        public String getNjd() {
            return njd;
        }

        public void setNjd(String njd) {
            this.njd = njd;
        }

        public String getWSE() {
            return WSE;
        }

        public void setWSE(String WSE) {
            this.WSE = WSE;
        }

        public String getTime() {
            return time;
        }

        public void setTime(String time) {
            this.time = time;
        }

        public String getSm() {
            return sm;
        }

        public void setSm(String sm) {
            this.sm = sm;
        }

        public String getIsRadar() {
            return isRadar;
        }

        public void setIsRadar(String isRadar) {
            this.isRadar = isRadar;
        }

        public String getRadar() {
            return Radar;
        }

        public void setRadar(String Radar) {
            this.Radar = Radar;
        }
    }
}
创建我们的Retrofit实例,通过构造者模式指定了baseUrl和Converter.Factory,后者是用于数据解析的,在本例中服务器返回的是json数据,所以这里直接设置了GsonConverterFactory来完成对象的转化
    /** 去请求天气信息*/
    private void toRequestWeatherInfo() {
        Retrofit retrofit = new Retrofit.Builder()
                //RequestHttp.WeatherBaseUrl = "http://www.weather.com.cn/"
                .baseUrl(RequestHttp.WeatherBaseUrl)
                //记得添加相关依赖
                .addConverterFactory(GsonConverterFactory.create())
                .build();
        IService weather = retrofit.create(IService.class);
        Call<WeatherBean> weatherBeanCall = weather.weatherInfo("101010100.html");
        //这里只是写了异步请求,你也可以进行同步请求
        weatherBeanCall.enqueue(new Callback<WeatherBean>() {
            @Override
            public void onResponse(Call<WeatherBean> call, Response<WeatherBean> response) {
                Log.i("Tag123",response.body().getWeatherinfo().getCity()+"-"+response.body().getWeatherinfo().getWD());
            }

            @Override
            public void onFailure(Call<WeatherBean> call, Throwable t) {
                Log.i("Tag123","onFailure");
            }
        });
    }
使用GsonConverterFactory,记得要在gradle中添加相关依赖
compile 'com.squareup.retrofit2:converter-gson:2.3.0'通过上面几步,一个完整的Retrofit请求就已经出来了,最后来看下运行结果
通过官方文档我们可以知道,每个方法都必须有一个HTTP注解用来提供请求方法和相对URL,Retrofit2.0的注解如下。如果你对于注解还不了解,可以查看Android 注解详解。
| Retrofit2.0中的注解 | 具体名称 |
|---|---|
| 请求方法的注解 | @GET、@POST、@PUT、@DELATE、@HEAD、@PATCH、@OPTIONS、@HTTP |
| 标记注解 | @FormUrlEncoded、@Multipart、@Streaming |
| 参数注解 | @Path 、@Field、 @FieldMap、 @Part、 @PartMap、 @Query、 @QueryMap、 @Body、 @Url、 @Header、 @Headers |
注解的个数比较多,如果都靠死记硬背肯定容易乱套,下面我们主要根据几个具体的情景,来看看上面注解的用法,以及注解之间的配合使用。
在一些固定的网址请求中,例如刚才我们使用到的获取天气接口,如果我们只需要获取北京的天气,那么直接可以使用@GET注解时传入我们所需要的全部元素
public interface IService {
    //完整北京天气网址:http://www.weather.com.cn/data/sk/101010100.html
    //baseUrl:http://www.weather.com.cn/
    //只需要获取北京的天气,不考虑其他地区,那么这个网址就变成了一个固定网址
    @GET("data/sk/101010100.html")
    Call<WeatherBean> weatherBJInfo();
}
WeatherBean类没有展示出代码,你可以直接将上面完整网址在浏览器中打开获得服务器返回的Json数据,再通过Android Studio提供的GsonFormat自动生成bean字段方法,后面的例子同样如此处理即可,随后Retrofit中的部分代码如下
IService weather = retrofit.create(IService.class);
Call<WeatherBean> weatherBeanCall = weather.weatherBJInfo();我们可以通过在@GET注解里包含替换块{}和在方法中使用参数@path来实现URL的动态更新,上面的demo就是用的这种方式
public interface IService {
    //完整北京天气网址:http://www.weather.com.cn/data/sk/101010100.html
    //完整上海天气网址:http://www.weather.com.cn/data/sk/101020100.html
    //baseUrl:http://www.weather.com.cn/
    @GET("data/sk/{location}")
    Call<WeatherBean> weatherInfo(@Path("location") String locationCode);
}
在Retrofit中的部分代码如下
IService weather = retrofit.create(IService.class);
//Call<WeatherBean> weatherBeanCall = weather.weatherInfo("101010100.html");
Call<WeatherBean> weatherBeanCall = weather.weatherInfo("101020100.html");
我们通过在@GET中添加一个{location}替换块,相当于占位符作用,当调用weatherInfo方法传入@path所标注的参数locationCode后,在实际运行时就会进行相应替换。
我们可以通过@Query来添加查询参数,因为没有找到单个参数的开放api,我就直接用自己的一个项目网址来测试了,网址并不重要,因为知识点都是一样的
public interface IService {
    //获取图片列表的网址:http://h5.comeup.com.cn:8081/upweb/msg?method=listImgs
    //baseUrl:http://h5.comeup.com.cn:8081/upweb/
    @GET("msg")
    Call<QueryImgBean> imgListInfo(@Query("method") String method);
}
在Retrofit中的部分代码
IService picList = retrofit.create(IService.class);
Call<QueryImgBean> weatherBeanCall = picList.imgListInfo("listImgs");
我们通过@Query参数来动态的指定网址中?method=listImgs部分,其实这个网址完全可以使用@GET(“msg?method=listImgs”),因为listImgs是不变的,但是这里主要就是演示一下@Query参数的使用方法。
在实际开发里,多个参数的查询方法是非常常见的,我们主要通过@QueryMap参数来添加查询参数,方法跟@Query参数大致一样,下面我们来看一个反地理编码的网址:
public interface IService {
    //反地理编码网址:http://api.map.baidu.com/geocoder/v2/?location=39.904239,116.510388&output=json&pois=1&ak=Oo5xCoWby8wCGC0tUvRNQ5cv6tdGU72c
    //baseUrl:http://api.map.baidu.com/
    @GET("geocoder/v2/")
    Call<MyLocationBean> location(@QueryMap Map<String, String> map);
}
这是我们的Retrofit的部分代码:
        //为了方便展示代码,直接简单粗暴的都写在一起了
        Map<String, String> map = new HashMap<>();
        map.put("output","json");
        map.put("pois","1");
        //百度地图web端ak,可能后期会失效
        map.put("ak","Oo5xCoWby8wCGC0tUvRNQ5cv6tdGU72c");
        //经纬度信息
        map.put("location","39.904239,116.510388");
        IService picList = retrofit.create(IService.class);
        Call<MyLocationBean> location = picList.location(map);
其实使用方法跟@Query一样,这里是通过一个map容器来将需要的每个参数字段拼接进请求网址里。
我们不仅可以通过@GET(“xxx”)来静态提供完整url,我们也能直接通过@Url来动态提供:
    //只需要获取北京的天气,不考虑其他地区,那么这个网址就变成了一个固定网址
    //完整北京天气网址:http://www.weather.com.cn/data/sk/101010100.html
    //baseUrl:http://www.weather.com.cn/
    @GET
    Call<WeatherBean> weatherBJInfoByUrl(@Url String url);
这是我们Retrofit中的部分代码:
IService weather = retrofit.create(IService.class);
Call<WeatherBean> weatherBeanCall = weather.weatherBJInfoByUrl("data/sk/101010100.html");在我们实际编写代码过程中,我们经常会把一个对象转换成Json串来作为整个HTTP的请求体来传给服务器,这个时候就用到了@Body这个注解,@Body注解的用法也很简单,只需要标识一下我们的参数对象即可:
    //POST @Body方式的:http://x.x.x.x:8088/patrolapp/iniInterface/taskList.do
    //请求体:{"userid":"234"}
    //baseUrl:http://x.x.x.x:8088/
    //因为是一个项目里的网址,所以就不公开了,但是这种方式亲测有效
    @POST("patrolapp/iniInterface/taskList.do")
    Call<PostBodyReponseBeanTwo> translateWordByPost(@Body PostBodyBean body);
这是我们的Body请求体bean:
public class PostBodyBean {
    /** 因为userid字段名字和PostBodyBean变量名字一样,所以不需要@SerializedName("userid"),注解里的userid字段为json串(请求体)里面字段名字,Retrofit会自动映射*/
    public String userid;
    public PostBodyBean(String userid) {
        this.userid = userid;
    }
}
这是我们的Retrofit中的部分代码:
IService service = retrofit.create(IService.class);
Call<PostBodyReponseBeanTwo> pageVo = service.translateWordByPost(new PostBodyBean("234"));
其中PostBodyReponseBeanTwo类为接收请求数据成功后返回的json数据类,在这里就不展示了,如果感兴趣的可以查看下Demo,代码都很简单。
有的时候,我们在请求数据的时候,经常需要将一个对象的Json串作为请求网址的一个参数来传给服务器,在这种时候,我们就不能像上面那样处理了,例如下面这个例子:
    //查询信息:http://h5.comeup.com.cn:8081/upweb/message/list?source=android&token=xxx&pageVo={"pullType":"","size":10,"orderTime":""}
    //baseUrl:http://h5.comeup.com.cn:8081/upweb/
    @POST("message/list")
    Call<PostBodyReponseJsonBean> registerPostBody(@Body RequestBody body);
这是我们的Retrofit的部分代码:
IService service = retrofit.create(IService.class);
RequestBody body = RequestBody.create(MediaType.parse("application/x-www-form-urlencoded"), "source=android&token=xxx&pageVo={}");
Call<PostBodyReponseJsonBean> pageVo = service.registerPostBody(body);
哈虽然可以,但这种方式比较简单粗暴,其实更好的方法可以看下文
当在方法上存在@FormUrlEncoded时,POST提交数据方式对应的Content-Type:application/x-www-form-urlencoded,我们可以通过@POST指定部分网址,然后通过一个或多个@Field拼接参数即可,当然你也可以使用@FieldMap通过map容器一次拼接多个参数,其用法与@QueryMap大体一致,在这里就不单独介绍了,下面我们来看一个有道词典翻译api的网址:
public interface IService {
    //有道词典翻译:http://fanyi.youdao.com/translate?doctype=json&jsonversion=&type=&keyfrom=&model=&mid=&imei=&vendor=&screen=&ssid=&network=&abtest=&i=love
    //当前网址翻译单词:love
    //baseUrl:http://fanyi.youdao.com/
    @FormUrlEncoded
    @POST("translate?doctype=json&jsonversion=&type=&keyfrom=&model=&mid=&imei=&vendor=&screen=&ssid=&network=&abtest=")
    Call<YDbean> translateWord(@Field("i") String translatedWord);
}
这是我们的Retrofit的部分代码:
IService service = retrofit.create(IService.class);
Call<YDbean> ydBean = service.translateWord("love");在这里我就直接为大家演示一个Retrofit2上传图片的例子,下面是我们的IService接口:
public interface IService {
    //上传图片:http://image.comeup.com.cn:7002/uploadweb/imgUpload/taskImg?method=publishTaskImg&token=xxx&source=android&codeImg=需要上传的图片file
    //baseUrl:http://image.comeup.com.cn:7002/uploadweb/
    //因为使用的是公司的服务器,所以token值没有给出,例子都是亲测有效的,测试机华为MATE7 6.0、OPPO R7 4.4.4
    @Multipart
    @POST("imgUpload/taskImg")
    Call<PhotoBean> upLoadPhoto(@Part MultipartBody.Part codeImg, @PartMap Map<String, RequestBody> params);
}
在这里@Multipart允许我们使用多个@Part来拼接多个参数,@Part的用法也很简单,例如@Part(“method”) RequestBody methodValue,如果参数过多时,我们也可以使用@PartMap来直接添加一个盛放参数的Map集合,其和上文的@FieldMap用法都是共通的,其中PhotoBean类是用来接收上传成功后服务器返回的Json信息的,其代码如下:
public class PhotoBean {
    /**
     * 上传图片成功后服务器返回的json信息
     * JSON样式:{"data":"files/task/20180523/1527070539100.png","errorCode":"0","errorMsg":null,"encrypt":false}
     */
    private String data;
    private String errorCode;
    private Object errorMsg;
    private boolean encrypt;

    public String getData() {
        return data;
    }

    public void setData(String data) {
        this.data = data;
    }

    public String getErrorCode() {
        return errorCode;
    }

    public void setErrorCode(String errorCode) {
        this.errorCode = errorCode;
    }

    public Object getErrorMsg() {
        return errorMsg;
    }

    public void setErrorMsg(Object errorMsg) {
        this.errorMsg = errorMsg;
    }

    public boolean isEncrypt() {
        return encrypt;
    }

    public void setEncrypt(boolean encrypt) {
        this.encrypt = encrypt;
    }
}
接下来添加我们的权限,不仅需要在清单中添加:
<uses-permission android:name="android.permission.WRITE_EXTERNAL_STORAGE" />
<uses-permission android:name="android.permission.READ_EXTERNAL_STORAGE" />
因为在android6.0系统以上时,需要动态获取权限:
    //当Android6.0系统以上时,动态获取权限
    private static final String[] PERMISSIONS = new String[]{
            Manifest.permission.WRITE_EXTERNAL_STORAGE,
            Manifest.permission.READ_EXTERNAL_STORAGE};
    //权限的标志
    private static final  int PERMISSION_CODES = 1001;
    private boolean permissionGranted = true;

    /** 动态的进行权限请求*/
    @TargetApi(Build.VERSION_CODES.M)
    private void requestPermission(){
        List<String> p = new ArrayList<>();
        for(String permission :PERMISSIONS){
            if(ContextCompat.checkSelfPermission(this,permission) != PackageManager.PERMISSION_GRANTED){
                p.add(permission);
            }
        }
        if(p.size() > 0){
            requestPermissions(p.toArray(new String[p.size()]),PERMISSION_CODES);
        }
    }

    @Override
    public void onRequestPermissionsResult(int requestCode, @NonNull String[] permissions, @NonNull int[] grantResults) {
        switch (requestCode){
            case PERMISSION_CODES:
                if(grantResults.length > 0 && grantResults[0] == PackageManager.PERMISSION_DENIED){
                    permissionGranted = false;
                }else {
                    permissionGranted = true;
                }
                break;
        }
    }
这是我们的Retrofit的部分代码:
        IService service = retrofit.create(IService.class);
        //type类型既可以上传图片,也可以上传简单键值对
        MediaType type = MediaType.parse("multipart/form-data");
        //为了直观,图片路径我就直接硬编码了
        File file = new File("sdcard/hy/pic/1527133940554.jpg");
        RequestBody photoRequestBody = RequestBody.create(type, file);
        //其中codeImg为我们网址中file需要对应的参数
        MultipartBody.Part codeImg = MultipartBody.Part.createFormData("codeImg", file.getName(), photoRequestBody);
        //这是我们需要的其他参数,如果这里的参数是固定值,我们就可以直接写死在@POST里面,例如method和source参数
        Map<String, RequestBody> map = new HashMap<>();
        map.put("method", RequestBody.create(type, "publishTaskImg"));
        map.put("token", RequestBody.create(type, "xxx"));
        map.put("source", RequestBody.create(type, "android"));
Call<PhotoBean> ydBean = service.upLoadPhoto(codeImg, map);这个我就直接根据完档写下用法了,这是@Header的用法,能够动态指定头部信息,添加HTTP请求报文头的目的就是为了能给我们的请求提供一些附属信息:
@GET("user")
Call<User> getUser(@Header("Authorization") String authorization)
这是@Headers的用法,可以静态添加请求头部信息,上面的”Authorization”相当于这里的”Cache-Control”:
@Headers("Cache-Control: max-age=640000")
@GET("widget/list")
Call<List<Widget>> widgetList();
同时@Headers还能够添加多个头部信息:
@Headers({
    "Accept: application/vnd.github.v3.full+json",
    "User-Agent: Retrofit-Sample-App"
})
@GET("users/{username}")
Call<User> getUser(@Path("username") String username);
相信通过上面的介绍,你对于Retrofit2.0的注解应该已经有个简单的认识了,其他的没有介绍到的注解,自己可以写个例子试一试,其实原理用法都是共通的。
有的时候,我们需要发出的请求共用一个OkHttpClient就好;有的时候,我们需要查看一下HTTP请求的日志信息;有的时候,我们需要为我们的请求添加一个HTTP请求报文头,来为我们的请求提供一些附属信息等等
        //如果想所有请求都共用一个okHttpClient,则采用单例模式就好
        OkHttpClient.Builder okHttpClient = new OkHttpClient.Builder();
        Retrofit retrofit1 = new Retrofit.Builder()
                .baseUrl(RequestHttp.REGISER_BASEURL1)
                //添加OkHttpClient,源码可以看到client()后会直接调用callFactory(okhttp3.Call.Factory factory)方法
                .client(okHttpClient.build())
                .build();
        Retrofit retrofit2 = new Retrofit.Builder()
                .baseUrl(RequestHttp.REGISER_BASEURL2)
                .client(okHttpClient.build())
.build();我们需要在gradle文件中添加依赖,注意版本与okhttp3保持一致:
    //记得要与compile 'com.squareup.okhttp3:okhttp:3.8.0'版本保持一致
    //否则会报错:java.lang.NoClassDefFoundError: okhttp3.internal.Platform
    compile 'com.squareup.okhttp3:logging-interceptor:3.8.1'
为okHttpClient添加需要的拦截器:
        //声明日志类
        HttpLoggingInterceptor httpLoggingInterceptor = new HttpLoggingInterceptor();
        //设定日志级别,分别为NONE、BASIC、HEADERS、BODY
        httpLoggingInterceptor.setLevel(HttpLoggingInterceptor.Level.BODY);
        //声明一个OkHttpClient
        OkHttpClient.Builder okHttpClient = new OkHttpClient.Builder();
        //添加拦截器
okHttpClient.addInterceptor(httpLoggingInterceptor);如果logging-interceptor不能满足你的要求,或者你想要对于请求数据做些自己的处理,那么可以自定义一个拦截器:
//这里使用的匿名内部类,来实现一个日志拦截器
okHttpClient.addInterceptor(new Interceptor() {
            @Override
            public okhttp3.Response intercept(Chain chain) throws IOException {
                //获得Request
                Request request = chain.request();
                //在这里我们可以添加统一的header信息
                request.newBuilder().header("token","xxx");
                //打印请求信息
                Log.i("Tag","url:" + request.url()+"n method:" + request.method()+"n request-body:" + request.body()+"n header:"+request.header("token"));
                //记录请求的开始时间
                long startNs = System.nanoTime();
                okhttp3.Response response;
                try {
                    response = chain.proceed(request);
                } catch (Exception e) {
                    throw e;
                }
                long tookMs = TimeUnit.NANOSECONDS.toMillis(System.nanoTime() - startNs);
                //打印请求耗时
                Log.i("Tag","请求耗时:"+tookMs+"ms");
                return response;
            }
});在我们自定义ConverterFactory之前,我觉得我们有必要先看一下GsonConverterFactory的实现,不管是在思路上还是在写法上,这都是一个非常非常值得借鉴模仿的示例。
这是我们的Converter.Factory类,我们所有自定义的ConverterFactory都是继承于它,GsonConverterFactory同样也不例外,在这里我们可以看到,Converter.Factory类是一个抽象类,并提供了3个公开方法
public interface Converter<F, T> {
  T convert(F value) throws IOException;

 //为了防止代码片段过长,我把源码注释都去掉了,你自己可以在AS中查看
  abstract class Factory {
   //将HTTP响应体ResponseBody转换成我们需要的bean
    public @Nullable Converter<ResponseBody, ?> responseBodyConverter(Type type,
        Annotation[] annotations, Retrofit retrofit) {
      return null;
    }
    //将@Body、@Part、@PartMap注解的数据转换为HTTP请求体RequestBody
    public @Nullable Converter<?, RequestBody> requestBodyConverter(Type type,
        Annotation[] parameterAnnotations, Annotation[] methodAnnotations, Retrofit retrofit) {
      return null;
    }

    public @Nullable Converter<?, String> stringConverter(Type type, Annotation[] annotations,
        Retrofit retrofit) {
      return null;
    }

    protected static Type getParameterUpperBound(int index, ParameterizedType type) {
      return Utils.getParameterUpperBound(index, type);
    }

    protected static Class<?> getRawType(Type type) {
      return Utils.getRawType(type);
    }
  }
}
接下来就是GsonConverterFactory类,代码并不多,主要是继承了Converter.Factory类,并重写了responseBodyConverter和requestBodyConverter方法:
public final class GsonConverterFactory extends Converter.Factory {
  public static GsonConverterFactory create() {
    return create(new Gson());
  }

  @SuppressWarnings("ConstantConditions") // Guarding public API nullability.
  public static GsonConverterFactory create(Gson gson) {
    if (gson == null) throw new NullPointerException("gson == null");
    return new GsonConverterFactory(gson);
  }

  private final Gson gson;

  private GsonConverterFactory(Gson gson) {
    this.gson = gson;
  }

  @Override
  public Converter<ResponseBody, ?> responseBodyConverter(Type type, Annotation[] annotations,
      Retrofit retrofit) {
    TypeAdapter<?> adapter = gson.getAdapter(TypeToken.get(type));
    return new GsonResponseBodyConverter<>(gson, adapter);
  }

  @Override
  public Converter<?, RequestBody> requestBodyConverter(Type type,
      Annotation[] parameterAnnotations, Annotation[] methodAnnotations, Retrofit retrofit) {
    TypeAdapter<?> adapter = gson.getAdapter(TypeToken.get(type));
    return new GsonRequestBodyConverter<>(gson, adapter);
  }
}
这是上面responseBodyConverter方法需要的GsonResponseBodyConverter类,主要作用就是将HTTP响应体ResponseBody转换成我们需要的类型:
final class GsonResponseBodyConverter<T> implements Converter<ResponseBody, T> {
  private final Gson gson;
  private final TypeAdapter<T> adapter;

  GsonResponseBodyConverter(Gson gson, TypeAdapter<T> adapter) {
    this.gson = gson;
    this.adapter = adapter;
  }

  @Override public T convert(ResponseBody value) throws IOException {
    JsonReader jsonReader = gson.newJsonReader(value.charStream());
    try {
      return adapter.read(jsonReader);
    } finally {
      value.close();
    }
  }
}
这是上面requestBodyConverter方法需要的GsonRequestBodyConverter类,主要作用就是将请求数据转换成HTTP请求体RequestBody:
final class GsonRequestBodyConverter<T> implements Converter<T, RequestBody> {
  private static final MediaType MEDIA_TYPE = MediaType.parse("application/json; charset=UTF-8");
  private static final Charset UTF_8 = Charset.forName("UTF-8");

  private final Gson gson;
  private final TypeAdapter<T> adapter;

  GsonRequestBodyConverter(Gson gson, TypeAdapter<T> adapter) {
    this.gson = gson;
    this.adapter = adapter;
  }

  @Override public RequestBody convert(T value) throws IOException {
    Buffer buffer = new Buffer();
    Writer writer = new OutputStreamWriter(buffer.outputStream(), UTF_8);
    JsonWriter jsonWriter = gson.newJsonWriter(writer);
    adapter.write(jsonWriter, value);
    jsonWriter.close();
    return RequestBody.create(MEDIA_TYPE, buffer.readByteString());
  }
}
从上面两个类中我们可以看到,既然我们能拿到请求数据和响应数据,我们就当然可以在其返回之前做些自己的特定需求定制,这也就是我们自定义ConverterFactory的思路。
分析完GsonConverterFactory之后,让我们来定义一个我们自己的ConverterFactory,我们的需求是对服务器返回的数据先进行解密操作再转换成我们需要的bean,这是我们自己定义的CryptConverterFactory类:
public final class CryptConverterFactory extends Converter.Factory{

    public static CryptConverterFactory create() {
        return create(new Gson());
    }

    @SuppressWarnings("ConstantConditions") // Guarding public API nullability.
    public static CryptConverterFactory create(Gson gson) {
        if (gson == null) throw new NullPointerException("gson == null");
        return new CryptConverterFactory(gson);
    }

    private final Gson gson;

    private CryptConverterFactory(Gson gson) {
        this.gson = gson;
    }

    @Nullable
    @Override
    public Converter<?, RequestBody> requestBodyConverter(Type type, Annotation[] parameterAnnotations, Annotation[] methodAnnotations, Retrofit retrofit) {
        //@body注解时,会调用此方法
        TypeAdapter<?> adapter = gson.getAdapter(TypeToken.get(type));
        return new MyCryptRequestConverter(gson);
    }

    @Nullable
    @Override
    public Converter<ResponseBody, ?> responseBodyConverter(Type type, Annotation[] annotations, Retrofit retrofit) {
        if(type == CryptDetailBean.class){
            return new MyCryptRespoceConverter(gson, type);
        }
        //自己不能处理的类型交给后面的ConverterFactory处理
        return null;
    }
}
写法是不是非常熟悉,跟GsonConverterFactory的代码大同小异,在这里我就直接使用了Gson,避免重复造轮子嘛,注意如果遇到我们不能处理的类型记得返回null,交给后面的ConverterFactory进行处理。
当使用@Body注解时,就会调用上面的requestBodyConverter方法,这是所需要的MyCryptRequestConverter类:
final class MyCryptRequestConverter<T> implements Converter<T, RequestBody> {
    private static final MediaType MEDIA_TYPE = MediaType.parse("application/json; charset=UTF-8");
    private final Gson gson;

    MyCryptRequestConverter(Gson gson) {
        this.gson = gson;
    }

    @Override public RequestBody convert(T value) throws IOException {
        String request = gson.toJson(value);
        //我们可以根据自己的需求,对于request进行一些操作
        return RequestBody.create(MEDIA_TYPE,request);
    }
}
代码不多,我们可以看到,MyCryptRequestConverter类的作用就是将请求数据转换为RequestBody对象,其实在这里我们既然知道了请求的信息request,我们当然就可以对于request做些想要的操作,例如加密等等操作。
下面这是我们的MyCryptRespoceConverter类:
final class MyCryptRespoceConverter<T> implements Converter<ResponseBody, T> {


                            版权声明:本文来源CSDN,感谢博主原创文章,遵循 CC 4.0 by-sa 版权协议,转载请附上原文出处链接和本声明。

                            原文链接:https://blog.csdn.net/MingJieZuo/article/details/80364368

                            站方申明:本站部分内容来自社区用户分享,若涉及侵权,请联系站方删除。
如果觉得我的文章对您有用,请随意打赏。你的支持将鼓励我继续创作!