社区微信群开通啦,扫一扫抢先加入社区官方微信群

社区微信群
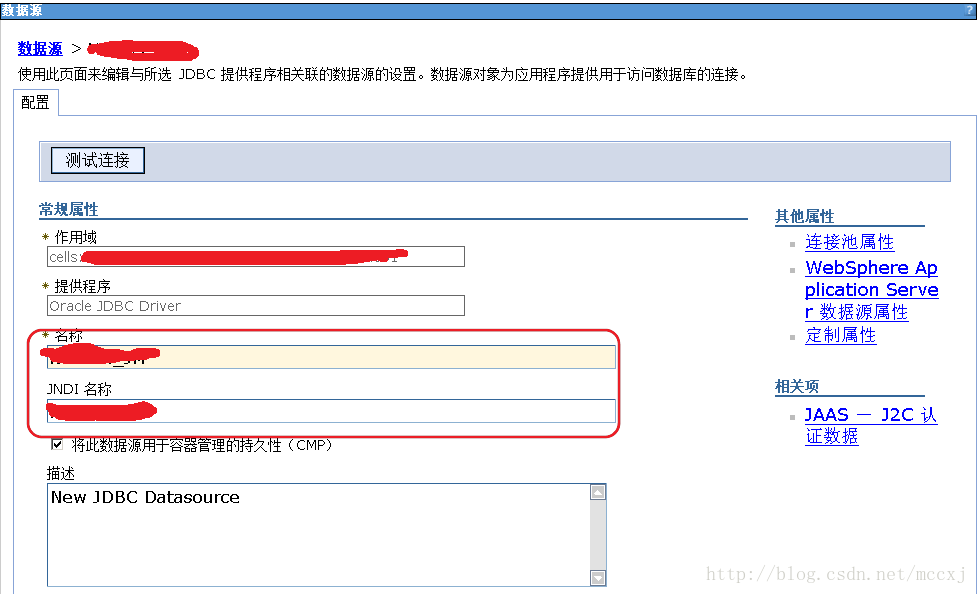
配置的步骤在下面简要说明:
下面进行详细描述。
注意:如果是第二种方式,可以忽略第三部分”链接iiop地址”
第一种方式:
<?xml version="1.0" encoding="UTF-8"?>
<beans xmlns="http://www.springframework.org/schema/beans"
 xmlns:xsi="http://www.w3.org/2001/XMLSchema-instance"
 xmlns:aop="http://www.springframework.org/schema/aop"
 xmlns:tx="http://www.springframework.org/schema/tx"
 xsi:schemaLocation="http://www.springframework.org/schema/beans http://www.springframework.org/schema/beans/spring-beans-2.0.xsd           http://www.springframework.org/schema/aop http://www.springframework.org/schema/aop/spring-aop-2.0.xsd           http://www.springframework.org/schema/tx http://www.springframework.org/schema/tx/spring-tx-2.0.xsd">

+   <bean id="GlobalConfig"
+       class="org.springframework.beans.factory.config.PropertyPlaceholderConfigurer">
+       <property name="systemPropertiesMode">
+           <value>1</value>
+       </property>
+       <property name="searchSystemEnvironment">
+           <value>true</value>
+       </property>
+       <property name="ignoreUnresolvablePlaceholders">
+           <value>true</value>
+       </property>
+   </bean>

+    <bean id="jtaTransactionManager" class="org.springframework.transaction.jta.WebSphereUowTransactionManager" />
     <tx:annotation-driven transaction-manager="jtaTransactionManager"  proxy-target-class="true" />
     <bean id="lobHandler" class="org.springframework.jdbc.support.lob.DefaultLobHandler"/>

+   <bean id="dataSource" class="org.springframework.jndi.JndiObjectFactoryBean">
+       <property name="jndiName"><value>XXX</value></property>
+       <property name="resourceRef"><value>true</value></property>
+       <property name="jndiEnvironment"><props><prop key="java.naming.provider.url">${java_naming_provider_url}</prop></props></property>
+   </bean>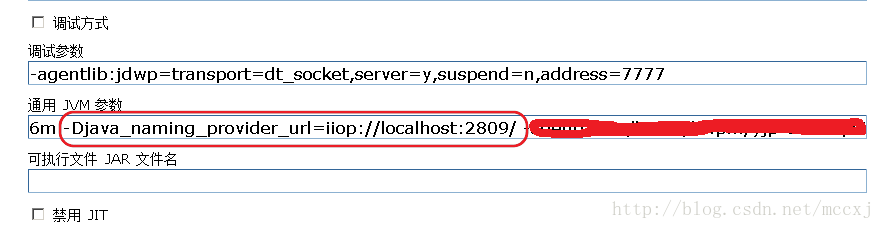
</beans>在server的java进程定义里边配置jvm参数: -Djava_naming_provider_url=iiop://localhost:port/,另外,修改启动参数需要重启server才能生效。
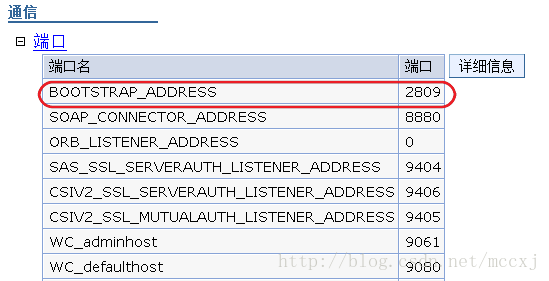
其中每个server的port都是不一样的,具体的端口通过Application servers - serverX - Communications - Ports上查看,如下图:
如果觉得我的文章对您有用,请随意打赏。你的支持将鼓励我继续创作!