社区微信群开通啦,扫一扫抢先加入社区官方微信群

社区微信群
上一篇文章中讲了json和jdk的序列化方式,这里讲使用protobuf来序列化
protobuf的介绍
Google Protocol Buffer( 简称 Protobuf) 是 Google
公司内部的混合语言数据标准,目前已经正在使用的有超过 48,162 种报文格式定义和超过 12,183 个 .proto 文件。他们用于
RPC 系统和持续数据存储系统。Protocol Buffers 是一种轻便高效的结构化数据存储格式,可以用于结构化数据串行化,或者说序列化。它很适合做数据存储或 RPC
数据交换格式。可用于通讯协议、数据存储等领域的语言无关、平台无关、可扩展的序列化结构数据格式。目前提供了 C++、Java、Python
三种语言的 API。
更详细的信息可以查看下面这篇文章,我也是从那边摘录过的
https://www.ibm.com/developerworks/cn/linux/l-cn-gpb/index.html
如果你已经熟悉了protobuf的使用可以跳过这部分。
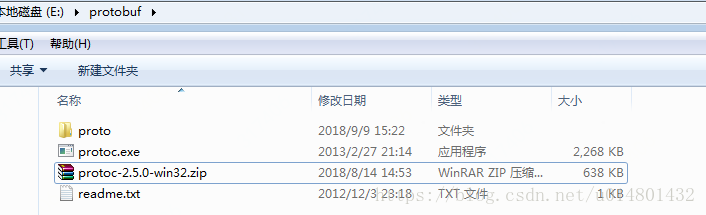
首先下载一个window版本的protobuf,我下载的是protoc-2.5.0-win32.zip的这个版本,下载链接如下:
https://github.com/protocolbuffers/protobuf/releases/download/v2.5.0/protoc-2.5.0-win32.zip
我下载的这个版本比较旧,因为我之前写的proto脚本是protobuf2的,下面的这个链接里可以下载最新的版本。
https://github.com/protocolbuffers/protobuf/releases
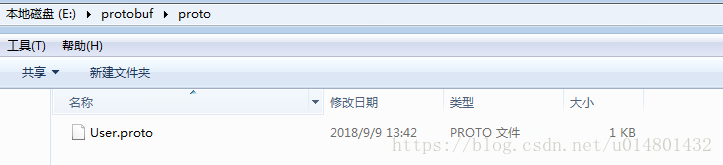
下载完成之后,解压,你会发现有个protoc.exe可执行文件,然后新建一个proto文件夹
进入 proto文件夹,新建User.proto文件。
然后用记事本打开User.proto,然后输入一下代码
syntax = "proto2";

package kafka;
option java_package = "com.yang.kafka.protobuf";
option java_outer_classname = "UserProto";

message User{
	required int64 id = 1;
	required string name = 2;
	optional string email = 3;
	required int32 sex = 4;
}
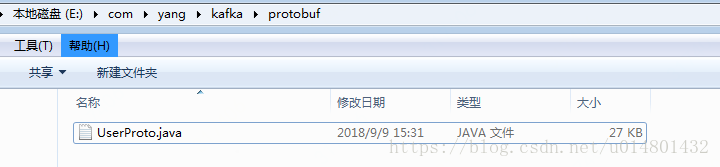
然后保存。打开cmd 进入到protoc.exe所在的目录,然后输入一下命令protoc -I=E:protobufproto --java_out=E: E:protobufprotoUser.proto,如下图:
第一个地址是proto文件所在的目录,第二个地址是输出的java文件的目录,第三个地址是proto文件的路径
命令执行成功后,你会发现在E:下生成了对应的java文件,将他copy到你的java工程中(java项目中的包名要与你之前的包名相同,否则copy进去这个java文件会报错)。
首先定义一个接口
public interface Protobufable {

	//将对象转为字节数组
	public byte[] encode();

}
然后User 实现这个接口,这里可以不实现Serializable接口,User 类代码如下:
public class User implements Serializable,Protobufable{
	private static final long serialVersionUID = 468062760765055608L;

	private Long id;

	private String name;

	private String email;
	/** {0:男,1:女} **/
	private Integer sex;

	public User() {}

	public User(Long id, String name, String email, Integer sex) {
		super();
		this.id = id;
		this.name = name;
		this.email = email;
		this.sex = sex;
	}

	/***
	 * 将byte解析为User对象
	 * @param bytes
	 */
	public User(byte[] bytes) {
		try {
			//将字节数组转换为UserProto.User对象
			UserProto.User user = UserProto.User.parseFrom(bytes);
			//UserProto.User对象转化为自己的User对象
			this.id = user.getId();
			this.name = user.getName();
			this.email = user.getEmail();
			this.sex = user.getSex();
		} catch (InvalidProtocolBufferException e) {
			e.printStackTrace();
		}
	}

	/** 编码 */
	@Override
	public byte[] encode() {
		UserProto.User.Builder builder = UserProto.User.newBuilder();
		builder.setId(id);
		builder.setName(name);
		builder.setEmail(email);
		builder.setSex(sex);
		return builder.build().toByteArray();
	}

	@Override
	public String toString() {
		return "[ID:" + id + ", 姓名:" + name + ", 性别:" + (sex==0?"男":"女") + ", 邮箱:" + email + "]";
	}

	/********************** getter & setter******************************/
	public Long getId() { return id; }
	public void setId(Long id) { this.id = id; }

	public String getName() { return name; }
	public void setName(String name) { this.name = name; }

	public String getEmail() { return email; }
	public void setEmail(String email) { this.email = email; }

	public Integer getSex() { return sex; }
	public void setSex(Integer sex) { this.sex = sex; }
	/********************** getter & setter******************************/
}
再然后,实现一个ProtobufSerializer 的序列化器,调用的实际上就是user.encode(),代码如下:
/**
 * protobuf序列化方式实现kafka消息的的序列化
 */
public class ProtobufSerializer implements Serializer<Protobufable>{

	@Override
	public void configure(Map<String, ?> configs, boolean isKey) {}

	@Override
	public byte[] serialize(String topic, Protobufable data) {
		return data.encode();
	}

	@Override
	public void close() {}
}
生产者代码:
/**
 * 生产者-使用Protobuf序列化
 */
public class ProtobufSerializerProducer {

	public static final String TOPIC_NAME = "producer-0";
	private  static Properties props = new Properties();

	static{
		 props.put("bootstrap.servers", "192.168.1.3:9092,192.168.1.128:9092,192.168.1.130:9092");
		 props.put("acks", "all");
		 props.put("retries", 0);
		 props.put("batch.size", 16384);
		 props.put("linger.ms", 1);
		 props.put("buffer.memory", 33554432);
		 props.put("key.serializer", "org.apache.kafka.common.serialization.StringSerializer");
		 props.put("value.serializer", "com.yang.kafka.serialization.ProtobufSerializer");
	}

	public static void main(String[] args) {
		 Producer<String, User> producer = new KafkaProducer<>(props);

		 User user = new User(101L,"kafka","serializer@kafka.com",1);
		 producer.send(new ProducerRecord<String, User>(TOPIC_NAME, Long.toString(user.getId()), user));

		 producer.close();
	}
}
消费者代码如下,这里对value.deserializer换成了ByteArrayDeserializer,其实就是返回的字节数组
/**
 * 消费者-使用Protobuf反序列化
 */
public class ProtobufDeserializerConsumer {
	private  static Properties props = new Properties();

	private static boolean isClose = false;

	static{
	     props.put("bootstrap.servers", "192.168.1.3:9092,192.168.1.128:9092,192.168.1.130:9092");
	     props.put("group.id", "test");
	     props.put("enable.auto.commit", "true");
	     props.put("auto.commit.interval.ms", "1000");
	     props.put("key.deserializer", "org.apache.kafka.common.serialization.StringDeserializer");
	     props.put("value.deserializer", "org.apache.kafka.common.serialization.ByteArrayDeserializer");
	}

	public  static void main(String args[]){
	     KafkaConsumer<String, byte[]> consumer = new KafkaConsumer<>(props);
	     consumer.subscribe(Arrays.asList(JSONSerializerProducer.TOPIC_NAME));

	     while (!isClose) {
	         ConsumerRecords<String, byte[]> records = consumer.poll(Duration.ofMillis(100));
	         for (ConsumerRecord<String, byte[]> record : records)
	        	 System.out.printf("key = %s, value = %s%n", record.key(), new User(record.value()));
	     }

	     consumer.close();
	}
}
消费者接收到的消息一上一篇文章中其实是一样的:
通过profobuf生成了java实体类之后,仔细的看User类,其实UserProto中生成了很多的工具类,可以实现字节数组与对象的转换。
顺便做了一个小实验,对于User user = new User(101L,"kafka","serializer@kafka.com",1);这个对象采用不同的序列化方式,输出其字节码长度,如下:
key = jdk, 字节码长度 = 292
key = json, 字节码长度 = 64
key = protobuf, 字节码长度 = 33
可以看到相同的内容,JDK的序列化方式要明显大很多,这无疑多占用了很多kafka集群的资源。当然只从上面这个无法充分的说明孰优孰劣。
这里有一篇我觉得写的很好的文章,是关于序列化效率的:http://www.sohu.com/a/136487507_505779
如果觉得我的文章对您有用,请随意打赏。你的支持将鼓励我继续创作!