社区微信群开通啦,扫一扫抢先加入社区官方微信群

社区微信群
Vert.x的各种优点本文就不再赘述了,感兴趣的朋友可以看一下博主的另一篇博文《Spring Boot同步架构与Vert.x异步架构高并发性能对比》。本文主要介绍博主整理开发的Vertx与SpringBoot整合的脚手架项目。项目旨在便于现有spring项目与Vert.x整合,既能体验Vert.x的高效又兼顾spring的泛用性,降低Vert.x的学习和使用成本,可以做到spring到Vert.x的平滑过渡。项目web层使用了vert.x-web框架,在web层与传统spring的服务层之间加入了异步服务层,异步服务层使用Service Proxies服务代理框架实现,简化了EventBus的使用。数据连接层使用了MybatisPlus框架。
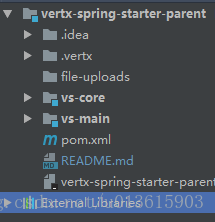
项目结构如下图。
其中vs-core模块为本项目核心,vs-main模块主要用于演示项目。
vs-main中App.java为项目启动类,代码如下。
package com.xxx;

import com.xxx.handlerfactory.RouterHandlerFactory;
import com.xxx.vertx.DeployVertxServer;
import com.xxx.vertx.VertxUtil;
import io.vertx.core.Vertx;
import io.vertx.core.VertxOptions;
import io.vertx.core.eventbus.EventBusOptions;
import io.vertx.ext.web.Router;
import org.springframework.beans.factory.annotation.Value;
import org.springframework.boot.SpringApplication;
import org.springframework.boot.autoconfigure.SpringBootApplication;
import org.springframework.boot.context.event.ApplicationReadyEvent;
import org.springframework.context.annotation.ComponentScan;
import org.springframework.context.event.EventListener;

import java.io.IOException;

@SpringBootApplication
@ComponentScan("com.xxx")
public class App {
    /**
     * web api所在包路径
     */
    @Value("${web-api-packages}")
    private String webApiPackages;

    /**
     * 异步服务所在包路径
     */
    @Value("${async-service-impl-packages}")
    private String asyncServiceImplPackages;

    /**
     * http服务器端口号
     */
    @Value("${http-server-port}")
    private int httpServerPort;

    /**
     * 工作线程池大小(可根据实际情况调整)
     */
    @Value("${worker-pool-size}")
    private int workerPoolSize;

    /**
     * 异步服务实例数量(建议和CPU核数相同)
     */
    @Value("${async-service-instances}")
    private int asyncServiceInstances;

    public static void main(String[] args) {
        SpringApplication.run(App.class, args);
    }

    @EventListener
    public void deployVerticles(ApplicationReadyEvent event) {
        EventBusOptions eventBusOptions = new EventBusOptions();
        //便于调试 设定超时等时间较长 生产环境建议适当调整
        eventBusOptions.setConnectTimeout(1000 * 60 * 30);
        Vertx vertx = Vertx.vertx(
                new VertxOptions().setWorkerPoolSize(workerPoolSize)
                        .setEventBusOptions(eventBusOptions)
                        .setBlockedThreadCheckInterval(999999999L)
                        .setMaxEventLoopExecuteTime(Long.MAX_VALUE)
        );
        VertxUtil.init(vertx);
        try {
            Router router = new RouterHandlerFactory(webApiPackages).createRouter();
            DeployVertxServer.startDeploy(router, asyncServiceImplPackages, httpServerPort, asyncServiceInstances);
        } catch (IOException e) {
            e.printStackTrace();
        }
    }
}
该类在SpringBoot传统启动类的基础之上加入了deployVerticles方法,加上@EventListener注解表示该方法在Spring容器初始化完成后执行。该方法的主要工作是完成Vertx对象的实例化,Router构建,verticle发布等。App.java类中有几个参数需要提前在application.yml中配置,具体见代码注释。
RestApi类类似于springMVC的Controller类,代码如下。
package com.xxx.web;

import com.xxx.anno.RouteHandler;
import com.xxx.anno.RouteMapping;
import com.xxx.anno.RouteMethod;
import com.xxx.entity.User;
import com.xxx.model.ReplyObj;
import com.xxx.service.UserAsyncService;
import com.xxx.service2.UserTwoAsyncService;
import com.xxx.utils.AsyncServiceUtil;
import com.xxx.utils.HttpUtil;
import com.xxx.utils.ParamUtil;
import com.xxx.vertx.VertxUtil;
import io.vertx.core.Handler;
import io.vertx.core.file.FileSystem;
import io.vertx.core.json.JsonObject;
import io.vertx.ext.web.FileUpload;
import io.vertx.ext.web.RoutingContext;

import java.util.List;
import java.util.Set;

import static java.net.HttpURLConnection.HTTP_INTERNAL_ERROR;
import static java.net.HttpURLConnection.HTTP_OK;


@RouteHandler("restapp")
public class RestApi {

    private UserAsyncService userAsyncService = AsyncServiceUtil.getAsyncServiceInstance(UserAsyncService.class);

    private UserTwoAsyncService userTwoAsyncService = AsyncServiceUtil.getAsyncServiceInstance(UserTwoAsyncService.class);

    /**
     * 演示过滤器
     *
     * @return
     */
    @RouteMapping(value = "/*", method = RouteMethod.ROUTE, order = 2)
    public Handler<RoutingContext> appFilter() {
        return ctx -> {
            System.err.println("我是appFilter过滤器!");
            ctx.next();
        };
    }

    /**
     * 演示路径参数
     *
     * @return
     */
    @RouteMapping(value = "/test/:id", method = RouteMethod.GET)
    public Handler<RoutingContext> myTest() {
        return ctx -> {
            JsonObject param = ParamUtil.getRequestParams(ctx);
            HttpUtil.fireJsonResponse(ctx.response(), HTTP_OK, ReplyObj.build().setMsg("Hello,欢迎使用测试地址.....").setData(param.encode()));
        };
    }

    /**
     * 演示服务调用
     *
     * @return
     */
    @RouteMapping(value = "/listUsers", method = RouteMethod.GET)
    public Handler<RoutingContext> listUsers() {
        return ctx -> {
            JsonObject param = ParamUtil.getRequestParams(ctx);
            if (param.containsKey("age")) {
                param.put("age", Integer.valueOf(param.getString("age")));
            }
            User user = new User(param);
            userAsyncService.listUsers(user, ar -> {
                if (ar.succeeded()) {
                    List<User> userList = ar.result();
                    HttpUtil.fireJsonResponse(ctx.response(), HTTP_OK, ReplyObj.build().setData(userList));
                } else {
                    HttpUtil.fireJsonResponse(ctx.response(), HTTP_INTERNAL_ERROR,
                            ReplyObj.build().setData(ar.cause().getMessage()).setCode(HTTP_INTERNAL_ERROR));
                }
            });
        };
    }

    @RouteMapping(value = "/findUserById", method = RouteMethod.GET)
    public Handler<RoutingContext> findUserById() {
        return ctx -> {
            JsonObject param = ParamUtil.getRequestParams(ctx);
            if (!param.containsKey("id")) {
                HttpUtil.fireJsonResponse(ctx.response(), HTTP_INTERNAL_ERROR,
                        ReplyObj.build().setMsg("缺少id参数").setCode(HTTP_INTERNAL_ERROR));
                return;
            }
            userTwoAsyncService.findUser(Long.valueOf(param.getString("id")), ar -> {
                if (ar.succeeded()) {
                    User user = ar.result();
                    HttpUtil.fireJsonResponse(ctx.response(), HTTP_OK, ReplyObj.build().setData(user));
                } else {
                    HttpUtil.fireJsonResponse(ctx.response(), HTTP_INTERNAL_ERROR,
                            ReplyObj.build().setData(ar.cause().getMessage()).setCode(HTTP_INTERNAL_ERROR));
                }
            });
        };
    }

    /**
     * 演示文件上传
     *
     * @return
     */
    @RouteMapping(value = "/upload", method = RouteMethod.POST)
    public Handler<RoutingContext> upload() {
        return ctx -> {
            Set<FileUpload> uploads = ctx.fileUploads();
            FileSystem fs = VertxUtil.getVertxInstance().fileSystem();
            uploads.forEach(fileUpload -> {
                String path = "D:/vertxupload/" + fileUpload.fileName();
                fs.copyBlocking(fileUpload.uploadedFileName(), path);
            });
            HttpUtil.fireJsonResponse(ctx.response(), HTTP_OK, ReplyObj.build().setData("OK"));
        };
    }

}
该类使用注解的方式定义了Router的路径,方法,并编写对应的handler处理http请求。在Vert.x-Web中,如果请求同时匹配多个路由,则会优先执行先注册的路由,如果该路由handler中执行了next()方法,则会继续执行下一个匹配的路由handler,我们可以利用此特性实现与servlet中过滤器相似的效果,例如权限控制等。请注意路由的注册顺序将影响handler的执行顺序,通过配置@RouteMapping注解中的order属性可以实现注册顺序控制,order默认为0,注册顺序为从大到小。
为了避免event-loop被阻塞,我们使用了异步服务封装service层的同步阻塞代码,并且服务代理的handler在worker thread中执行。异步服务实际上是官方对EventBus调用的封装,简化了代码编写,因此服务代理的handler实际上就是EventBus的消费handler。要注意的是服务代理接口的参数类型与异步返回类型都有限制,具体可以参考官方文档中的Vert.x Service Proxy一节。
服务代理接口代码如下。
package com.xxx.service;

import com.xxx.entity.User;
import io.vertx.codegen.annotations.ProxyGen;
import io.vertx.core.AsyncResult;
import io.vertx.core.Handler;

import java.util.List;


@ProxyGen
public interface UserAsyncService {

    void listUsers(User user, Handler<AsyncResult<List<User>>> resultHandler);
}
加上@ProxyGen可以自动生成服务代理实现类,但是并不代表我们不需要编写代码,我们仍需要自己编写服务代理接口实现类来自定义handler的逻辑。注意@ProxyGen需要配合package-info.java才能实现自动生成。
服务代理接口实现类代码如下。
package com.xxx.service.impl;

import com.baomidou.mybatisplus.core.conditions.query.QueryWrapper;
import com.xxx.anno.AsyncServiceHandler;
import com.xxx.entity.User;
import com.xxx.model.BaseAsyncService;
import com.xxx.service.UserAsyncService;
import com.xxx.service.UserService;
import io.vertx.core.AsyncResult;
import io.vertx.core.Future;
import io.vertx.core.Handler;
import org.springframework.beans.factory.annotation.Autowired;
import org.springframework.stereotype.Component;

import java.util.List;


@Component
@AsyncServiceHandler
public class UserAsyncServiceImpl implements UserAsyncService, BaseAsyncService {

    @Autowired
    private UserService userService;

    @Override
    public void listUsers(User user, Handler<AsyncResult<List<User>>> resultHandler) {
        try {
            List<User> userList = userService.list(new QueryWrapper<>(user));
            Future.succeededFuture(userList).setHandler(resultHandler);
        } catch (Exception e) {
            resultHandler.handle(Future.failedFuture(e));
        }
    }
}
注意该类需要加上@AsyncServiceHandler注解,同时还需要实现BaseAsyncService接口,这些是用于服务代理注册及实例化的,具体实现在vs-core模块中。加上@Component注解后可以注入spring服务,服务层以及数据连接层代码与传统Spring项目相同,因此本文不再赘述。
对项目封装感兴趣的朋友可以下载源码看看。
vertx-framework开源项目
如果觉得我的文章对您有用,请随意打赏。你的支持将鼓励我继续创作!