社区微信群开通啦,扫一扫抢先加入社区官方微信群

社区微信群
package edu.szu.test.controller;

import java.io.BufferedOutputStream;
import java.io.File;
import java.io.FileOutputStream;
import java.util.List;

import javax.servlet.http.HttpServletRequest;

import org.springframework.stereotype.Controller;
import org.springframework.web.bind.annotation.RequestMapping;
import org.springframework.web.bind.annotation.RequestParam;
import org.springframework.web.bind.annotation.ResponseBody;
import org.springframework.web.multipart.MultipartFile;
import org.springframework.web.multipart.MultipartHttpServletRequest;

@Controller
@RequestMapping("/upload")
public class FileController {

    //单文件上传
    @RequestMapping("/little")
    @ResponseBody
    public String upload(@RequestParam("file1") MultipartFile file) {
        if (file.isEmpty()) {
            return "空文件";
        }
        // 获取文件名
        String fileName = file.getOriginalFilename();
        // 文件上传后的路径
        String filePath = "D://javatest//";
        File dest = new File(filePath + fileName);
        // 检测是否存在目录
        if (!dest.getParentFile().exists()) {
            dest.getParentFile().mkdirs();
        }
        try {
            file.transferTo(dest);
            return "单文件上传成功";
        } catch (Exception e) {
            e.printStackTrace();
        }
        return "单文件上传失败";
    }

    //多文件上传
    @RequestMapping("/many")
    @ResponseBody
    public String handleFileUpload(HttpServletRequest request) {
        List<MultipartFile> files = ((MultipartHttpServletRequest) request).getFiles("file2");
        MultipartFile file = null;
        BufferedOutputStream stream = null;
        for (int i = 0; i < files.size(); ++i) {
            file = files.get(i);
            if (!file.isEmpty()) {
                try {
                	// 获取文件名
                    String fileName = file.getOriginalFilename();
                    // 文件上传后的路径
                    String filePath = "D://javatest//";
                    byte[] bytes = file.getBytes();
                    stream = new BufferedOutputStream(new FileOutputStream(
                            new File(filePath + fileName)));
                    stream.write(bytes);
                    stream.close();
                } catch (Exception e) {
                    stream = null;
                    return "上传第" + i + "个文件失败";
                }
            } else {
                return "第 " + i + "个文件为空";
            }
        }
        return "多文件上传成功";
    }
}
<%@ page language="java" contentType="text/html; charset=UTF-8"
    pageEncoding="UTF-8"%>
<!DOCTYPE html>
<html lang="en">
<head>
	<meta charset="UTF-8" />
    <title>文件上传测试</title>
</head>
<body>
<p>单文件上传测试</p>
<form action="/upload/little" method="POST" enctype="multipart/form-data">
    请选择你需要上传的单文件:<input type="file" name="file1"/>
    <input type="submit" value="点我提交"/>
</form>
<p>多文件上传测试</p>
<form action="/upload/many" method="POST" enctype="multipart/form-data">
    <p>请选择你需要上传的文件1:<input type="file" name="file2"/></p>
    <p>请选择你需要上传的文件2:<input type="file" name="file2"/></p>
    <p><input type="submit" value="点我提交" /></p>
</form>
</html>
# 指定端口
server.port=8080
# 页面默认前缀目录
spring.mvc.view.prefix=/WEB-INF/jsp/
# 响应页面默认后缀
spring.mvc.view.suffix=.jsp

# 上传文件总的最大值
spring.servlet.multipart.max-request-size=10MB
# 单个文件的最大值
spring.servlet.multipart.max-file-size=1MB
打开页面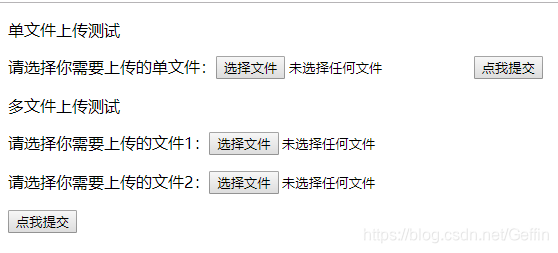
选择添加一张图片
提交
发现网页上显示上传成功,然后我们打开 javatest 文件夹,发现图片已经被添加进去了,证明我们的文件上传功能已经成功实现。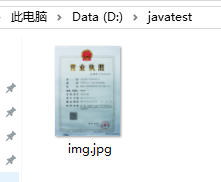
package edu.szu.test.controller;

import java.io.BufferedInputStream;
import java.io.File;
import java.io.FileInputStream;
import java.io.IOException;
import java.io.OutputStream;

import javax.servlet.http.HttpServletResponse;

import org.springframework.stereotype.Controller;
import org.springframework.web.bind.annotation.RequestMapping;

@Controller
public class FileController {

	//文件下载功能的实现
	@RequestMapping("/download")
	public void download(HttpServletResponse res ) {
		String fileName = "img.jpg";

		res.setHeader("content-type", "application/octet-stream");
		res.setContentType("application/octet-stream");
		res.setHeader("Content-Disposition", "attachment; filename=" + fileName);
		byte[] buff = new byte[1024];
		BufferedInputStream bis = null;
		OutputStream os = null;

		try {
			os = res.getOutputStream();
			bis = new BufferedInputStream(new FileInputStream(new File("d://javatest//" + fileName )));
			int i = bis.read(buff);

			while (i != -1) {
				os.write(buff, 0, buff.length);
				os.flush();
				i = bis.read(buff);
			}
		} catch (IOException e) {
			e.printStackTrace();
		} finally {
			if (bis != null) {
				try {
					bis.close();
				} catch (IOException e) {
					e.printStackTrace();
				}
			}
		}
  }
}
<%@ page language="java" contentType="text/html; charset=UTF-8"
    pageEncoding="UTF-8"%>
<!DOCTYPE html>
<html lang="en">
<head>
	<meta charset="UTF-8" />
    <title>文件下载测试</title>
</head>
<body>
<a href="http://localhost:8080/download">点我开始下载文件img.jpg</a>
</html>
打开页面
点击下载,发现文件确实已经被下载到了本机,证明我们的文件下载功能实现成功。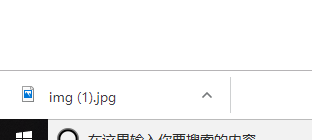
如果觉得我的文章对您有用,请随意打赏。你的支持将鼓励我继续创作!
