社区微信群开通啦,扫一扫抢先加入社区官方微信群

社区微信群
Spring Cloud Config 是一种用来动态获取Git、SVN、本地的配置文件的一种工具。是springcloud的一个核心技术。pring Cloud为开发人员提供了快速构建分布式系统中一些常见模式的工具(例如配置管理,服务发现,断路器,智能路由,微代理,控制总线)。
分布式系统的协调导致了样板模式, 使用Spring Cloud开发人员可以快速地支持实现这些模式的服务和应用程序。 Spring Cloud Config就是我们通常意义上的配置中心。Spring Cloud Config-把应用原本放在本地文件的配置抽取出来放在中心服务器,本质是配置信息从本地迁移到云端。从而能够提供更好的管理、发布能力。
Spring Cloud Config分服务端和客户端,服务端负责将git(svn)中存储的配置文件发布成REST接口,客户端可以从服务端REST接口获取配置。
但客户端并不能主动感知到配置的变化,从而主动去获取新的配置,这需要每个客户端通过POST方法触发各自的/refresh。
看这边文章之前建议先看一下我的上一篇文章springcloud微服务探索之完整demo的记录与分析,因为服务的注册中心项目都在这里。废话不多说直接上代码。
所以注册中心代码可以从上边参考。
新建springboot项目(我用的是myeclipse,直接建立maven项目加入pom文件内容,新建启动类即可)
1.加入pom文件内容
<?xml version="1.0" encoding="UTF-8"?>
<project xmlns="http://maven.apache.org/POM/4.0.0"
         xmlns:xsi="http://www.w3.org/2001/XMLSchema-instance"
         xsi:schemaLocation="http://maven.apache.org/POM/4.0.0 http://maven.apache.org/xsd/maven-4.0.0.xsd">
    <modelVersion>4.0.0</modelVersion>

    <groupId>com.cnblogs.hellxz</groupId>
    <artifactId>ConfigServer</artifactId>
    <version>1.0-SNAPSHOT</version>

    <parent>
        <groupId>org.springframework.cloud</groupId>
        <artifactId>spring-cloud-starter-parent</artifactId>
        <version>Dalston.SR5</version>
        <relativePath/>
    </parent>

    <dependencies>
        <!--Spring Cloud Config 服务端依赖-->
        <dependency>
            <groupId>org.springframework.cloud</groupId>
            <artifactId>spring-cloud-config-server</artifactId>
        </dependency>
    </dependencies>

    <build>
        <plugins>
            <plugin>
                <groupId>org.springframework.boot</groupId>
                <artifactId>spring-boot-maven-plugin</artifactId>
            </plugin>
            <plugin>
                <groupId>org.apache.maven.plugins</groupId>
                <artifactId>maven-compiler-plugin</artifactId>
                <configuration>
                    <source>1.8</source>
                    <target>1.8</target>
                </configuration>
            </plugin>
        </plugins>
    </build>
</project>
2.建立启动类
package com.boot.config;
import org.springframework.boot.SpringApplication;
import org.springframework.boot.autoconfigure.SpringBootApplication;
import org.springframework.cloud.client.discovery.EnableDiscoveryClient;
import org.springframework.cloud.config.server.EnableConfigServer;
@SpringBootApplication
@EnableConfigServer
@EnableDiscoveryClient
/**
 * 这里没有使用SpringBootApplication或SpringCloudApplication注解,会报错
 * 原因也很简单,我们的java源码目录下没有目录,我们手动加一个也就正常了,
 * 为了写点体会和这里没必要用到包和类,所以使用这种方式
 */
public class ConfigApplication {
	/**
	 * @Title: main
	 * @Description: TODO
	 * @param args
	 * void
	 * @author mars
	 * @date 2018-10-25下午3:45:35
	 */
	public static void main(String[] args) {
		// TODO Auto-generated method stub
		SpringApplication.run(ConfigApplication.class, args);
	}
}
其中我们只需要提供@EnableConfigServer注解来开启config 的server功能
3.建立yml文件。bootstrap.yml 就是项目启动之前会先加载该文件
server:
 port: 7000
spring:
 application:
  name: config-server1
 cloud:
  config:
   server:
    git:
     uri: https://github.com/hellxz/SpringCloudlearn
     search
eureka:
 client:
  service-url:
   defaultZone: http://127.0.0.1:1000/eureka/
这里的git uri是我在别人git上找的。search-paths指向该仓库的文件夹。
- 第一个规则的分支名是可以省略的,默认是master分支
- 无论你的配置文件是properties,还是yml,只要是应用名+环境名能匹配到这个配置文件,那么就能取到
- 如果是想直接定位到没有写环境名的默认配置,那么就可以使用default去匹配没有环境名的配置文件
- 使用第一个规则会匹配到默认配置
- 如果直接使用应用名来匹配,会出现404错误,此时可以加上分支名匹配到默认配置文件
- 如果配置文件的命名很由多个-分隔,此时直接使用这个文件名去匹配的话,会出现直接将内容以源配置文件内容直接返回,内容前可能会有默认配置文件的内容(已测试)
再次我们可以启动服务进行测试一下。可以直接访问该配置文件。
测试正常,配置文件信息依旧被请求获取到了,该配置信息来自Config Server本地
4.创建服务配置的客户端
#application.yml的配置文件如下
server:
  port: 7005
spring:
  application:
    name: hellxztest
  cloud:
    config:
#启动什么环境下的配置,dev 表示开发环境,这跟你仓库的文件的后缀有关,比如,仓库配置文件命名格式是cloud-config-dev.properties,所以profile 就要写dev
      uri: http://localhost:7000/
      profile: dev
      label: master
#面向服务,允许被发现
      discovery:
        enabled: true
#这个名字是Config Server端的服务名字,不能瞎写。
        service-id: config-server1
#注册中心
eureka:
  client:
    service-url:
      defaultZone:  http://127.0.0.1:1000/eureka/
#是否需要权限拉去,默认是true,如果不false就不允许你去拉取配置中心Server更新的内容
management:
  security:
    enabled: false


####controller代码如下
package com.config.client;

import org.springframework.beans.factory.annotation.Value;
import org.springframework.cloud.context.config.annotation.RefreshScope;
import org.springframework.web.bind.annotation.GetMapping;
import org.springframework.web.bind.annotation.RequestMapping;
import org.springframework.web.bind.annotation.ResponseBody;
import org.springframework.web.bind.annotation.RestController;

@RestController
 //开启更新功能
@RefreshScope
@RequestMapping("api")
public class TestController {
    @Value("${name }")
    private String fromValue;
    /**
     * 返回配置文件中的值
     */
    @GetMapping("/from")
    @ResponseBody
    public String returnFormValue(){
        return fromValue;
    }
}
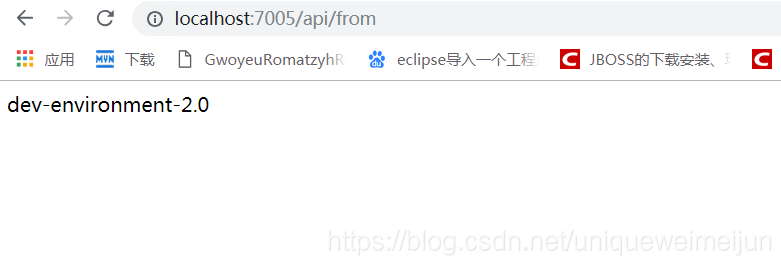
此时启动客户端项目,在浏览器地址栏输入http://localhost:7005/api/from
即可访问,结果如下:

这里的流程给大家说下:首先请求到客户端controller, @Value("${name }")这个注解的值在项目启动时候已经给获取到了。
cloud:
config:
#启动什么环境下的配置,dev 表示开发环境,这跟你仓库的文件的后缀有关,比如,仓库配置文件命名格式是cloud-config-dev.properties,所以profile 就要写dev
uri: http://localhost:7000/
profile: dev
label: master
#面向服务,允许被发现
discovery:
enabled: true
#这个名字是Config Server端的服务名字,不能瞎写。
service-id: config-server1这里是客户端的核心配置文件,启动过程中会去配置的服务端请求配置文件。然后在请求的过程中会根据名称来注入属性值。
如果觉得我的文章对您有用,请随意打赏。你的支持将鼓励我继续创作!
