社区微信群开通啦,扫一扫抢先加入社区官方微信群

社区微信群
#一台虚拟机
hostname:myhost
ip:ip_address
[root@myhost ~]# cat /etc/redhat-release
CentOS release 6.5 (Final)
[root@myhost ~]# iptables -I INPUT -p tcp --dport 4110 -j ACCEPT #假设设置mysql的服务端口为4110
[root@myhost ~]# /etc/init.d/iptables save
[root@myhost ~]# getenforce
Disabled
安装包存放目录:/home/tools
Mysql安装目录:/usr/local/mysql
数据库保存位置:/usr/local/mysql/data  	#需要自行建立,并修改属主和属组为mysql:mysql
日志保存位置:/usr/local/mysql/log		#需要自行建立,并修改属主和属组为mysql:mysql
[root@myhost ~]#cd /home/tools
[root@myhost tools]# wget http://dev.mysql.com/get/Downloads/MySQL-5.7/mysql-5.7.13-linux-glibc2.5-x86_64.tar.gz
[root@myhost tools]# ll
total 835560
-rw-r--r--. 1 root root 639864682 May 25  2016 mysql-5.7.13-linux-glibc2.5-x86_64.tar.gz
[root@myhost tools]# tar xf mysql-5.7.13-linux-glibc2.5-x86_64.tar.gz
[root@myhost tools]# ll -h
total 8355
drwxr-xr-x. 9 7161 wheel      4M May 25  2016 mysql-5.7.13-linux-glibc2.5-x86_64
-rw-r--r--. 1 root root  611M May 25  2016 mysql-5.7.13-linux-glibc2.5-x86_64.tar.gz
#移动已解压好的mysql软件到安装目录并重命名为mysql(省去做软连接)
[root@myhost tools]# mv mysql-5.7.13-linux-glibc2.5-x86_64  /usr/local/mysql
[root@myhost tools]# useradd mysql -s /sbin/nologin  -M
[root@myhost tools]# id mysql
uid=503(mysql) gid=503(mysql) groups=503(mysql)
[root@myhost tools]# mkdir -p  /usr/local/mysql/data
#[root@myhost tools]# mkdir -p /usr/local/mysql/data/temp   #这里暂不创建,必须在初始化之后创建,否则报错
[root@myhost tools]# mkdir -p  /usr/local/mysql/log
[root@myhost tools]# mkdir -p  /usr/local/mysql/run
[root@myhost tools]# chown -R mysql:mysql /usr/local/mysql/
[root@myhost tools]#vi /etc/profile 添加 export PATH=$PATH:/usr/local/mysql/bin
[root@myhost tools]#source /etc/profile
[root@myhost tools]#echo $PATH
注意:如何同一台服务器重新安装mysql时,必须要把/etc/my.cnf文件内容恢复到之前,否则初始化会一直报错!!!!
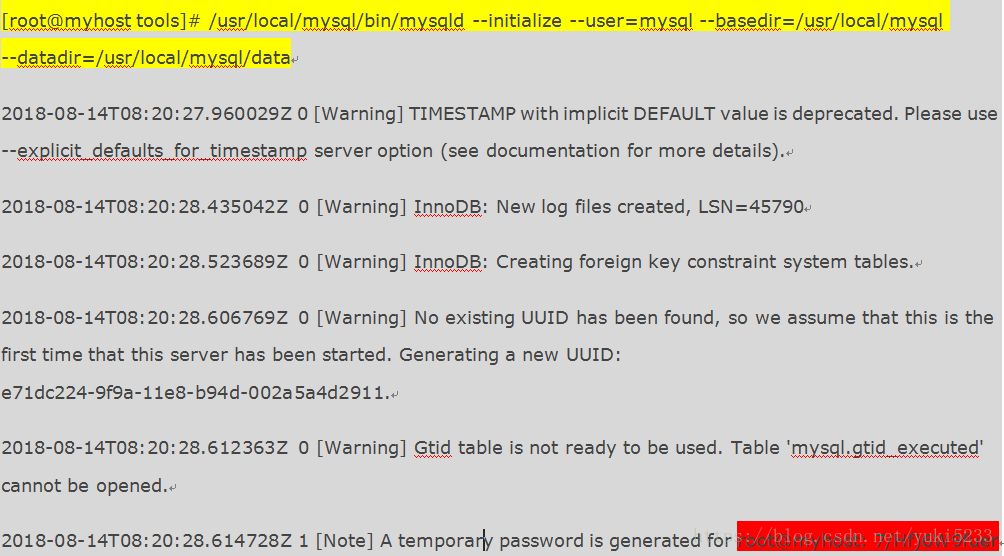
[root@myhost tools]# /usr/local/mysql/bin/mysqld --initialize --user=mysql --basedir=/usr/local/mysql --datadir=/usr/local/mysql/data
#临时密码:7/Hf)6W9fuer
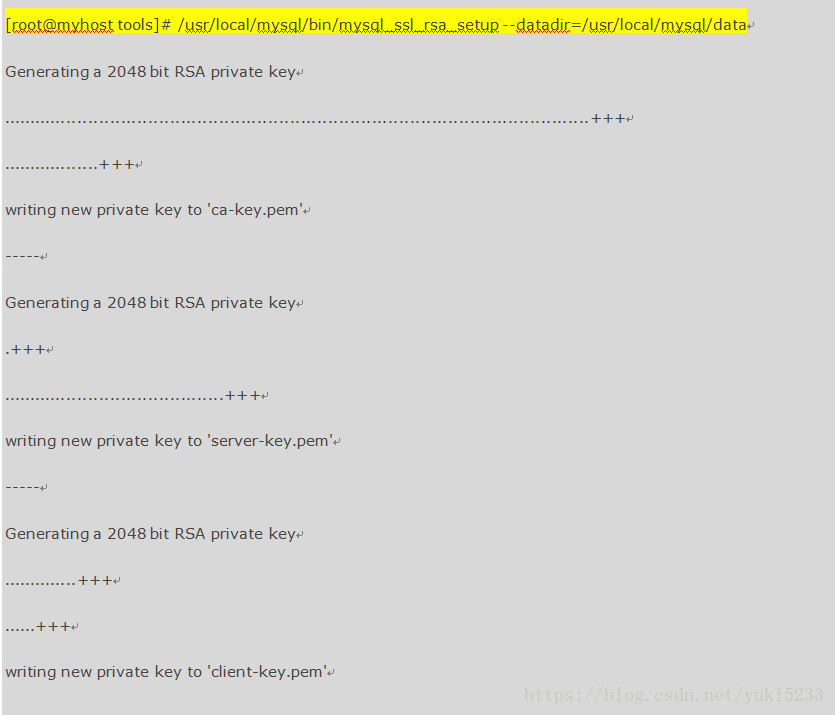
[root@myhost tools]# /usr/local/mysql/bin/mysql_ssl_rsa_setup --datadir=/usr/local/mysql/data
[root@myhost support-files]$ mv   /etc/my.cnf   /etc/my.cnf_bak
[root@myhost support-files]$ cp /usr/local/mysql/support-files/my-default.cnf   /etc/my.cnf
[root@myhost support-files]# cp /usr/local/mysql/support-files/mysql.server   /etc/init.d/mysqld
[root@myhost support-files]#vi /etc/my.cnf
###########################
[client]
port = 4110
default-character-set=utf8
socket = /usr/local/mysql/mysql.sock
###########################
[mysqld]
port = 4110
character-set-server = utf8
collation-server = utf8_general_ci
skip-external-locking
skip-name-resolve
user = mysql
basedir = /usr/local/mysql
datadir = /usr/local/mysql/data
tmpdir = /usr/local/mysql/data/temp   #需要在数据库初始化之后自行创建并修改权限,否则会报错。
socket = /usr/local/mysql/mysql.sock
open_files_limit = 10240
back_log = 600
max_connections=2000
max_connect_errors = 6000
wait_timeout=605800
max_allowed_packet = 32M
sort_buffer_size = 4M
join_buffer_size = 4M
thread_cache_size = 300
query_cache_type = 1
query_cache_size = 256M
query_cache_limit = 2M
query_cache_min_res_unit = 16k
tmp_table_size = 256M
max_heap_table_size = 256M
key_buffer_size = 256M
read_buffer_size = 8M
read_rnd_buffer_size = 64M
bulk_insert_buffer_size = 64M
lower_case_table_names=1
lower_case_table_names=1
default-storage-engine = INNODB
innodb_buffer_pool_size = 128MB
innodb_log_buffer_size = 32M
innodb_log_file_size = 128M
innodb_flush_method = O_DIRECT
sql_mode=NO_ENGINE_SUBSTITUTION,STRICT_TRANS_TABLES
explicit_defaults_for_timestamp=true

##########################
[mysqldump]
quick
max_allowed_packet = 32M
###########################
[mysqladmin]
host=127.0.0.1
user=zabbix
password=1234569101111
port=4110
##########################
[mysqld_safe]
log-error=/usr/local/mysql/log/mysqld_4110.err
pid-file=/usr/local/mysql/run/mysqld.pid
[root@myhost support-files]# mkdir -p /usr/local/mysql/data/temp
[root@myhost support-files]# chown -R mysql:mysql /usr/local/mysql
[root@myhost support-files]# cd
[root@myhost ~]# /usr/local/mysql/bin/mysqld_safe --user=mysql &
[root@myhost support-files]# mysql --user=root -p 或 mysql -uroot -p
Enter password: 7/Hf)6W9fuer	#输入之前初始化数据库时得到的临时密码
Welcome to the MySQL monitor.  Commands end with ; or g.
Your MySQL connection id is 2
Server version: 5.7.13

Copyright (c) 2000, 2016, Oracle and/or its affiliates. All rights reserved.

Oracle is a registered trademark of Oracle Corporation and/or its
affiliates. Other names may be trademarks of their respective
owners.

Type 'help;' or 'h' for help. Type 'c' to clear the current input statement.

mysql>
mysql>  set password=password('新密码');
mysql>  set authentication_string=password('新密码');
##### mysql的版本不一样,用户密码字段表示也不一样,这一点需要注意。
mysql> 	grant all privileges on *.* to root@'%' identified by '新密码';
mysql>  flush privileges;
mysql> 	update mysql.user set authentication_string=password('新密码') where User='root' and Host='localhost';  #另外一种修改root用户密码的方法
mysql>  exit;
[root@myhost support-files]# mysql --user=root -p 或 mysql -uroot -p
Enter password: 新密码
mysql>	grant all privileges on *.* to  other@'%' identified by 'other123456';
mysql> 	flush privileges;
mysql> 	use mysql;
mysql>  select host,user from mysql.user;
[root@client ~]#mysql -P 4110 -h ip_address -u other -p
Enter password: other123456
[root@myhost ~]# chmod 755 /etc/init.d/mysqld
[root@myhost ~]# chkconfig --add mysqld
[root@myhost ~]# chkconfig --level 345 mysqld on
[root@myhost ~]# kill -9 `ps -ef |egrep 'mysql'|egrep -v 'grep'|awk '{print$2}'|xargs`
[root@myhost ~]# /etc/init.d/mysqld start
[root@myhost ~]# ps -ef |grep mysql
[root@myhost ~]# netstat -lntup |grep mysql
[root@myhost ~]# lsof -i:4110
######replication-master###########
server-id=22
log-bin=/usr/local/mysql/log/mysql-bin
relay_log=master-relay-bin
binlog-do-db=xxx   #需要同步的数据库名
binlog-ignore-db=mysql  #不需要同步的数据库名
binlog_cache_size=1M
binlog_format=mixed
expire_logs_days=7
slave_skip_errors=1062
auto-increment-increment = 3
auto-increment-offset = 1
#skip-name-resolve

###### replication-slave ###########
server_id=23
log-bin=/usr/local/mysql/log/mysql-slave-bin
relay_log=/usr/local/mysql/log/slave-relay-bin
binlog-do-db=xxx   #需要同步的数据库名
binlog-ignore-db=mysql  #不需要同步的数据库名
binlog_cache_size = 1M
binlog_format=mixed
expire_logs_days=7
slave_skip_errors=1062
read_only=0
log_slave_updates=1  #从库记录binlog,这里推荐开启
如果觉得我的文章对您有用,请随意打赏。你的支持将鼓励我继续创作!