有三中方法可以实现验证码的功能
第一种是自定义一个filter,放在SpringSecurity过滤器之前,在用户登录的时候会先经过这个filter,然后在这个filter中实现对验证码进行验证的功能,这种方法不推荐,因为它已经脱离了SpringSecurity
第二种是自定义一个filter让它继承自UsernamePasswordAuthenticationFilter,然后重写attemptAuthentication方法在这个方法中实现验证码的功能,如果验证码错误就抛出一个继承自AuthenticationException的验证吗错误的异常比如(CaptchaException),然后这个异常就会被SpringSecurity捕获到并将异常信息返回到前台,这种实现起来比较简单
1. @Override
2. public Authentication attemptAuthentication(HttpServletRequest request,
3. throws AuthenticationException {
4.
5. this.getCaptchaFieldName());
6. "code");
7.
8. "开始校验验证码,生成的验证码为:"+genCaptcha+" ,输入的验证码为:"+requestCaptcha);
9.
10. if( !genCaptcha.equals(requestCaptcha)){
11. throw new CaptchaException(
12. this.messageSource.getMessage("AbstractUserDetailsAuthenticationProvider.badCaptcha",null,"Default",null));
13.     }
14. return super.attemptAuthentication(request, response);
15. }
然后在配置文件中配置下
1. <bean id="loginFilter" class="com.zrhis.system.security.DefaultUsernamePasswordAuthenticationFilter">
2. <property name="authenticationManager"  ref="authenticationManager"></property>
3. <property name="authenticationSuccessHandler">
4. <bean class="org.springframework.security.web.authentication.SavedRequestAwareAuthenticationSuccessHandler">
5. <property name="defaultTargetUrl" value="/index.jsp"></property>
6. </bean>
7. </property>
8. <property name="authenticationFailureHandler">
9. <bean class="org.springframework.security.web.authentication.SimpleUrlAuthenticationFailureHandler">
10. <property name="defaultFailureUrl" value="/login.jsp"></property>
11. </bean>
12. </property>
13. </bean>
最后在http中加入custom-filter配置,将这个filter放在SpringSecurity的FORM_LOGIN_FILTER之前
1. <custom-filter ref="loginFilter" before="FORM_LOGIN_FILTER"/>
最后一种是直接替换掉SpringSecurity的UsernamePasswordAuthenticationFilter,这种比较复杂,但是更为合理,也是我现在正在用的。
如果用这种方法那么http 中的auto-config就必须去掉,而form-login配置也必须去掉,因为这个不需要了,里面的属性都需要我们自行注入。
首先需要创建一个EntryPoint
1. <bean id="authenticationEntryPoint" class="org.springframework.security.web.authentication.LoginUrlAuthenticationEntryPoint">
2. <property name="loginFormUrl" value="/login.jsp" />
3. </bean>
然后在http中配置下
1. <sec:http access-decision-manager-ref="accessDecisionManager"
2. entry-point-ref="authenticationEntryPoint">
然后我们来写CaptchaAuthenticationFilter,同样需要继承自UsernamePasswordAuthenticationFilter
1. public class CaptchaAuthenticationFilter extends UsernamePasswordAuthenticationFilter{
2.
3. public static final String SPRING_SECURITY_FORM_CAPTCHA_KEY = "j_captcha";
4. public static final String SESSION_GENERATED_CAPTCHA_KEY = Constant.SESSION_GENERATED_CAPTCHA_KEY;
5.
6. private String captchaParameter = SPRING_SECURITY_FORM_CAPTCHA_KEY;
7.
8. public Authentication attemptAuthentication(HttpServletRequest request,
9. throws AuthenticationException {
10.
11. this.obtainGeneratedCaptcha(request);
12. this.obtainCaptcha(request);
13. if(genCode == null)
14. throw new CaptchaException(this.messages.getMessage("LoginAuthentication.captchaInvalid"));
15. if(!genCode.equalsIgnoreCase(inputCode)){
16. throw new CaptchaException(this.messages.getMessage("LoginAuthentication.captchaNotEquals"));
17.         }
18.
19. return super.attemptAuthentication(request, response);
20.     }
21.
22. protected String obtainCaptcha(HttpServletRequest request){
23. return request.getParameter(this.captchaParameter);
24.     }
25.
26. protected String obtainGeneratedCaptcha (HttpServletRequest request){
27. return (String)request.getSession().getAttribute(SESSION_GENERATED_CAPTCHA_KEY);
28.     }
29.
30. }
在配置文件中配置CaptchaAuthenticationFilter
1. <bean id="captchaAuthenticaionFilter" class="com.zrhis.system.security.CaptchaAuthenticationFilter">
2. <property name="authenticationManager" ref="authenticationManager" />
3. <property name="authenticationFailureHandler" ref="authenticationFailureHandler" />
4. <property name="authenticationSuccessHandler" ref="authenticationSuccessHandler" />
5. <property name="filterProcessesUrl" value="/login.do" />
6. </bean>
7.
8. <bean id="authenticationSuccessHandler" class="com.zrhis.system.security.SimpleLoginSuccessHandler">
9. <property name="defaultTargetUrl" value="/WEB-INF/app.jsp"></property>
10. <property name="forwardToDestination" value="true"></property>
11. </bean>
12. <bean id="authenticationFailureHandler" class="org.springframework.security.web.authentication.SimpleUrlAuthenticationFailureHandler">
13. <property na
me="defaultFailureUrl" value="/login.jsp" />
- </bean>
从配置文件中就可以看出来authenticationManager、authenticationFailureHandler、authenticationSuccessHandler、filterProcessesUrl等都需要我们自行注入了。
filterProcessesUrl定义的是登录验证的地址,默认的是j_spring_security_check这里我们改成login.do
authenticationSuccessHandler中的defaultTargetUrl定义的是登录成功后跳转到的页面
authenticationFailureHandler中的defaultTargetUrl定义的是登录失败后跳转到的页面
我们的首页app.jsp在/WEB-INF下所以需要使用服务器跳转,所以需要将forwardToDestination设为true,因为客户端跳转是不能直接访问WEB-INF下的内容的。
最后在http中将FORM_LOGIN_FILTER替换掉,最终http中完整的配置就变成了下面的内容
1. <sec:http access-decision-manager-ref="accessDecisionManager"
2. entry-point-ref="authenticationEntryPoint">
3.
4. <sec:access-denied-handler ref="accessDeniedHandler"/>
5.
6. <sec:session-management invalid-session-url="/login.jsp" />
7.
8. <sec:custom-filter ref="filterSecurityInterceptor" before="FILTER_SECURITY_INTERCEPTOR"/>
9. <sec:custom-filter ref="captchaAuthenticaionFilter" position="FORM_LOGIN_FILTER"/>
10. </sec:http>
custom-filter中before是在这个filter之前,after是之后,position是替换。
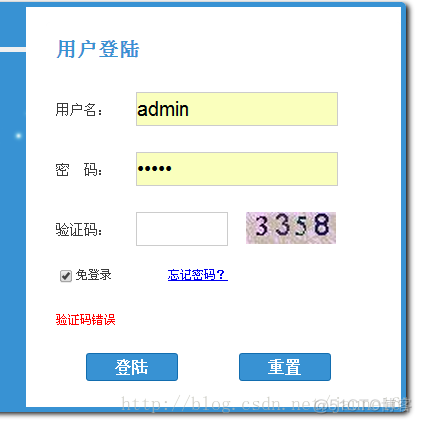
这样就可以实现对验证码的验证了,效果如下