社区微信群开通啦,扫一扫抢先加入社区官方微信群

社区微信群
一、简介
Seafile是一个开源、专业、可靠的云存储平台;解决文件集中存储、共享和跨平台访问等问题,由北京海文互知网络有限公司开发,发布于2012年10月;除了一般网盘所提供的云存储以及共享功能外,Seafile还提供消息通信、群组讨论等辅助功能,帮助更好的围绕文件展开协同工作。
官网:https://www.seafile.com/home/
下载:https://www.seafile.com/download/
Centos 服务安装包:http://seafile-downloads.oss-cn-shanghai.aliyuncs.com/seafile-server_7.0.5_x86-64.tar.gz
Windows 服务安装包:http://seafile-downloads.oss-cn-shanghai.aliyuncs.com/seafile-server_6.0.7_win32.tar.gz
二、基本环境
1、系统说明
系统:CentOS-7-x86_64-Minimal-1708
下载地址:
http://archive.kernel.org/centos-vault/7.4.1708/isos/x86_64/
2、安装虚拟机
安装过程可参考:
https://blog.csdn.net/llwy1428/article/details/89328381
三、安装搭建
1、安装基本工具
[root@compute ~]# yum install -y wget vim net-tools epel-release
2、配置防火墙
关闭防火墙,并设置开机禁止启动
关闭防火墙 : systemctl stop firewalld
查看状态    : systemctl status firewalld
开机禁用    : systemctl disable firewalld
3、安装数据库
安装 MariaDb(Mysql)
https://blog.csdn.net/llwy1428/article/details/84965680
Mariadb一些安全设置(参考)
mysql_secure_installation
#根据下面提示进行设置
# 第一次运行密码为空,回车。
Enter current password for root (enter for none):
# 需要设置root密码,输入y后回车。
Set root password? [Y/n] y
# 是否删除匿名用户,回车。
Remove anonymous users? [Y/n]
# 是否禁止root远程登录,回车。
Disallow root login remotely? [Y/n]
# 是否删除test数据库,回车。
Remove test database and access to it? [Y/n]
# 是否重新加载权限表,回车。
Reload privilege tables now? [Y/n]
[root@compute ~]# netstat -lntp

4、设置数 MariaDb(Mysql)据库开机启动
[root@compute ~]# systemctl enable mariadb
5、下载安装 seafile-server
进入 /opt 目录
下载安装包
[root@compute opt]# wget http://seafile-downloads.oss-cn-shanghai.aliyuncs.com/seafile-server_7.0.5_x86-64.tar.gz

6、解压安装包
[root@compute opt]# tar zxvf seafile-server_7.0.5_x86-64.tar.gz
查看目录

7、安装依赖
[root@compute ~]# yum install -y python-memcached python-ldap python-urllib3 python-imaging MySQL-python python-distribute ffmpeg ffmpeg-devel
8、初始化 seafile-server
进入文件目录
[root@compute ~]# cd /opt/seafile-server-7.0.5/
执行初始化脚本
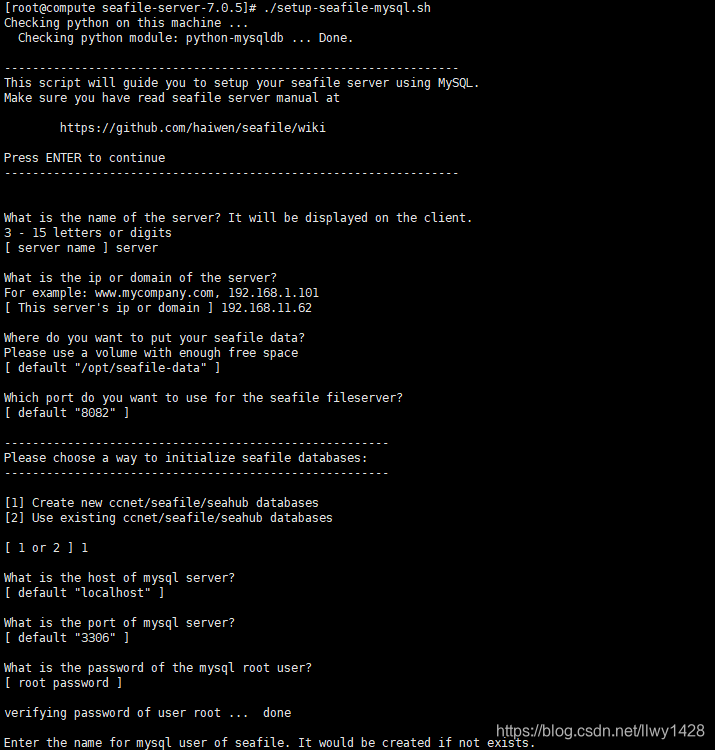
[root@compute seafile-server-7.0.5]# ./setup-seafile-mysql.sh
说明:
# 显示给客户端的服务名,输入服务名后回车。
[ server name ] server
# 输入ip或域名,由于内部使用直接ip,输入ip后回车。
For example: www.mycompany.com, 192.168.1.101
[ This server's ip or domain ] 192.168.11.62
# 使用默认,将数据文件放在/root/seafile-data下,回车。
[ default "/opt/seafile-data" ]
# 使用默认的文件服务端口8082,回车。
[ default "8082" ]
# 使用新的seahub数据库,输入1后回车。
[1] Create new ccnet/seafile/seahub databases
[2] Use existing ccnet/seafile/seahub databases
[ 1 or 2 ] 1
# 由于刚才装了mariadb,使用默认本地,回车。
[ default "localhost" ]
# mariadb的默认端口就是3306,回车。
[ default "3306" ]
# 使用默认的seafile作为seafile使用mariadb的用户,回车。
[ default "seafile" ]
Enter the password for mysql user "seafile":(数据库密码)
[ password for seafile ]
# 使用默认ccnet-db作为ccnet-server使用的数据库名,回车。
[ default "ccnet-db" ]
# 使用默认seafile-db作为seafile-server使用的数据库名,回车。
[ default "seafile-db" ]
# 使用默认seahub-db作为seahub使用的数据库名,回车。
[ default "seahub-db" ]
过程截图如下:


9、启动seafile、seahub
[root@compute seafile-server-7.0.5]# ./seafile.sh start

10、初始化管理员账号
[root@compute seafile-server-7.0.5]# ./seahub.sh start 80

11、修改配置文件
关闭服务
[root@compute ~]# /opt/seafile-server-7.0.5/seafile.sh stop
[root@compute ~]# /opt/seafile-server-7.0.5/seahub.sh stop
修改配置文件
[root@compute ~]# vim /opt/conf/gunicorn.conf

12、启动服务
[root@compute ~]# /opt/seafile-server-7.0.5/seafile.sh start
[root@compute ~]# /opt/seafile-server-7.0.5/seahub.sh start
13、浏览器访问
http://部署seafile的虚拟机IP,使用刚才创建的管理员账号登录。

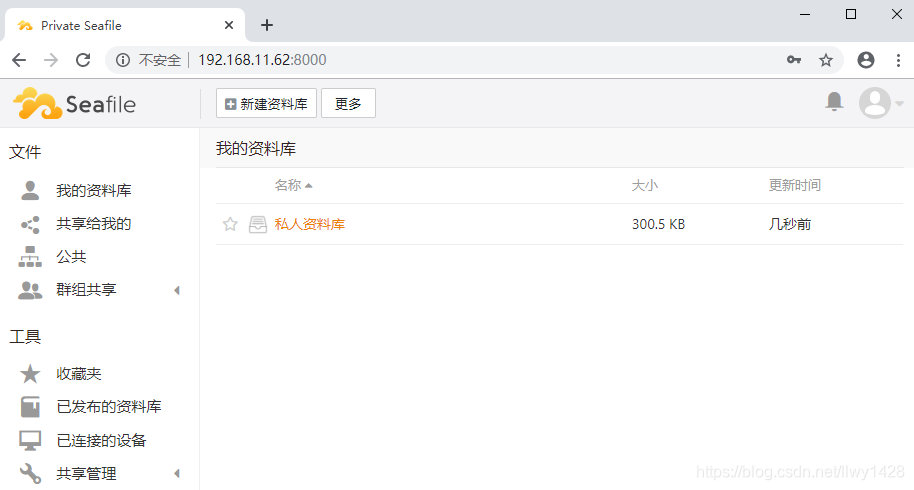
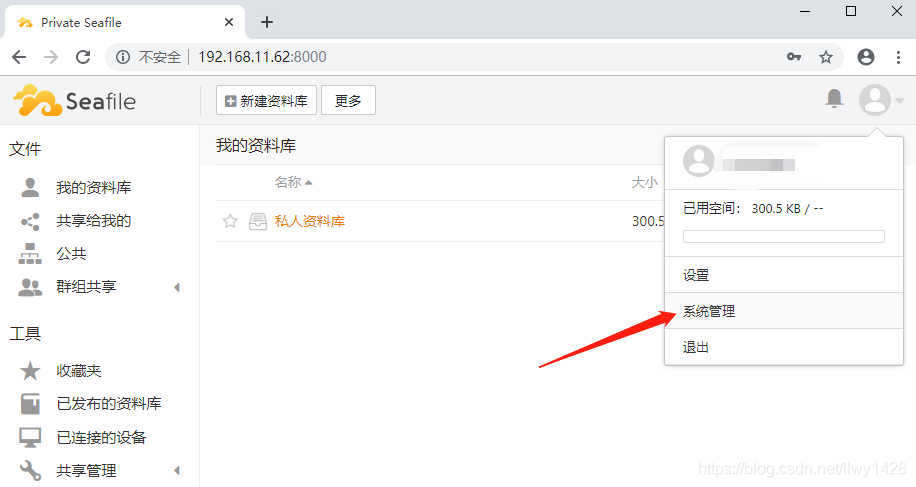
设置系统信息

至此 Centos7 私有云盘 seafile 安装完毕!
参考:
https://cloud.seafile.com/published/seafile-manual-cn/deploy/using_mysql.md
如果觉得我的文章对您有用,请随意打赏。你的支持将鼓励我继续创作!
