社区微信群开通啦,扫一扫抢先加入社区官方微信群

社区微信群
结合本人上篇博文《Python图转字符画》
和其他参考
https://blog.csdn.net/kongfu_cat/article/details/79511087
代码如下:
# -*- coding:utf-8 -*-
from PIL import Image
import os
from PIL import Image, ImageFont, ImageDraw
import argparse

IMG = r'F:PythonFilesPycharmFileex11CharacterGraph2_GraphIn.png'  #文件路径

WIDTH = 80  #定义输出画面的宽度
HEIGHT = 45  #定义
ascii_char = list("$@B%8&WM#*oahkbdpqwmZO0QLCJUYXzcvunxrjft/|()1{}[]?-_+~<>i!lI;:,"^`'. ")  #所用字符列表

# 将256灰度映射到70个字符上
def get_char(r, g, b, alpha=256):  # alpha透明度
    if alpha == 0:
        return ' '
    length = len(ascii_char)
    gray = int(0.2126 * r + 0.7152 * g + 0.0722 * b)  # 计算灰度
    unit = (256.0 + 1) / length
    return ascii_char[int(gray / unit)]  # 不同的灰度对应着不同的字符

# 通过灰度来区分色块
#该部分以下和灰度值字符画区别所在
if __name__=='__main__':
    im = Image.open(IMG)
    WIDTH = int(im.width/6) #高度比例为原图的1/6较好,由于字体宽度
    HEIGHT = int(im.height/15)  #高度比例为原图的1/15较好,由于字体高度
    im_txt = Image.new("RGB",(im.width,im.height),(255,255,255))
    im = im.resize((WIDTH,HEIGHT),Image.NEAREST)
    txt = ""
    colors = []
    for i in range(HEIGHT):
        for j in range(WIDTH):
            pixel = im.getpixel((j,i))
            colors.append((pixel[0],pixel[1],pixel[2]))#记录像素颜色信息
            if(len(pixel) == 4):
                txt += get_char(pixel[0],pixel[1],pixel[2],pixel[3])
            else:
                txt += get_char(pixel[0],pixel[1],pixel[2])
        txt += 'n'
        colors.append((255,255,255))
    dr = ImageDraw.Draw(im_txt)
    font=ImageFont.load_default().font#获取字体
    x=y=0
    #获取字体的宽高
    font_w,font_h=font.getsize(txt[1])
    font_h *= 1.37 #调整后更佳
    #ImageDraw为每个ascii码进行上色
    for i in range(len(txt)):
        if(txt[i]=='n'):
            x+=font_h
            y=-font_w
        dr.text([y,x],txt[i],colors[i])
        y+=font_w
    #输出
    im_txt.save(r'F:PythonFilesPycharmFileex11CharacterGraph2_GraphOut.png')
输入:
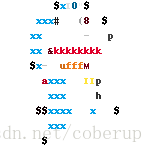
输出:
如果觉得我的文章对您有用,请随意打赏。你的支持将鼓励我继续创作!