社区微信群开通啦,扫一扫抢先加入社区官方微信群

社区微信群
这篇博文标题为:你想为自己的工作和生活减负吗?那么欢迎关注语音识别技术吧!
作为21世纪,很多生活和工作的模式都发生了变化,特别是多媒体技术的普遍应用,随着人工智能的兴起,给多媒体技术锦上添花。那么当多媒体技术遇到人工智能将会有怎么样的体验呢?
欢迎继续往下看。
这是我的思考:
(1)如果你写了一篇很长很长的文章,然后想把他录成视频,那么这个工作量很大吧!
(2)如果你听到一个很好听很好听的音频,你想把里面的好句子、好段落、好文章摘录下来,需要手抄、笔写,很累吧!
(3)如果你有很多很多类似的动作需要做(譬如又要写、又要录),重复性动作很多,是否觉得很鼓噪、很烦恼!
如果你也遇到同样的上述问题,欢迎继续、继续、一定要继续看下面的内容。
终于到本博文的主题:其实我是想介绍百度的语音识别AI的功能,
从技术上看,百度花了很多、大力气去实现,完全让我们的体验有了质的飞越,深深的感受到大数据时代、人工智能的时代已经落地、变现,在我们的日常生活中。
从使用上看,百度提供了很大的免费额度,也就是说,如果我们只是作为日常工作使用,那么完全就是免费使用的。
多好的一种体验啊!
好吧,吹了好多水,这次真的进入正题了。
我是这样的一个思路:
1、我想介绍一下我的一篇博文,我觉得这篇博文非常值得介绍,我整理了相关的文字保存在了txt文本文件中。
2、我使用百度文字转语音的功能,把这些文字转成语音,生成MP3文件。
3、然后模拟第二重体验者,打算把上述的MP3文件进行解码,但是需要考虑停顿啊、分段、分句啊,需要使用pydub进行分句处理。
4、把上述MP3文件转成文字,体验百度的语音转文字的功能。
OK,让我们现在开始吧!
百度智能云平台创建一个应用,获取 API Key 和 Secret Key:
(备注:大家各自自行注册)
附上相关的免费说明: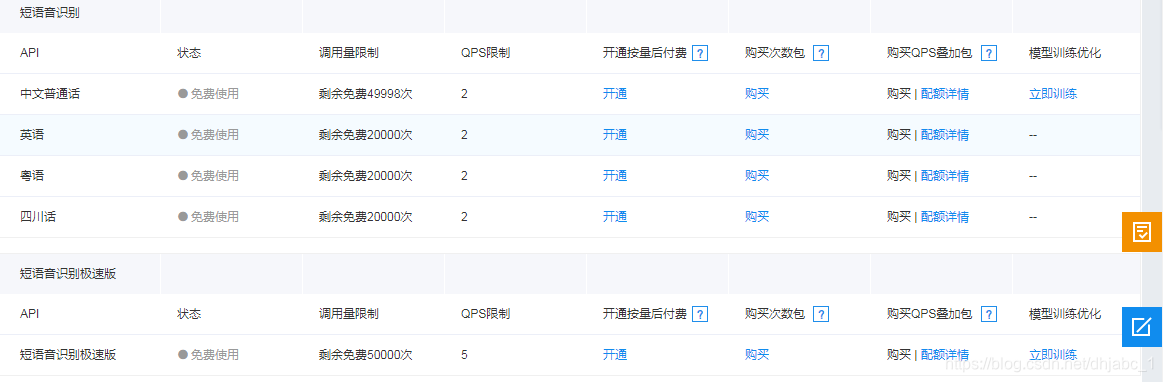
新建temp.txt文件,然后输入内容。
我是俊哥,欢迎关注我的微信公众号“俊哥随笔”。
这一篇主要介绍:python多媒体应用,如何使用python和win32gui一步步教你按需截图和图片文字识别。
这里将会分成三大模块进行介绍。
如何使用百度AI识别的API接口进行图片文字识别;
如何通过使用python和win32gui进行截图;
如何通过使用python和win32gui进行截图,保存成图片,然后使用百度AI识别的API接口进行图片文字识别;
感谢你的关注,让我们一起共勉之,比心。
from aip import AipSpeech

APP_ID = '19639329'
API_KEY = 'tvRzGsNCWETjVtxUdSUOBTDi'
SECRET_KEY = 'KB2BiPGzZ0gjHUQNzPFrapYAUYO4DHPh'

client = AipSpeech(APP_ID, API_KEY, SECRET_KEY)
with open('temp.txt','r',encoding='utf-8') as f:
    str = f.readline().strip('').strip(' ')
    while str:
        print(str)
        result = client.synthesis(str, 'zh', 1, {'vol': 5, 'per': 4})
        if not isinstance(result, dict):
            with open('mytemp.mp3', 'ab') as f1:
                f1.write(result)
        str = f.readline().strip('').strip(' ')
核心步骤解析:
(1)遍历文件中的所有行,然后逐行生成语音,保存在result变量中
result = client.synthesis(str, 'zh', 1, {'vol': 5, 'per': 4})
(2)如果result有数据,那么就追加到文件mytemp.mp3中。
        if not isinstance(result, dict):
            with open('mytemp.mp3', 'ab') as f1:
                f1.write(result)
这样的解释,应该可得懂吧。
mytemp.mp3
具体见提供的附件。
用于音频流播放,下载地址为:https://ffmpeg.zeranoe.com/builds/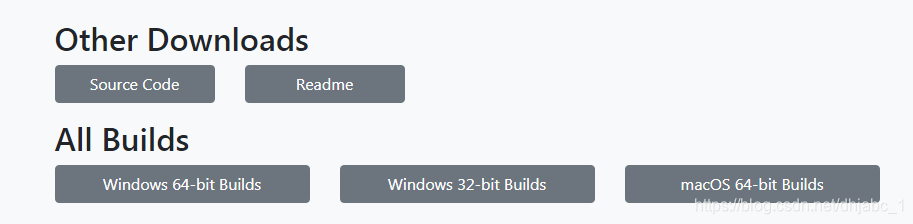
设置到自己的安装路径下。
在CMD命令行窗口输入ffmpeg -version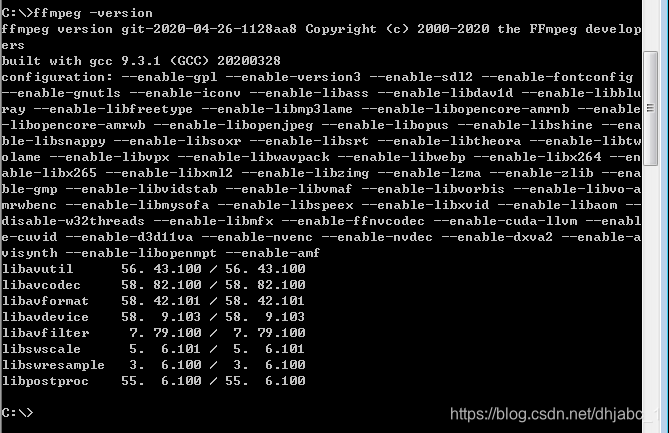
放一个mp4视频,然后把声音提取到output.acc,用命令测试一下:
ffmpeg -i temp.mp3 output.wav
输出屏幕如下;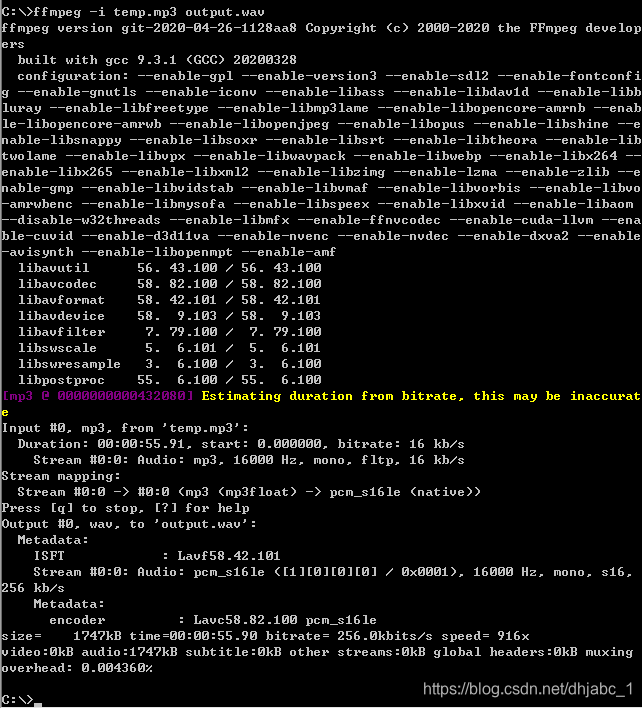
| 参数 | 说明 |
|---|---|
| -i | 设定输入流 |
| -f | 设定输出格式 |
| -ss | 开始时间 |
| -b | 设定视频流量(码率),默认为200Kbit/s |
| -r | 设定帧速率,默认为25 |
| -s | 设定画面的宽与高 |
| -aspect | 设定画面的比例 |
| -vn | 不处理视频 |
| -vcodec | 设定视频编解码器,未设定时则使用与输入流相同的编解码器 |
| -ar | 设定采样率 |
| -ac | 设定声音的Channel数 |
| -acodec | 设定声音编解码器,未设定时则使用与输入流相同的编解码器 |
| -an | 不处理音频 |
比如一个mp3文件,想转为wav。
ffmpeg -i temp.mp3 output.wav
ffmpeg -i temp.mp4 -acodec copy -vn output.aac
ffmpeg -i input.mp4 -vcodec copy -an output.mp4
从时间为00:00:15开始,截取5秒钟的视频。
ffmpeg -ss 00:00:15 -t 00:00:05 -i input.mp4 -vcodec copy -acodec copy output.mp4
-ss表示开始切割的时间,
-t表示要切多少
将输入的1920x1080缩小到960x540输出:
ffmpeg -i input.mp4 -vf scale=960:540 output.mp4
一个视频,我想提取一些帧,存为图片,咋办?
ffmpeg -i input.mp4 -r 1 -q:v 2 -f image2 pic-%03d.jpeg
-r 表示每一秒几帧
-q:v表示存储jpeg的图像质量,一般2是高质量。
如此,ffmpeg会把input.mp4,每隔一秒,存一张图片下来。
如果要截取部分,那么也可以设置开始的时间,和你想要截取的时间呀。
ffmpeg -i input.mp4 -ss 00:00:20 -t 10 -r 1 -q:v 2 -f image2 pic-%03d.jpeg
-ss 表示开始时间
-t表示共要多少时间。
如此,ffmpeg会从input.mp4的第20s时间开始,往下10s,即20~30s这10秒钟之间,每隔1s就抓一帧,总共会抓10帧。
使用pydub来分割音频
pip install pydub -i https://mirror.baidu.com/pypi/simple
file_path = "mytemp.mp3"
file_suffix = os.path.splitext(file_path)[-1][1:]
print("file path:", file_path, "suffix", file_suffix)
#打开文件
sound = AudioSegment.from_file(file_path, file_suffix)
timestamp_list = detect_nonsilent(sound,min_silence_len,sound.dBFS*1.3,1)
关键函数为:
detect_nonsilent(audio_segment, min_silence_len=1000, silence_thresh=-16, seek_step=1)
解析:
该函数返回分割好的声音片段,audio_segment表示要处理的声音,min_silence_len表示每次处理的声音段的长度,单位ms,silence_thresh表示小于该阈值的声音段会被认为静音,单位为dBFS,是个负数,seek_step表示两次处理的时间段的间隔。
该函数会把min_silence_len长度内的声音计算均方根,然后和silence_thresh比较,如果小于该阈值,则认为该段声音为静音声段,把声音段向后滑动seek_step,继续计算声音段,判断是否静音。把静音的声音段都找出来了,那么整段声音也就裁好了。
min_silence_len越小,声音段被裁分的越多,silence_thresh越大,被裁分的声音段数量越多。
for i in range(len(timestamp_list)):
    d = timestamp_list[i][1] - timestamp_list[i][0]
    start = max(0, timestamp_list[i][0])
    end = min(len(sound), timestamp_list[i][1])
    print("Section is :", timestamp_list[i], "duration is:", d)
    play(sound[start: end])
    # time.sleep(0.5)
print('dBFS: {0}, max_dBFS: {1}, duration: {2}, split: {3}'.format(round(sound.dBFS,2),round(sound.max_dBFS,2),sound.duration_seconds,len(timestamp_list)))
在循环处理的过程中,打印输出信息,并播放语音。
from pydub import AudioSegment
from pydub.silence import detect_nonsilent
from pydub.playback import play
import os

min_silence_len = 1000

file_path = "mytemp.mp3"
file_suffix = os.path.splitext(file_path)[-1][1:]
print("file path:", file_path, "suffix", file_suffix)
#打开文件
sound = AudioSegment.from_file(file_path, file_suffix)
#声音分段
timestamp_list = detect_nonsilent(sound,min_silence_len,sound.dBFS*1.3,1)

for i in range(len(timestamp_list)):
    d = timestamp_list[i][1] - timestamp_list[i][0]
    start = max(0, timestamp_list[i][0])
    end = min(len(sound), timestamp_list[i][1])
    print("Section is :", timestamp_list[i], "duration is:", d)
    play(sound[start: end])
    # time.sleep(0.5)
print('dBFS: {0}, max_dBFS: {1}, duration: {2}, split: {3}'.format(round(sound.dBFS,2),round(sound.max_dBFS,2),sound.duration_seconds,len(timestamp_list)))
输出效果:
E:Python37python.exe D:/code05.py
file path: mytemp.mp3 suffix mp3
Section is : [0, 11894] duration is: 11894
Section is : [13037, 15705] duration is: 2668
Section is : [16904, 19633] duration is: 2729
Section is : [20764, 21342] duration is: 578
Section is : [22780, 24102] duration is: 1322
Section is : [25548, 33630] duration is: 8082
Section is : [35000, 38844] duration is: 3844
dBFS: -17.86, max_dBFS: -0.67, duration: 38.844, split: 7

Process finished with exit code 0
由于该功能百度官网已经提供了非常完整的DEMO示例,那么,我这里直接使用百度的DEMO进行处理。
由于百度AI目前只支持 pcm/wav/amr 格式,极速版额外支持m4a 格式,因此,我们需要先做异步处理,先把上面的mytemp.mp3转换成output.wav格式。
C:>ffmpeg -i mytemp.mp3 output.wav
# coding=utf-8

import sys
import json
import time

IS_PY3 = sys.version_info.major == 3

if IS_PY3:
    from urllib.request import urlopen
    from urllib.request import Request
    from urllib.error import URLError
    from urllib.parse import urlencode

    timer = time.perf_counter
else:
    import urllib2
    from urllib2 import urlopen
    from urllib2 import Request
    from urllib2 import URLError
    from urllib import urlencode

    if sys.platform == "win32":
        timer = time.clock
    else:
        # On most other platforms the best timer is time.time()
        timer = time.time

API_KEY = 'tvRzGsNCWETjVtxUdSUOBTDi'
SECRET_KEY = 'KB2BiPGzZ0gjHUQNzPFrapYAUYO4DHPh'

# 需要识别的文件
AUDIO_FILE = './audio/output.wav'  # 只支持 pcm/wav/amr 格式,极速版额外支持m4a 格式
# 文件格式
FORMAT = AUDIO_FILE[-3:];  # 文件后缀只支持 pcm/wav/amr 格式,极速版额外支持m4a 格式

CUID = '123456PYTHON';
# 采样率
RATE = 16000;  # 固定值

# 普通版

DEV_PID = 1537;  # 1537 表示识别普通话,使用输入法模型。根据文档填写PID,选择语言及识别模型
ASR_URL = 'http://vop.baidu.com/server_api'
SCOPE = 'audio_voice_assistant_get'  # 有此scope表示有asr能力,没有请在网页里勾选,非常旧的应用可能没有

class DemoError(Exception):
    pass


"""  TOKEN start """

TOKEN_URL = 'http://openapi.baidu.com/oauth/2.0/token'


def fetch_token():
    params = {'grant_type': 'client_credentials',
              'client_id': API_KEY,
              'client_secret': SECRET_KEY}
    post_data = urlencode(params)
    if (IS_PY3):
        post_data = post_data.encode('utf-8')
    req = Request(TOKEN_URL, post_data)
    try:
        f = urlopen(req)
        result_str = f.read()
    except URLError as err:
        print('token http response http code : ' + str(err.code))
        result_str = err.read()
    if (IS_PY3):
        result_str = result_str.decode()

    print(result_str)
    result = json.loads(result_str)
    print(result)
    if ('access_token' in result.keys() and 'scope' in result.keys()):
        if SCOPE and (not SCOPE in result['scope'].split(' ')):  # SCOPE = False 忽略检查
            raise DemoError('scope is not correct')
        print('SUCCESS WITH TOKEN: %s ; EXPIRES IN SECONDS: %s' % (result['access_token'], result['expires_in']))
        return result['access_token']
    else:
        raise DemoError('MAYBE API_KEY or SECRET_KEY not correct: access_token or scope not found in token response')


"""  TOKEN end """

if __name__ == '__main__':
    token = fetch_token()

    """
    httpHandler = urllib2.HTTPHandler(debuglevel=1)
    opener = urllib2.build_opener(httpHandler)
    urllib2.install_opener(opener)
    """

    speech_data = []
    with open(AUDIO_FILE, 'rb') as speech_file:
        speech_data = speech_file.read()
    length = len(speech_data)
    if length == 0:
        raise DemoError('file %s length read 0 bytes' % AUDIO_FILE)

    params = {'cuid': CUID, 'token': token, 'dev_pid': DEV_PID}
    #测试自训练平台需要打开以下信息
    #params = {'cuid': CUID, 'token': token, 'dev_pid': DEV_PID, 'lm_id' : LM_ID}
    params_query = urlencode(params);

    headers = {
        'Content-Type': 'audio/' + FORMAT + '; rate=' + str(RATE),
        'Content-Length': length
    }

    url = ASR_URL + "?" + params_query
    print("url is", url);
    print("header is", headers)
    # print post_data
    req = Request(ASR_URL + "?" + params_query, speech_data, headers)
    try:
        begin = timer()
        f = urlopen(req)
        result_str = f.read()
        print("Request time cost %f" % (timer() - begin))
    except  URLError as err:
        print('asr http response http code : ' + str(err.code))
        result_str = err.read()

    if (IS_PY3):
        result_str = str(result_str, 'utf-8')
    print(result_str)
    with open("result.txt", "w") as of:
        of.write(result_str)
E:Python37python.exe D:/code.py
{"corpus_no":"6820602869800298262","err_msg":"success.","err_no":0,
"result":["我是俊哥,欢迎关注我的微信公众号,俊哥随笔。这一篇主要介绍多媒体应用如何一步步拟按车睫图片关注识别,这里将会分成三大模块进行介绍,如何使用百度ai识别的api接口进行图片文字识别,如何通过进行局部截图,如何通过进行直播截图泵转成图片,然后使用百度ai识别的api接口进行图片文字识别,感谢你的关注,让我们一起共两支表现。"]
,"sn":"9100174801588045356"}

Process finished with exit code 0
从输出效果看,整体是OK的,但是还是有部分语音转文字不对。
文章写完了,你们都学会了吗?
其实不难,主要是需要自行申请和注册账号比较麻烦。
建议多动手、多思考、多学习积累,那么这些技术将会真的改变我们的生活!
OK,感谢你们的阅读,希望大家喜欢!
共勉,比心!
如果觉得我的文章对您有用,请随意打赏。你的支持将鼓励我继续创作!
